Search Chitra's Food Book

July 20, 2023

Siru Keerai Poriyal Recipe | Keerai poriyal recipe

keerai poriyal recipe

Keerai poriyal is an yummy side dish for sambar and vatha kuzhambu rice. Usually I make keerai kadaiyal with garlic which is our family favourite. Its been a long time I made keerai poriyal or kootu in my kitchen. So I prepared this poriyal recipe with siru keerai (Tropical Amaranthus in English). It came out so well. You can make the same with arai keerai, mulai keerai and murungai keerai too. Procedure for making this poriyal is the same for all the keerai. 

Addition of coconut is the highlight of this keerai poriyal. So do not skip it. It gives a nice taste and texture to the poriyal. You can make this for lunch box as well. Its a very good side dish for sambar rice. Kids will also have it. Lets see how to make keerai poriyal with siru keerai.


     keerai poriyal recipe

Keerai poriyal recipe | Siru keerai poriyal recipe


Keerai poriyal recipe | Siru keerai poriyal recipe

Keerai poriyal recipe | Siru keerai poriyal recipe for rice


Cuisine: Tamil nadu
Category: Side dish
Serves: 3
Prep time: 10 Minutes
Cook time: 20 Minutes
Total time: 30 Minutes


INGREDIENTS

  • Siru keerai - 3 cups ( chopped)
  • Big onion - 1 (finely chopped)
  • Garlic cloves - 5 (finely chopped)
  • Cooking oil - 1 tbsp
  • Mustard seeds - 1/2 tsp
  • Urad dal - 1 tsp
  • Chana dal - 1 tsp
  • Cumin seeds - 1/2 tsp
  • Curry leaves - few
  • Red chilli - 1
  • Hing / Asafoetida - a pinch
  • Turmeric powder - a pinch
  • Sugar - a pinch (optional, helps to maintain green color)
  • Grated coconut - 1/4 cup
  • Salt & water - as needed
HOW TO MAKE KEERAI PORIYAL
  1. Wash and chop the keerai finely. Wash and chop onion, garlic finely.
  2. Heat oil in a kadai. Splutter mustard seeds, urad dal, chana dal, cumin seeds, curry leaves and red chilli.
  3. Add the chopped onion and garlic cloves. Saute till transparent.
  4. Add the chopped keerai, turmeric powder, salt and sugar. Mix well.
  5. Add water and cook the keerai till it becomes soft.
  6. Lastly add the grated coconut and mix well. Serve with rice.
METHOD - STEP BY STEP PICTURES
  • Wash and chop the keerai finely. Wash and chop onion, garlic finely. Set aside.
  • keerai poriyal
  • Heat oil in a kadai. Splutter mustard seeds, urad dal, chana dal, cumin seeds, curry leaves and red chilli.
  • keerai poriyal
  • Add the chopped onion, garlic cloves. Saute till transparent. Add the chopped keerai, turmeric powder, salt and sugar. Mix well.
  • keerai poriyal
  • Add water and cook the keerai till it becomes soft. Lastly add the grated coconut, mix well. Serve with rice.keerai poriyal

Note

  • You can use Arai keerai, Thandu keerai / Amaranthus to make this poriyal.
  • Do not skip onion and garlic. It gives a nice smell.
  • Addition of coconut gives a nice taste and good yield too.


Try this healthy Siru keerai poriyal and share your feedback with me.

 keerai poriyal recipe

Continue Reading...


July 5, 2023

Kaddu ki Sabzi | Kaddu Ki Sabji Recipe | Yellow Pumpkin Sabzi Recipe

Kaddu ki sabzi

North Indian style pumpkin curry was in my try list for long time. When I was looking for some good recipes, I came across Kaddu ki sabzi recipes like Bengali style, Maharashtrian style and Gujarati style with some minor changes in each recipe. I made a fusion of all these recipes following an YouTube video. It came out finger licking delicious. 

Usually I make our South Indian style Pumpkin curry directly in a pressure cooker but here I didn’t want to take risk as I am trying it for the first time. It came out so well with nice flavour and color. We loved it. Friends, if you are bored of making South Indian Pumpkin recipes, try this North Indian style Kaddu ki Sabji. You will love it and make it more often. Please CLICK HERE TO WATCH VIDEO

 Kaddu ki sabzi recipe


Kaddu ki sabzi recipe


Kaddu ki sabzi recipe

Kaddu ki sabzi recipe | Kaddu ki sabji for rice, roti.


Cuisine: North Indian
Category: Side dish
Serves: 2
Prep time: 10 Minutes
Cook time: 20 Minutes
Total time: 30 Minutes


INGREDIENTS
1 cup - 250ml
  • Yellow pumpkin pieces - 1 cup
  • Cooking oil - 1 tbsp
  • Mustard seeds - 1/2 tsp
  • Methi seeds - 1/4 tsp
  • Cumin seeds - 1/2 tsp
  • Curry leaves - few
  • Red chilli - 1
  • Turmeric powder - 1/4 tsp
  • Red chilli powder - 3/4 tsp
  • Coriander powder - 1 tsp
  • Garam masala powder - 1/2 tsp
  • Salt & water - as needed
  • Crushed Kasoori methi – 1 tsp
  • Coriander leaves - to garnish
  • Powdered jaggery – 1 tsp
  • Lemon juice - few drops (optional)
HOW TO MAKE KADDU KI SABZI
  1. Wash and peel the skin of pumpkin and chop into big cubes. Set aside.
  2. Heat oil in a kadai. Splutter mustard seeds, methi seeds, cumin seeds, red chilli and curry leaves.
  3. Add the chopped pumpkin pieces and saute for a minute. Add turmeric powder, red chilli powder, , coriander powder, garam masala powder, salt and mix well.
  4. Lastly add water and cover cook till pumpkin is cooked well. 
  5. Add crushed kasoori methi, jaggery, coriander leaves and mix well. Switch off the flame, add few drops of lemon juice and serve hot with rice and roti.
METHOD - STEP BY STEP PICTURES
  • Wash and peel the skin of pumpkin and chop into big pieces. Set aside.
  • kaddu ki sabzi
  • Heat oil in a kadai and splutter mustard seeds, methi seeds, cumin seeds, red chilli and curry leaves.

  • Add the chopped pumpkin pieces and saute for a minute. Add turmeric powder, red chilli powder, coriander powder, garam masala powder, salt and mix well.
  • kaddu ki sabzi
  • Add water and cover cook till pumpkin is cooked well. Add crushed Kasoori methi, coriander leaves, powdered jaggery and switch off the flame.
  • Kaddu ki sabji
  • Serve with rice and roti. Enjoy.

Note

  • Adjust the quantity of spice powders as per your taste.
  • Addition of jaggery and Kasoori methi gives a nice flavor. Don’t skip it.


Try this no onion, no garlic Kaddu Ki Sabzi and enjoy with rice and roti.

Kaddu ki sabzi recipe
 

Continue Reading...


June 20, 2023

Pav bhaji In A Pressure Cooker | Pressure Cooker Pav Bhaji Recipe

Pressure cooker pav bhaji

Ultimate Pressure Cooker Pav Bhaji Recipe

When it comes to street food in Mumbai, pav bhaji reigns supreme as the most popular and beloved snack. It has been a go-to choice for many, including my daughter, who can't resist its flavoursome charm. Traditionally, I would prepare pav bhaji by cooking the vegetables and masala separately, but recently, I stumbled upon a game-changing technique on YouTube: one pot, one shot pressure cooker pav bhaji. Intrigued by its vibrant colours and tempting texture, I couldn't help but bookmark a few videos to try it out.

During a recent visit to my parents' house, they surprised me with the Prestige Svachh FLIP-ON Pressure Cooker. As a cooking enthusiast, I've always appreciated the convenience and time-saving benefits of pressure cookers. With its gas and induction compatibility, it caters to all kitchen setups. The unique lid design with spillage control caught my attention, making it incredibly easy to handle and maintain. I was particularly impressed by the effortless locking and unlocking mechanism, which even beginners will appreciate.

Excited to put my new cooker to the test, I decided to try making pav bhaji masala using this innovative technique. The results were nothing short of extraordinary! The pressure cooker method allowed me to complete all the tempering, sauteing, and cooking in one go, eliminating the need for multiple pans and saving precious time. The end product was a tantalising plate of pav bhaji that retained its authentic flavours and delightful texture. It was an instant hit with my family, leaving us all craving more.

Tempering, sautéing, cooking are all done in one go without any compromise in taste and texture. In the quest for the perfect pav bhaji, the pressure cooker technique has revolutionised the way we prepare this beloved dish. Thanks to the Prestige pressure cooker and its exceptional features, cooking has become a breeze, with uncompromised taste and texture. So, why wait? It's time to elevate your pav bhaji game and savour the wonders of this delectable dish. Get ready to embark on a culinary journey that will leave you craving for more with each flavourful bite.


Friends, do try this pressure cooker pav bhaji recipe and enjoy with your family. Even bachelors can give this as try. You can make the same in instant pot as well.

 Pav bhaji recipe in pressure cooker

Pav bhaji in a pressure cooker


Pav bhaji in a pressure cooker

Pav bhaji in a pressure cooker


Cuisine: North Indian
Category: Snacks
Serves: Serves 3
Prep time: 10 Minutes
Cook time: 20 Minutes
Total time: 30 Minutes


INGREDIENTS
For Pav bhaji masala
  • Pav buns - 6
  • Butter - 2 tbsp
  • Cooking oil - 1 tbsp
  • Cumin seeds - 1/2 tsp
  • Big onion - 2 (finely chopped)
  • Tomato - 3 (-do-)
  • Capsicum - 2 tbsp
  • Carrot - 1
  • Potato - 3
  • Cauliflower - 10 florets
  • Beetroot - 2 small pieces (for bright color)
  • Green peas - 1/4 cup
  • Red chilli powder - 1/2 tsp
  • Pav bhaji masala powder - 1 tbsp
  • Salt & water - as needed
  • Coriander leaves - to garnish
For Tadka
  • Butter - 1 tbsp
  • Pav bhaji masala powder - 1/2 tsp
  • Kasoori methi - 2 tsp
For Pav bun
  • Butter - 1 tbsp
  • Pav bhaji masala powder - 1/2 tsp
  • Coriander leaves - 1 tbsp
HOW TO MAKE PRESSURE COOKER PAV BHAJI
  1. Wash and chop onion, tomato and vegetables finely. Set aside.
  2. Heat butter+cooking oil in Prestige pressure cooker.
  3. Splutter cumin seeds. Saute onion till transparent. Add ginger garlic paste and saute well.
  4. Add tomato and saute till mushy. Add all the spice powders , salt and mix well.
  5. Lastly add the chopped vegetables and mix well. Add required water and pressure cook in low flame for one whistle.
  6. Open the cooker after the steam is released. Take a potato masher and mash it well to make a paste like consistency.
  7. Add little water if its too thick. Boil for a minute and switch off the flame.
  8. In a tadka pan, melt butter and add pav bhaji masala powder and Kasoori methi. Switch off the flame and add to pav bhaji masala.
  9. Garnish with coriander leaves. Pav bhaji masala is ready.
  10. For pav buns, take the bun and slit it. Heat butter in a dosa tawa and add the pav bhaji masala powder, a pinch of salt and coriander leaves. Mix well.
  11. Dip the pav buns in this masala and cook both the sides till soft. Remove and serve it.
  12. Serve the pav buns with pav bhaji masala, finely chopped onions and lemon wedges. Enjoy.
PRESSURE COOKER PAV BHAJI RECIPE - STEP BY STEP PICTURES
  • Wash and chop onion, tomato, vegetables and set aside. Heat butter+cooking oil in a pressure cooker base.

  • Splutter cumin seeds. Saute onion till transparent and add ginger garlic paste and saute till raw smell goes off. Add chopped tomato and saute till mushy.
  • Pav bhaji recipe
  • Add turmeric powder, red chilli powder, pav bhaji masala powder and salt. Mix well and add the vegetables.
  • cooker pav bhaji recipe
  • Add required water and pressure cook in low flame for one or two whistles. Open the cooker after the steam is released and mash the cooked vegetables and masala using a potato masher.
  • cooker pav bhaji recipe
  • After mashing, it looks creamy and thick. Add little more water and boil for a minute. Switch off the flame. Lets do the tadka. Heat butter in a kadai and reduce the flame to low. Add pav bhaji masala powder and crushed Kasoori methi. Add to pav bhaji and mix well. Garnish with coriander leaves and set aside.
  • cooker pav bhaji recipe
  • To cook pav buns : Melt butter in a dosa tawa and add little pav bhaji masala powder and chopped coriander leaves. Slit the bun like an open book, place over it and spread well. Remove the bun and serve hot with bhaji, finely chopped onion and a lemon wedge. 
  • cooker pav bhaji recipecooker pav bhaji recipe
    Enjoy !

Note

  • For variations, you can skip other vegetables and use potato alone.
  • Use butter generously for best taste.


Try this easy, one pot one shot, pressure cooker pav bhaji and enjoy !

Pav bhaji recipe
 

Continue Reading...


May 29, 2023

Midhi Pavakkai Poriyal | Baby Bitter Gourd Fry | Karela Fry

Midhi pavakkai poriyal

During my recent trip to Salem, my MIL gave me a handful of baby Bitter gourd that was grown in our house backyard. We call this as midhi pavakkai in Tamil. Some people also call it as Kuruvi thalai pavakkai as it resembles the head of sparrow. This is the first time I am seeing such a small sized Bitter gourd. As I am a big fan of Pavakkai, I was tempted to try some interesting recipes in my kitchen.

Actually my MIL suggested me to make pitlai in a slightly different way from my usual Pavakkai pitlai recipe. Before making that, I tried this simple and easy stir fry recipe to know the actual taste of midhi pavakkai. As expected, this baby bitter gourd is less bitter when compared with our regular bitter gourd. So you don’t need to remove the bitterness by slicing thinly, soaking in curd and squeezing the water. The quantity of onions and other ingredients we use in this recipe helps to make this stir fry tastes less bitter.

Midhi pavakkai poriyal

Now lets see how to make this South Indian style Midhi pavakkai poriyal recipe. In this recipe, I have pressure cooked baby bitter gourd before making the stir fry to use less oil. For variations, you can saute the bitter gourd in more oil till it shrinks in size and cooks soft in oil. Ok, now lets see how to make this baby bitter gourd stir fry also known as Karela fry in Hindi and Kakarakaya fry in Telugu with step by step pictures and a video.

Check out my other Bitter gourd recipes below

Bitter gourd Biryani / Pavakkai sadam

Chettinad Bitter gourd puli kuzhambu

Andhra style Kakarakaya pulusu

Karnataka style Hagalakayi gojju

Bitter gourd poriyal with moong dal in a pressure cooker

Bitter gourd poriyal with onion, garlic

Bitter gourd masala curry 

Pavakkai pitlai

Bitter gourd chips with wheat flour

Bitter gourd chips with besan flour

Bitter gourd podi

Pavakkai thokku

Bengali tetor dal / Bitter gourd dal

Bitter gourd rasam

Midhi pavakkai poriyal recipe | Baby bitter gourd fry


Midhi pavakkai poriyal recipe | Baby bitter gourd fry

Midhi pavakkai poriyal recipe | Baby bitter gourd fry for rice


Cuisine: South Indian
Category: Side dish
Serves: Serves 2
Prep time: 10 Minutes
Cook time: 20 Minutes
Total time: 30 Minutes


INGREDIENTS

  • Baby bitter gourd / Midhi pavakkai - 15
  • Big onion - 1 (Finely chopped)
  • Tamarind - Small gooseberry size
  • Sambar powder - 1 tsp
  • Turmeric powder - 1/4 tsp
  • Salt - as needed
  • Jaggery - 1/2 tsp
  • Water - as needed
  • Grated coconut - 1/4 cup
  • Lemon juice - few drops
To temper
  • Cooking oil or sesame oil - 1 tbsp
  • Mustard seeds - 1/2 tsp
  • Urad dal - 1 tsp
  • Chana dal - 2 tsp
  • Curry leaves - few
  • Asafoetida / Hing - a pinch
HOW TO MAKE BABY BITTER GOURD FRY
  1. Wash and chop the head and tail portion of baby bitter gourd.
  2. Slit in the middle till half the way and set aside.
  3. Take them in a pressure cooker along with tamarind water, salt.
  4. Pressure cook in low flame for 1 whistle. Open the cooker after the steam is released. Drain the excess water and set aside.
  5. Heat oil and temper mustard seeds, urad dal, chana dal, curry leaves, onion and saute well.
  6. Add the cooked bitter gourd pieces, sambar powder, turmeric powder, salt and jaggery. Mix well and cook it for few minutes till onions turn golden in color.
  7. Switch off the flame and add grated coconut. Mix well and squeeze little lemon juice if needed.
METHOD - STEP BY STEP PICTURES
  • Wash and chop the head and tail portion of bitter gourd. Slit in the middle till half the way through and set aside. Soak tamarind and take 1/4 cup of extract using it.
  • midhi pavakkai poriyal recipe
  • Take a pressure cooker and add in the slit bitter gourd, turmeric powder, salt and tamarind water. Mix well and pressure cook in low flame for one to two whistles. Open the cooker after the steam is released. Drain the excess water and keep the cooked bitter gourd aside.
  • midhi pavakkai poriyal recipe
  • Heat oil in a kadai and splutter mustard seeds, urad dal, chana dal, curry leaves and hing. Add onion and saute till transparent.
  • midhi pavakkai poriyal recipe
  • Add the cooked baby bitter gourd, sambar powder, salt, jaggery and turmeric powder.
  • midhi pavakkai poriyal recipe
  • Mix well and cover cook in low flame till onion turns golden in color. Switch off the flame. Add lemon juice and grated coconut. Mix well and serve with rice.
    Enjoy !

Note

  • You can make the same poriyal with regular bitter gourd as well but make sure you chop the bitter gourd finely or as thin rings for less bitter taste.
  • Instead of pressure cooking the baby bitter gourd pieces, you can saute in oil till it shrinks in size and becomes soft.
  • You can also garnish with coriander leaves at the end. 


Try this easy and yummy Midhi pavakkai poriyal and enjoy with sambar rice or curd rice.

 midhi pavakkai poriyal


Continue Reading...


May 4, 2023

Karnataka Style Chutney Pudi Recipe | Chutney Powder Recipe

Karnataka chutney powder

Chutney powder also known as Gun powder or Chutney pudi is a dry condiment and its one of the most important side dishes served in South India for tiffin varieties and rice. It can be stored for weeks and had as an accompaniment for Idli, dosa, chapathi, roti and rice. Every state has its own style of making chutney powder. Today’s recipe is an easy and simple Karnataka style spicy chutney powder recipe using dry coconut.

Recently I bought Prestige Endura mixer grinder with 1000W ultra powerful motor. As I wanted to grind small quantities of Idli, dosa batter, I was looking for some heavy duty, elegant and powerful mixer grinder. The features of Prestige Endura met my expectations. It has a sparkling stainless steel finish body, 3 multi purpose jars with 7 super efficient blades gives a stylish look to your modular kitchen. I tried grinding a small quantity of this chutney powder and it got ready in few pulses. I am sure this Prestige Endura Mixer Grinder is a worthy addition in my kitchen.

Chutney powder


Ok, lets see how to make traditional, Karnataka style Chutney powder recipe with simple ingredients.

Karnataka style chutney powder recipe


Karnataka style chutney powder recipe

Karnataka style chutney powder recipe | Chutney Pudi Recipe


Cuisine: Karnataka
Category: Condiment
Serves: 1 cup
Prep time: 10 Minutes
Cook time: 20 Minutes
Total time: 30 Minutes


INGREDIENTS
1 cup = 250ml
  • Chana dal - 1/4 cup
  • Urad dal - 1/4 cup
  • Byadgi chilli - 5 to 8
  • Red chilli powder - 1 tsp
  • Dry coconut - 1/4 cup
  • Curry leaves - Fistful
  • Jaggery - 1 tsp
  • Garlic - 10 cloves
  • Tamarind - small gooseberry size
  • Black or white Sesame seeds - 1 tsp
  • Cumin seeds - 1/2 tsp
  • Hing - 1/4 tsp
  • Salt - as needed
  • Cooking oil - 1 tsp
HOW TO MAKE CHUTNEY POWDER
  1. Heat a tsp of oil and roast urad dal , chana dal till golden in color.
  2. Remove in a plate and add the red chilli, curry leaves and garlic. Roast for a minute.
  3. Collect in the plate. Dry roast the grated coconut for a minute.
  4. Add sesame seeds, cumin seeds and dry roast till they crackle. Remove and collect in a plate.
  5. Let everything cool down. Take them in Prestige Endura Mixie jar. Add salt, red chilli powder, jaggery, hing and tamarind.
  6. Grind coarsely like rava/ sooji and transfer to an air tight box.
  7. Store upto a month. Use a clean spoon to handle.
  8. Serve and enjoy with Idli, dosa, Chapathi, Jowar roti. You can also relish it mixing with plain rice adding ghee. 
METHOD - STEP BY STEP PICTURES
  • Heat a tsp of oil and roast the urad dal, chana dal till golden in color. Remove in a plate.
  • Chutney powder recipe
  • In the same kadai roast the red chilli, curry leaves and garlic till chilli turns crispy. Collect in the plate.
  • Chutney powder recipe
  • Dry roast the grated coconut for a minute and transfer to the plate.
  • Chutney powder recipe
  • Lastly add the sesame seeds, cumin seeds and dry roast till the sesame seeds crackle. Collect in the plate.
  • Chutney powder recipe
  • Let everything cool down. Take them in a mixie jar and add salt, tamarind, hing and jaggery. Grind to a coarse Rava/ Sooji like powder.
  • Chutney powder recipe
  • Remove in an air tight box and store it up to a month. Use a clean spoon to handle.
  • Chutney powder recipe
    Enjoy with Rice, Idli, dosa, Chapathi and Jowar roti !

Note

  • Adjust the quantity of red chilli as per your taste.
  • Byadgi chilli helps to give bright color to this chutney powder.
  • Do not skip jaggery as its the highlight of Karnataka style chutney powder.
  • For variations, you can also add 2 tbsp of roasted peanuts without skin.


Try this Karnataka style Chutney powder and enjoy with rice, idli, dosa and roti.


Continue Reading...


April 27, 2023

20 Sambar Recipes For Rice | Sambar Varieties For Lunch | Different types of Sambar for rice

sambar varieties for rice

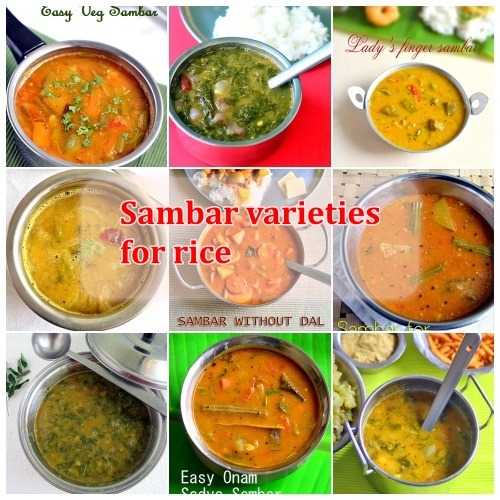
After a long time, I am sharing a collection post. Its a list of 20 best sambar recipes for rice. In South India, Sambar is the staple side dish for rice. We South Indians cannot live without sambar for rice. Even though we make hundreds of varieties of kuzhambu, Sambar in the lunch menu gives the fulfilment of eating rice.

In hotels or at houses, Sambar would be the first thing in our lunch menu. Then comes Rasam, Kara kuzhambu, Vatha kuzhambu, More kuzhambu etc. Sambar can be prepared in varieties of ways. But most of the households have a standard preparation of their sambar recipe using homemade sambar powders. Me too not an exception.

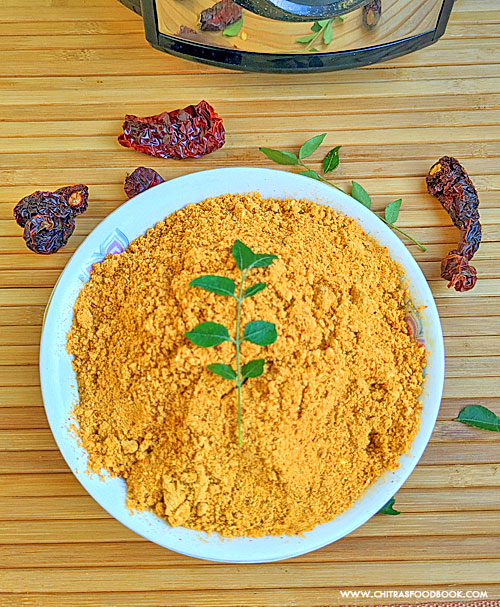
My sambar tastes and smells the best with my MIL’s homemade sambar powder. I never buy store bought sambar powders even though my friends and relatives have tried and told about Sakthi, Aachi and MTR sambar powders. If you don’t have the option of making homemade sambar powder, you can definitely go with store bought ones. It also tastes equally good but you should adjust the spice levels based on the brand you use. Please click the picture below for our Homemade sambar powder recipe. I have also shared a Tamil brahmin sambar powder recipe learning from my neighbour. Please click the picture and check it if you are interested. 

Tamil brahmin sambar powder   

In this collection, I have shared nearly 20 varieties of sambar for rice. It includes mixed vegetable sambar, basic sambar adding drumstick, sambar without vegetables, Sambar without dal, Tamil brahmin style sambar adding freshly ground spices, Pongal sambar adding 7 country vegetables, some 4 varieties of keerai sambar, 3 varieties of Kerala sambar and finally a sambar recipe for making bisibelebath.

homemade sambar powder

Friends, do check out this list of sambar recipes for lunch and try your favourite. Please don’t forget to leave your feedback.

BASIC SAMBAR RECIPE ADDING DRIUMSTICK

This is our basic sambar recipe we have been following for years together adapting through generations. You can make a perfect, Tamil Nādu style sambar using this recipe. Click the picture below for the detailed recipe link.

 drumstick sambar


Radish Sambar | Mullangi Sambar

Many beginners refrain from making Mullangi sambar / Radish sambar thinking about its weird smell. But if you try the way I have mentioned in this recipe, you will start to love this sambar and make it often. There is a secret tip I learnt from my aunty/ Athai.

 Mullangi sambar

LADY’S FINGER SAMBAR | VENDAKKAI SAMBAR RECIPE

If its a no moon day or any festival, this Lady’s finger sambar without onion will be in our lunch menu without fail. Its a simple and yummy sambar recipe with the goodness of fried lady’s finger.

    Lady's finger sambar

PONGAL SAMBAR | 7 VEGETABLE SAMBAR FOR PONGAL FESTIVAL

This is our traditional 7 kai sambar for Pongal festival. In this recipe, I have used 7 different country vegetables. Its a must try recipe on Pongal festival. Instead of sambar, we make the same as kootu with slight variation in this recipe. The same sambar can be prepared for Thiruvathirai festival too. In general, I call this as festival sambar.

 Pongal kuzhambu

SORAKKAI SAMBAR / BOTTLE GOURD SAMBAR RECIPE

This is an interesting sambar recipe using sorakkai / bottle gourd. If you are bored of making Sorakkai dal and Sorakkai kootu, try this sambar. You will love it.

    Sorakkai sambar

ARACHUVITTA SAMBAR – TAMIL BRAHMIN STYLE SAMBAR

I am a big fan of Tamil brahmin style arachuvitta sambar. The aroma of freshly roasted and ground spices takes this sambar to the next level. I have used onion in this recipe. You can use any vegetable like drumstick, brinjal, chow chow etc.

arachuvitta sambar    

CABBAGE SAMBAR | MUTTAIKOSE SAMBAR

Have you ever tried a sambar recipe adding Cabbage ? If not, try this delicious sambar recipe. You will be amazed by its taste and flavour.

    cabbage sambar

CLUSTER BEANS SAMBAR | KOTHAVARANGAI SAMBAR

Cluster beans sambar is our family favourite recipe. Whenever we buy cluster beans, this sambar would be our priority. Adding in sambar helps to remove the mild bitterness of cluster beans.  Do try it and see how you like it.

    cluster beans sambar

MIXED VEGETABLE SAMBAR IN A PRESSURE COOKER

This is a super easy and quick, one pot sambar recipe for rice adding mixed vegetables. Ideal for working women and bachelors.

 Vegetable sambar

KEERAI SAMBAR

We usually make this sambar with Amaranthus variety. It tastes so good when paired with raw banana curry. Do give it a try.

    Keerai sambar

KERALA SAMBAR WITHOUT COCONUT | ONAM SADYA SAMBAR

Basically I love Kerala food especially Onam sadya is my favourite lunch menu. Here is a simple and easy Onam sadya sambar recipe with mixed vegetables.

    Onam sadya sambar

VARUTHARACHA SAMBAR | KERALA SAMBAR WITH COCONUT

This is yet another version of Onam sadya sambar. In this recipe, sambar is prepared using freshly roasted and ground spices and coconut. Do give it a try !

    Kerala varutharacha sambar 

KERALA ULLI SAMBAR

Kerala Ulli sambar is one of the simple and yummy sambar varieties that tastes great not only with rice but idli, dosa as well. Do check it out by clicking the picture below.

    Kerala ulli sambar

MANGO SAMBAR

Mango sambar is my most favourite sambar recipe. We never fail to make this sambar during mango season. With the tangy taste of raw mango, it smells and tastes the best. Check it out friends. 

    Mango sambar

DRUMSTICK LEAVES SAMBAR | MURUNGAI KEERAI SAMBAR

Super healthy and delicious sambar recipe adding Drumstick leaves/ Murungai keerai. You must try this once. 

    Murungai keerai sambar

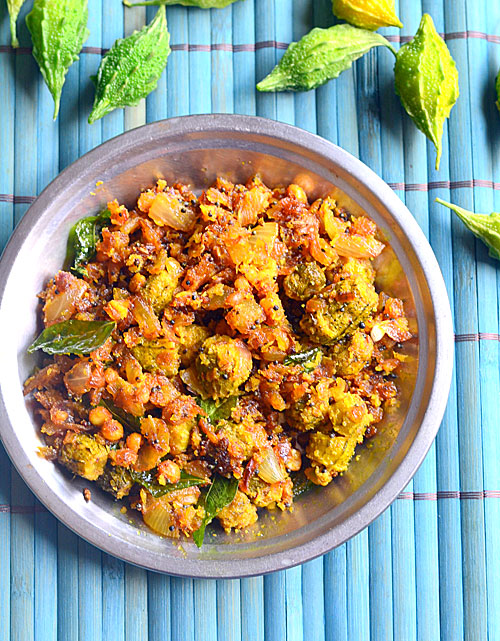
SAMBAR WITHOUT VEGETABLES | ONION SAMBAR

When you don’t have any vegetables in your pantry and still want to make sambar for rice, this onion sambar comes to rescue. You can use either small onion or big onion in this recipe.

    Onion sambar

PALAK SAMBAR / PASALAI KEERAI SAMBAR

Healthy and delicious Palak sambar / Spinach sambar. You can use regular spinach or even baby spinach for this recipe. Its a yummy variation from the usual Dal palak.

    Palak sambar

PONNANGANNI KEERAI SAMBAR | GOOD FOR EYESIGHT

Many of you must be aware of this Ponnanganni keerai. Its known as Dwarf copper leaf in English, Gudari Saag in Hindi, ‎Ponnaganti Koora in Telugu, ‎Honagonne soppu in Kannada, ‎Kozuppa, Ponnankanni in Malayalam. Its very good for eyesight and a great coolant for summer. Try it out.

    Ponnanganni keerai sambar

PUMPKIN SAMBAR | PARANGIKAI SAMBAR

With a mildly sweet taste of Pumpkin, this sambar is a super healthy and flavourful one. Tastes good with idli, dosa as well.

    pumpkin sambar

SAMBAR FOR BISIBELEBATH

Usually Bisibelebath is prepared in one pot by mixing rice, dal, vegetables and spices together. In this version, I have prepared sambar and rice separately and mixed them just before serving. Its a different method but tastes so good. Do give it a try.

    Bisibelebath sambar

SAMBAR WITHOUT DAL

Many of my readers asked me to share a sambar recipe without dal. So I tried this variety and posted it. Its a tasty sambar recipe without cooked toor dal. The flavor and taste comes from the freshly roasted and ground spices. I am sure you will love it.

    
sambar without dal

TIRUNELVELI SAMBAR

This is my mom’s special Tirunelveli sambar which is popularly known as IDI sambar. I have used Drumstick and mango in this recipe. You can make it adding brinjal or simply onions.

    Tirunelveli sambar

Friends, hope you have gone through and enjoyed my collection of Sambar recipes for rice. Do try them and share your feedback with me.

Continue Reading...