Murukku recipes comes to my mind only when Diwali is nearby. Thenkuzhal murukku is a must & should Diwali snack in my home.We prepare other murukku varieties too based on our interest. This year I have a big list of murukku recipes to try. To begin with, I started my Diwali Snack/Savories recipes with this crispy, all time favorite potato murukku recipe ( Urulai kizhangu murukku) also known as Potato chakli/Aloo chakli in Hindi. I tried it last week by referring Sharmi’s passions. Actually I asked her for using ghee instead of butter but then I tried it with butter as per her recipe.It came out really well and crunchy. Raksha and Sendhil loved it a lot. Its very easy to make without using urad dal powder or fried gram powder.I have heard about Gulab jamun made with potato but murkku with potato is really a new thing to me. When I saw its results, I became very happy. Butter and potato does the magic in this recipe.Soon I will try this recipe with ghee and update the results.Now, Lets see how to make this simple and easy potato murukku recipe with step by step photos and a video !
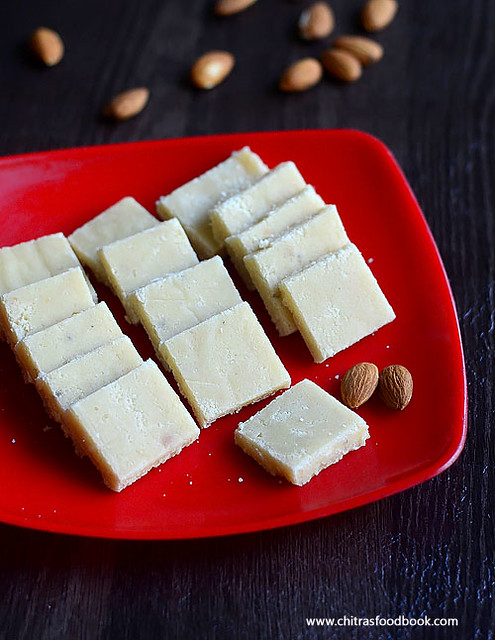
Yesterday I made badam burfi recipe with milk for Navratri neivedyam and distributed it to my guests. Everybody loved it very much. Badam burfi (Almond burfi in English) is an easy, healthy, melt in mouth burfi recipe. It is known as Badam katli in Hindi. Its Ingredients and the method of preparation is very similar to Kaju katli.
Last year I had shared Kaju badam burfi ( Almond cashew burfi) during Diwali for beginners. Procedure of making this badam barfi is slightly different. But its a very easy and fool proof recipe just like kaju badam burfi. Even though it takes time to prepare this burfi, its really worthy. Mixing and stirring is the major work here. I have used milk for grinding badam. You can use water too. No need to worry about sugar syrup consistency and no need to use more ghee. Its totally a beginners recipe. However we should be conscious towards the end of cooking to avoid mistakes.
I adapted this recipe from Nisha madhuilka ji's website and used more sugar and milk than the mentioned quantity. Just follow the steps, video, tips & tricks I have shared in this post. I am sure you can make a perfect melt in mouth badam burfi. If you are a beginner, try half the quantity given in the recipe.
For variations, you can use almond powder ( Almond flour/Almond meal), coconut, cashews and even carrot. Diwali is not too far. Do bookmark this easy sweet recipe and try it out. Ok, Lets see how to prepare badam barfi at home easily with step by step photos and a video !
Badam burfi - Full video !
Badam burfi recipe
Badam burfi recipe - Easy badam katli for beginners
Cardamom powder - 1/2 tsp Or saffron threads - few
Ghee - 1 tbsp + few drops for greasing the plate
HOW TO MAKE BADAM BURFI - METHOD
Take a plate and grease it with ghee. To blanch badam quickly, boil 3 cups of water. When the water roll boils, add the badam. Let it boil for a minute. Switch off the flame and cover it with a lid. Let it sit for 5 minutes.
Drain the badam and add to the cold water. Skin will come off easily. Keep all the blanched badam in the plate. Grind Sugar to fine powder and set aside. In the same jar, grind badam to a coarse paste without adding milk. Wipe the sides of jar and add 1/2 cup of milk. Grind to a paste.Wipe the sides of mixer.
Check if the badam paste is smooth without any grits. If not, add 1/4 cup more milk and grind it well. Remember adding more milk while grinding takes ling time to make burfi. So add milk little by little while grinding.
Heat 1 tbsp ghee in a good non-stick kadai. Add the ground badam paste and powdered sugar. Mix well in medium flame. Stay nearby and keep mixing. Flame should be low to medium. Initially, the mixture will become thin as the sugar melts. Add the cardamom powder & keep stirring. The mixture will start to thicken. Mixture will bubble vigorously. It may splash. So please be careful. Keep the flame low if it splashes. Keep stirring because the bottom layer may burn quickly.
Keep mixing till the mixture becomes thick.Wipe the sides of the pan every time while u mix.It will take nearly 10-20 minutes to start thickening. Small bubbles will appear in the corners. When you keep on mixing, mixture turns thicker and it will start to leave the sides of pan. Wipe the sides & again mix it. At one stage, the mixture will become really thick and resembles a soft dough.
At that time, switch off the flame and mix for few seconds. Grease your fingers with ghee and take a pinch from the dough.Try to make a small ball. If you are able to make a soft, round ball, your burfi is done. Give a quick stir and make it even more slightly thick. The heat of kadai is sufficient to make your mixture thick.
Do not stir for more time. Mixture will become crumbly and you will not be able to shape it properly. If you remove it before the correct stage, it will taste like halwa. So try to make a small ball and then remove it at the right time.
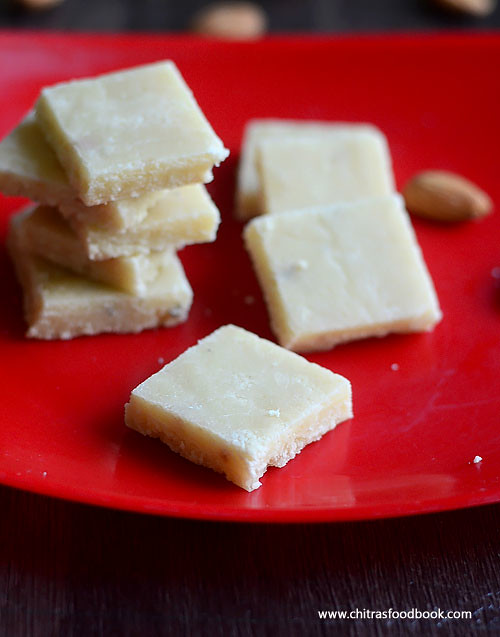
Transfer the burfi mixture to the greased plate. If you wish, you can knead it using your hands after it turns slightly warm. But I directly made the shape by levelling it with rolling pin. For this, Cover the dough with a butter paper and level the mixture using a rolling pin.Roll it according to the thickness you need.
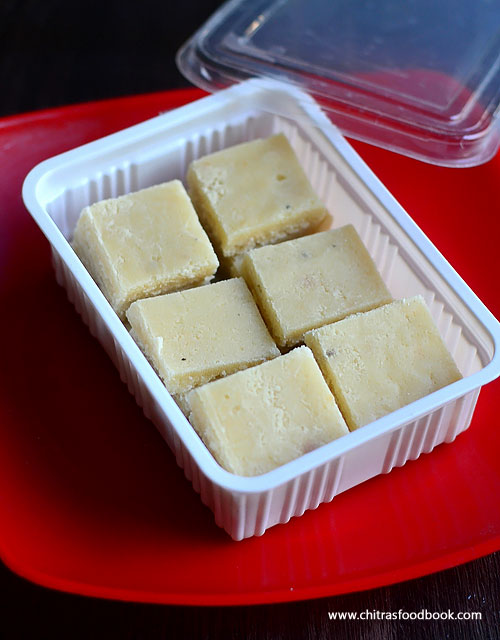
Remove the butter paper and cut the burfi into pieces using a ghee greased knife, when the mixture is warm. But do not try to remove the pieces when the mixture is warm. It may break. Take it after the burfi cools down completely. Store in a box. Stays good for 2 days at room temperature.
Enjoy !
Note
To find out whether the burfi is well set, after You levelled the burfi in tray with butter paper,try to remove the butter paper after 5 minutes.If it comes out clean,your burfi is perfect and you can make pieces & enjoy .If the butter paper doesn’t come out clean or if it sticks to the burfi mixture, then the right consistency is not reached and it becomes halwa. So transfer the mixture to the kadai, add little water, melt the mixture and again start mixing till you get it right !
Suppose if you over do the mixing and if burfi becomes crumbly, take the crumbled burfi in a mixie jar, add milk and make a smooth paste. Again keep it in flame and mix well till it reaches the right consistency...
Color of this burfi will improve over time.
Adding more sugar makes the burfi even more soft. I used 1:1.5 ratio of badam n sugar which is perfect for me. U can use 1:2 ratio too.
U can skip cardamom powder and use saffron soaked milk. But colour of burfi would change to yellow. This is known as kesar badam burfi.
Make & Enjoy this healthy, melt in mouth burfi at home !
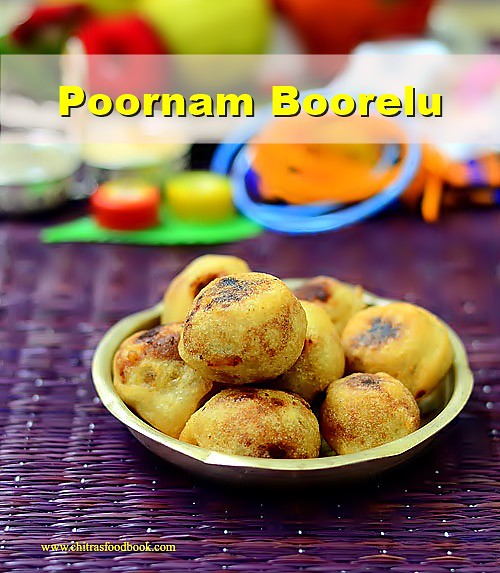
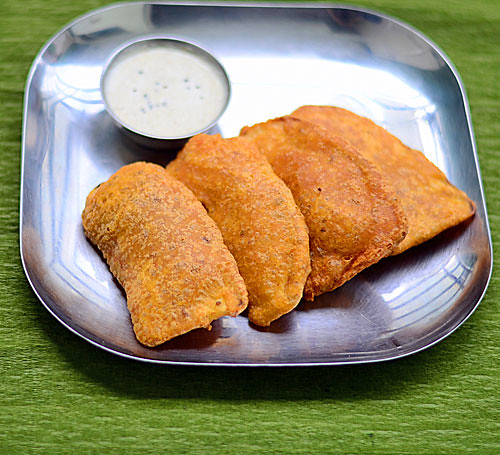
Poornam Boorelu/Poornalu/ Burelu (In Telugu) is one of the most important Neivedyam /Prasadam recipes for Varalakshmi Vratham in Andhra. Most of the people make this during Diwali and Ganesh chaturthi too. Boorelu is very similar to Tamil nadu style Suzhiyam/Suzhiyanrecipe but the ingredients used for the outer covering is different. In suzhiyan, maida and rice flour is used for the outer covering whereas boorelu needs rice + urad dal batter (Just like dosa batter) for the covering. Otherwise, the procedure for making Pooranam is one and the same. Pooranam ( Stuffing) can be made with Senaga pappu ( Chana Dal ), Pesarapappu ( Moong dal ) or Kobbari ( Coconut). This morning I tried it for pooja and of course to post this special recipe on this Varamahalakshmi festival day. Even though its my first attempt, it came out very well and I am happy with the result. For this recipe, I asked my neighbor Sowjanya who is from Andhra. She told, on Varamahalakshmi, they make a count of 9 boorelu/poornalu and offer to God. It should be consumed only by the family members after the pooja. So its a must and should sweet recipe to be made for them during this festival.She shared her recipe along with some useful tips too. Thank you Sowjanya for the perfect recipe. We all loved it. Do try this Andhra special sweet recipe for festivals and have a great celebration. Ok, Lets see how to make Pooranam Boorelu ( Poornalu) with step by step pictures.
Wash and soak the rice and dal together for minimum 4 hours. Over night soaking is also fine. Grind it to a slightly coarse paste in dosa batter consistency adding required water. Make sure batter is not too thin. Set the batter aside for one to 5 hours. But I used it immediately without resting time.
Wash and pressure cook chana dal adding enough water. Chana dal should be blossomed and retain its shape ( i.e when you press the dal, it should become mushy) Do not over cook the dal. Grind it to a coarse paste without adding water or mash it with a ladle.
In a pan, melt jaggery adding water. Strain it to remove the impurities using a metal strainer. Boil the syrup till it becomes frothy or reaches one string consistency. Add the ground chana dal paste, cardamom powder and grated coconut. Mix well till it becomes a whole mass and leaves the sides of pan. Switch off the stove and let it become warm. Make balls of golf balls size and arrange in a plate.
Heat oil to deep fry. Test the oil temperature by dropping a pinch of batter. If it rises to the top, oil heat is just right. Simmer the flame completely.Take the ground batter, add sugar, mix well. Dip a stuffing ball into the batter using a spoon. Wipe the excess batter in the sides of vessel and deep fry the balls in medium flame till it turns slightly golden with brown spots.Do not fry for long time. Remove in a tissue. Offer to GOD and get the blessings. Enjoy eating!
NOTE : You should make 9 or 5 balls and offer to GOD. It should be eaten only by the family members.Do not give this as prasad to others.
Tip 1 : Adding sugar in the batter gives a mild sweet taste to the outer covering too. So it won't taste bland.
Tip 2 : Poornam should be thick and there should not be any moisture content in it else it will disperse in oil when you deep fry the balls.So add besan flour if needed to make the stuffing thick.
Tip 3 : If the batter is thin, you can add some rice flour to bring the right consistency.
Note
You can use the remaining batter to make dosa or punugulu.
While cooking dal , if u add more water , drain the excess water and grind to a smooth paste.
If there is more moisture in the cooked dal, you can add some besan flour to thicken the stuffing quickly.
It stays soft and good for 1-2 days.
Enjoy this delicious traditional Andhra sweet at home !
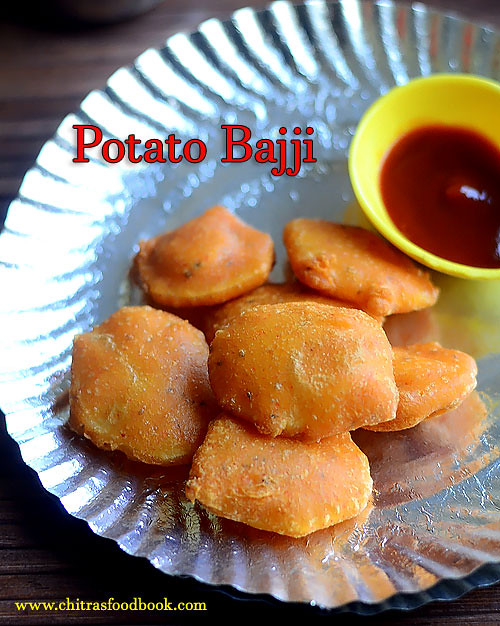
I make Potato bondaand onion bajjivery often as both are Raksha’s favorite. But I have seen my mom making Potato bajji, Brinjal bajji and many more varieties of bajji before my marriage. So recently I too tried Potato bajji and Karpooravalli leaves bajji for the first time in my kitchen.Its preparation is very easy. If you make the basic bajji batter, you can prepare any number of bajji varieties with it. Both came out very well and we all loved it a lot. Raksha enjoyed potato bajji( Aloo pakora in Hindi, Urulaikizhangu bajji in Tamil) with tomato ketchup.Try this easy, yummy bajji recipe for your kids as evening snacks during this holidays. They will love it for sure. Lets see how to make this crispy, puffy Potato bajji at home.
Hi Friends, Hope you all doing good. I am sure you all had a great Diwali celebration.My Diwali went very well in my new house with my in-laws and family. As I was busy with some personal works, I was not able to make any post here. For Diwali, I made Badam burfi, Doodh peda, Wheat halwa, Thenkuzhal and Ribbon pakoda for my family. Apart from these sweets, I also made Adhirasam, Suzhiyan and Vazhakkai bajji on Diwali day. We love to eat these deep fried stuffs more than sweets and other savories.
Actually I had planned to make this post before Diwali. But I couldn’t do it. So Iam sharing it today. Every year my mom prepares potato bajji, Brinjal/Kathirikai bajji, Onion bajji and my most favorite Valakkai bajji( Raw banana fritters) on Diwali day morning. I guess many of you make bajji and bonda with store bought bajji, bonda mix/powder. But my mom and MIL makes bajji mix on their own.
Basically I love tea shop Vazhakkai bajji a lot. Eating hot Vazhakkai bajji with a sip of steaming hot tea on a rainy day is a pure bliss! Try and experience it without worrying about the calories. Lets see how to make this easy, yummy South Indian style Vazhakkai bajji recipe.
In a wide bowl , mix all the flours, powders, Ajwain or cumin seeds, salt, baking soda and add water to make a slightly watery batter( like dosa batter). If you make it too watery, bajji will have tails. At the same time, thick batter yields hard bajjis. The batter should be slightly thick and flow like a ribbon. It should coat the raw banana pieces well. Adjust water and flour accordingly.
Wash and cut the raw banana into two horizontally. Peel the skin and discard it. Slice the raw banana thinly and arrange in a plate. Dip the raw banana in bajji batter.
Heat oil in a kadai and check with a drop of batter to find the correct heating point. i.e. If you put a drop of batter , the batter will rise immediately and floats on top. As soon as you get this heating point, simmer the flame and drop the raw banana slices coated well with batter.
Deep fry till the color changes golden brown and the bubbles ceases. Flip it and again cook for a minute. Drain & remove in a tissue paper. Enjoy with tea/coffee!
Note
Addition of food color gives a nice color to bajji as u see in stalls.
My mom & mil adds cumin seeds but i used ajwain for an enhanced flavour. Use any as per ur wish.
Please don’t skip adding soda. It gives a puffy, soft bajji. Make sure you don’t add too much because bajji will be very oily and it is unhealthy too..
Adjust the consistency of batter. Batter should not be too thin or too thick. If your batter has become too thin, add besan & rice flour in 3:1 ratio and adjust the batter. If it is too thick add more water. Always add the extra water using a tbsp & check it.
Enjoy puffy, hot Vazhakkai bajji as an evening snack with your family !
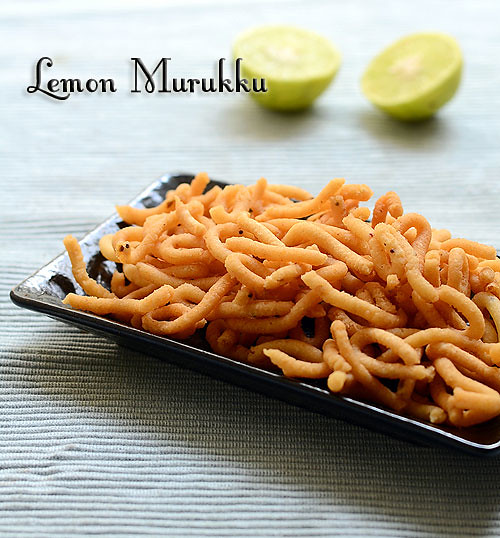
Pulippu murukku / Sour murukku – This recipe may sound new to many of you. It’s a traditional murukku recipe made among Telugu people. Its called as Pulani/Pullani Murukku( Meaning Sour) in Telugu.I learnt this recipe from my friend Shalini. Her mom & periamma are experts in making varieties of murukku recipes.Onion murukku & Lemon murukku are some of their unique preparations.When we were in college,I used to go to Shalini’s house for group studies. Her mom used to serve this murukku as evening snacks for us.I love this murukku a lot.Its mild tangy taste and spiciness makes anyone fall for it.This murukku can be made in two ways. One method is by grinding rice soaked in curd/Thayir & other one by adding lemon juice.My friend taught me an easy method using store bought rice flour,Green chillies & lemon juice.It came out crunchy with tangy and spicy taste. We all loved it.Friends,if you are looking for an easy,unique murukku variety,do try this recipe for Diwali.You will love it like us.
Check out my butter murukku recipe , Onion murukku recipes too !
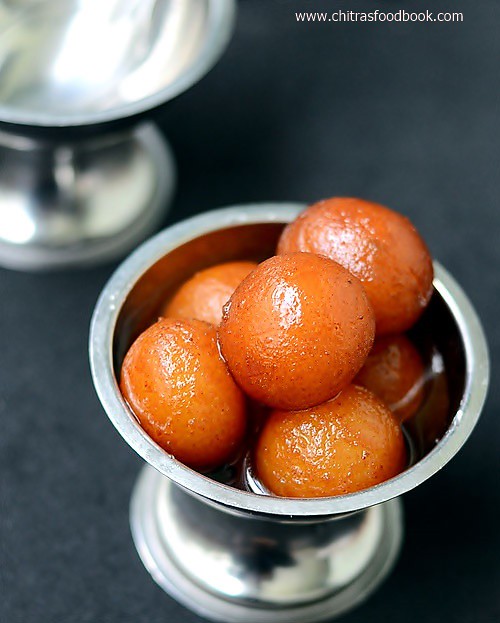
Diwali celebration would not be fulfilled without Gulab Jamun for Indians. Not just for Diwali, we make this delicious sweet recipe for celebrations like New year, Birthday, anniversary to make it more special. It’s one of the most popular dessert recipes that tastes the best with Vanilla ice cream. Even beginners who are new in making sweets never fail to try jamun at least with store bought gulab jamun mix like MTR, Aachi, Gits during Diwali.
Long back,I had tried gulab jamun with homemade khova and posted here too. Then due to my laziness, I started making jamun using instant mix every year. But this year for Diwali, I was determined to try gulab jamun with khoya or milk powder. I used store bought khoya here. To make this sweet, I watched many youtube video recipes like Samayal Samayal with Venkatesh Bhat , Vahchef , Sanjeev kapoor & went through many recipes for the ratio of ingredients and tips to make perfect jamun. I came across few recipes with khoya and paneer too.
As its my first attempt with store bought khoya, I chose the gulab jamun recipe with khoya alone and tried it. After so many trial & errors, I made a perfect gulab jamun following Chitra Viswanathan Mam’s recipewith slight changes. I was very happy to see my golden colored, soft and juicy gulab jamun. I made them like mini jamuns in very small size to suit my serving bowls. It did double in size & well soaked too. I have given the recipe for lesser quantity.
If you are attempting jamun with khoya for the first time, go ahead with this recipe. Once you get it perfect you can double this recipe and make in large quantity. Beginners, do follow the tips I have shared in this post. I am sure you will get the same results like me. Lets see how to make Gulab jamun using store bought khoya !
Gulab jamun recipe with khoya
How to make gulab jamun with store bought khoya
Cuisine:Indian
Category:Sweet
Serves:12 nos
Prep time:10 Minutes
Cook time:20 Minutes
Total time:30 Minutes
INGREDIENTS
1 cup - 200ml
Store bought sugarless khoya - 1/2 cup Grated ( I used Milky mist brand)
All purpose flour / Maida - 3 levelled tbsp
Cooking soda - A pinch (approx. half of 1/8th tsp)
Salt - a pinch
Water - as needed
Cooking oil - to deep fry jamun
For sugar syrup
Sugar -1 cup
Water - 1.5 cups
Cardamom powder - 1/8 tsp
Saffron threads - few ( Optional)
Note : Double the recipe for more quantity
METHOD
Take the khoya from the refrigerate and bring it to room temperature.If the khoya is too moist n soft to handle,crumble it well using your hands. If its dry and slightly hard,grate it using a grater. Measure 1/2 cup of khoya and knead it well for 2-3 minutes using the heel of your palm. Make it smooth and soft without any grains.
After kneading add the maida,a small pinch of salt & cooking soda. Mix well to make a crumbly mixture. Add water very little by little and make a smooth,non-sticky dough. If the khoya is too moist, you don’t need to add water. So add water only if needed. Its not necessary that the dough should be completely crack free. No issues if there are mild cracks. Keep the dough covered for 5-10 minutes.
In the mean time, make the sugar syrup. Take the sugar & water in a bowl, mix well. Melt the sugar and boil it for 5 minutes in medium flame.Syrup should reach sticky consistency.i.e If you take the syrup in your finger, it should coat well with a glossy look and sticky to touch. No need of half thread or single thread consistency.
Add cardamom powder and few saffron threads if using. Switch off the flame and let the syrup become warm. As we have added more water, the syrup won’t become thick. If you wish, you can add 2 tsp of lemon juice to avoid crystallization of sugar syrup. But I din’t add it.
Beginners,please do this testing step.Heat a kadai with oil and take a small ball from the dough. Make it round and crack free. Check the temperature of oil by dropping a pinch of dough. If it rise to the top slowly, oil temperature is correct. Stir the oil twice and drop the small ball which we kept for testing. Flame should be low to medium. Check whether the balls are not dissolved in oil and crack free. It should be doubled in size and cook properly. The color of jamun should change slowly. If the flame is high,jamun will become brown quickly but it won’t be cooked inside.So open the jamun and see whether its properly cooked inside. Please do this testing to make a perfect jamun.
The balls will dissolve in oil if cooking soda is more.In that case,add little more maida and make the dough by sprinkling few drops of water.If there are cracks in the ball after cooking, sprinkle a tsp of water and mix well to make the dough moist. If the ball comes out properly, make the remaining balls using the dough and proceed cooking. Switch off the flame till you make the remaining balls.
Make small crack free balls by rolling the dough between your hands. Grease your hands with ghee if needed. Make sure the balls should be crack free & smooth. This is more important to get crack free,smooth gulab jamun.If there are more cracks in the balls, slightly dip one edge of the ball in milk or water and make the balls smooth.
Now heat the oil in medium flame and check the temperature.Stir the oil and drop the balls one by one. Do not mix it for few seconds. Then mix the oil using the ladle without touching the jamun. Stirring the oil helps to cook the jamun evenly with nice color. Make sure the flame is medium low. Color of jamun should change gradually. If the flame is high, it will brown quickly and inner portion won’t cook well. Gulab jamun will almost double in size after cooking.
Please watch Vahchef’s gulab jamun video if you wish to see the cooking process in detail. Remove the jamun after it becomes golden brown to a tissue paper. Drain the excess oil and immediately transfer the jamun to the warm sugar syrup. Let it soak in the syrup for 1-2 hours.
Enjoy ! It stays good without refrigeration for 2 days if its properly handled. Use a clean spoon every time to take the jamun. Do not use your hands. Refrigerating the jamun may make it slightly harder and chewy.
Note
Gulab jamun will dissolve in oil if you add more cooking soda.
If the moisture content is more in khoya,u don’t have to add water for making the dough. The wetness of khoya is enough to make the smooth dough.
Gulab jamun will become flat if the moist in khoya is more. In that case you should add little more maida.
Adding more maida make the jamun hard.So add the mentioned quantity.
Do not make the dough too sticky or watery. In that case, grease your hands with ghee and make crack free ball. Do the oil test and proceed.
Cook the jamun slowly and patiently else it won’t cook inside properly.
If the sugar syrup is too hot, jamun won’t absorb the syrup. So add the hot jamun to the warm syrup.Allow it to soak for minimum 1 hour.Do not refrigerate the jamun.Use a clean spoon to handle every time.
You can also use boiled,cooled milk to make the dough instead of water.
Make yummy,juicy Gulab jamun for this Diwali and have a great celebration !


 .
.