Recently one of my readers requested me to share Ganesh Chaturthi Pooja Vidhanam/Puja vidhi along with mantras just like my Varalakshmi Vratham pooja post. So I referred my book “Avanai maadha Pooja Vidhanam” ( My friend Shalini’s gift) and shared the slokhas, detailed pooja method with pictures and Ganesha story in PDF format ( you can see at the end of post) to help people who wish to celebrate Ganesh chaturthi pooja in an authentic way. I have shared pooja vidhanam in Tamil. So I have mentioned some useful links for pooja vidhi in Sanskrit, Hindi, Telugu and Kannada at the end of the post. Hope you find them useful.
Ganesh Chaturthi festival is celebrated as the birthday of Lord Ganesha. He is the first worshipped God before any holy puja or occasion. This year 2023, Vinayagar Chaturthi festival falls on September 18th, Monday as per Vaakiya panchangam. This festival is also known as 'Vinayak Chaturthi' or 'Vinayaka Chavithi' . It is observed during the Hindu month of Bhadra in Hindi /Avani in Tamil (mid-August to mid-September). For more information on Ganesh chaturthi festival, click this link .
.
Click this Video on how to make Homemade Ganesh using Kozhukattai dough.
For Ganesh chaturthi Kolam/Rangoli designs, please Visit my in-laws blog for Learn kolam.
Disclaimer : The pictures and pooja procedures I shared in this post are from a devotional book gifted by my friend. This is just one of the ways of celebration. It may vary from place to place. Please consult the elders in your family and follow your tradition. Beginners can follow this if you don’t have any specific procedure at home. Thanks for visiting this page.

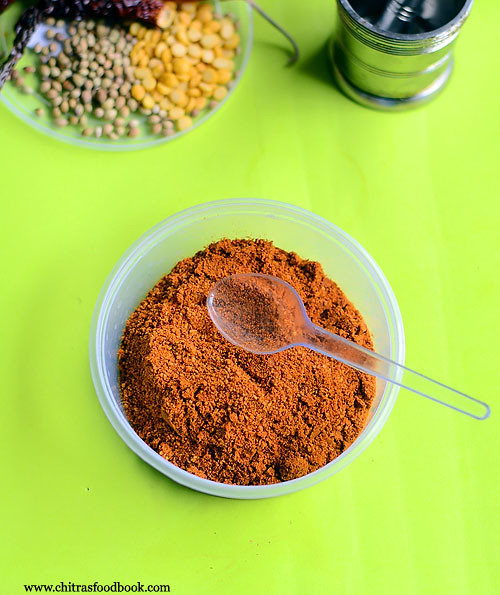
Ingredients
List for Abishekam, pooja and neivedyam
Ganesh idol
-
Wooden plank or peeta to place Ganesha
-
Flowers
-
Milk
-
Curd
-
Honey
-
Tender coconut water
-
Water
-
Rice flour
-
Sesame oil
-
Turmeric powder
-
Shikakai powder
-
Kumkum,Sandal paste
-
Panchamirtham (Curd based delicacy consisting of Panch(5) items: Milk, Sugar, Ghee (clarified butter), Honey, Bananas) Some items are not shown in pic.

-
Vastram for Ganesha ( New blouse bit or dhoti cloth)
-
Mupiri nool for poonool ( 3 threaded string)
-
ArugamPul (Bermuda grass (English). Arugampul (Tamil), Dhub (Hindi), Durva (Sanskrit). Karuka (Malayalam), Garikagoddi (Telugu), Garikoihallu (Kannada))
-
Tulsi leaves ( Its allowed only on this day)
-
Vellerukku Malai ( White flower garland, refer the above picture)
-
Yellow rice/Akshathai
-
Flowers
-
Kumkum, Sandal powder
-
Incense stick
-
Camphor
-
Sesame oil & ghee for lamp
-
Fruits, coconut, betel leaves & betel nut for offering
-
Banana leaf
-
Turmeric powder for manjal pillayar
For Decoration and pooja
-
Coconut
-
Jaggery
-
Chana dal/Moong dal
-
Sugar
-
Besan
-
Urad dal
-
Green chillies, ginger, salt ( for pooran)
-
Raw rice for payasam
-
Urad dal for vada
-
Wheat flour,banana & jaggery for appam
-
Sesame seeds for ellu urundai
-
Click HERE to see the no onion no garlic lunch menu cooking with ingredients
For Neivedyam recipes
Click THIS LINK for Neivedyam recipes collection.
For Neivedyam recipes

Abhishekam Order

Benefits of Abhishekam
PANCHAGAVYAM - Removes all sins of mankind
PANCHAMRUTHAM - Gives wealth
GHEE- Gives Moksha state
MILK - Gives long life
CURD - Gives Good Children
HONEY - Melodious voice
RICE POWDER - Frees from debts
SUGAR CANE JUICE - Gives good health and removes enmity
LIME JUICE - Removes fear of death
TENDER COCONUT JUICE - Gives enjoyment and full satisfaction in life
SANDAL PASTE - Gives Lakshmi's Grace
SUGAR - Removes enmity
Source : http://www.teluguone.com/devotional/content/what-are-things-used-in-shiva-abhishekam-its-effects-56-27598.html#sthash.kCQAROkq.dpuf

Abhishekam should be done by the elders of the family. In our house, my daughter sits with my husband and do the abhishekam :) Refer the above picture. If you are having Ganesha made of Turmeric powder, soft clay or Kozhukattai dough, pour water and other abhishekam items only in spoons else Ganesha will dissolve in water.
You can chant this Ganesha Gayathri mantram while doing Abhishekam.
“Om Tatpurushaya Vidmahe Vakratundaya dheemahi, Tanno Danti Prachodayat”
Draw Kolam/Rangoli on where you are going to do the pooja. Take all the abhishekham items in a plate as shown in the picture. Keep a bowl full of water. Keep some flowers in a plate. Keep an incense stick and a camphor ready.Take a wide plate ( thambaalam). Place a wooden plank inside it and keep the Ganesh idol. Start the abhishekam by putting some flowers and few drops of water. Before doing abhishekam,keep this mind. Ganesh idol should not fall down during abhishekam. So do not pour more water. Touch the idol carefully with support.
First do the sesame oil abhishekam, then apply shikakai powder. Wash it well by adding water. Then apply turmeric powder, light the incense stick and show the dhoop & dheep. Mix rice flour in water and do the abhishekam. Then comes milk, lemon juice, tender coconut water, curd, panchamirtham followed by honey. Collect the panchamirtham with honey in a plate. Pour some water and then continue with sandal paste, Kumkum and lastly viboodhi abhishekam. Finish the abhishekam with little milk. Show the dheep. Pour water and start to decorate the Ganesh. Collect all the abhishekam water in the wide plate and pour in tulsi plant or under some trees.
Lord Ganesha Decoration
Wipe the idol with a clean cloth. Put a poonool / Mupiri nool(3 threaded string) from left to right keeping Ganesha facing towards you. Then wear a new cloth for the idol. Decorate with Tulsi leaves (Generally Tulsi should not be used to decorate Ganesha. But it is allowed only on this day.) Vellerukku malai, arugampul malai and flowers. After abhishekam and decoration, start doing the pooja.
How to do pooja
Check out this PDF for detailed pooja stotras in Tamil. Please download it and follow the directions if you wish to make pooja with kalasam.
Before you start the pooja, keep lots of flowers, leaves and Arugampul in a plate. Make a small cone shaped pillayar/Ganesh with turmeric powder and keep a kumkum dot. Keep a small bowl full of Panchamirtham and a spoonful of honey in a bowl.
If you are placing Kalash, It should be placed firmly on a Copper/Silver plate with rice spread on it. A Coconut is placed over the mouth of the Kalash. Five mango leaves are placed inside the kalash before placing the coconut (like a skirting).
The decorated Ganesha Idol can be placed above on a table/stool and the Kalasha and its plate can be placed in the ground. Light the lamp on the sides of Ganesha. Keep the small turmeric Ganesha( made of turmeric powder mixed with little water) nearby the idol. Keep kumkum & flowers. Place a plate with 5 types of fruits, broken coconut, betel leaves and nuts in front of the God.
In another plate or banana leaf, spread the neivdeyam recipes. Kozhukattai varieties comes to the left side of Ganesha. Rice and other items has to be kept in the usual order. Refer picture for the idea. Keep payasam and aval.pori kadalai/Puffed rice with peanuts in small bowls. Start doing the pooja.
For any pooja, Poorvanga pooja is considered as Pradhana pooja. So keep the turmeric Ganesha before the Ganesh idol and start the poorvanga pooja mantra.
Check out this PDF for detailed pooja stotras with method in Tamil. Please download it and follow the directions. Finish the pooja with mangala aarti !
Ganesha Chaturthi pooja vidhi with mantras in sanskrit / english
http://www.drikpanchang.com/festivals/ganesh-chaturthi/ganesha-chaturthi-puja-vidhi.html
Please use http://www.virtualvinodh.com/aksharamkh/aksharamukha2.php to transliterate the mantras to your script (tamil / telugu / kannada ) from Devanagari.
Siddhi Vinayaka Ashtottara sadha namavali in other languages
Sanskrit - http://sanskritdocuments.org/doc_ganesha/vinaayaka108-5.html?lang=sa
Tamil - http://sanskritdocuments.org/doc_ganesha/vinaayaka108-5.html?lang=ta
Telugu - http://sanskritdocuments.org/doc_ganesha/vinaayaka108-5.html?lang=te
English - IAST - http://sanskritdocuments.org/doc_ganesha/ganesha108.html?lang=iast
AUDIO, VIDEO LINKS FOR OTHER LANGUAGES
- Click this LINK for Pooja Vidhanam Audio in Telugu
- For Hindi version, check this youtube video LINK
After celebration procedures ( Visarjanam)
On Chaturthi evening, make wheat flour appam and do the neivedyam. The next day morning, you can keep idli for neivedyam or simply fruits would do. On afternoon, keep dal and rice with ghee for neivedyam. Continue this neivedyam till Ganesha stays in your house. The next day or the third day, take the ganesha idol along with flowers, vastram, some puffed rice, jaggery and fried gram dal (Do not remove anything from idol) and put it in water. Let the Ganesh idol dissolve in water and take away all the misfortunes of people.
- Click THIS LINK for Neivedyam recipes collection.


Please click this LINK for full collection of neivedyam recipes. This is the LINK for Kozhukattai making Videos & Homemade Ganesh idol using rice flour dough.
Disclaimer : The pictures and pooja procedures I shared in this post are from a devotional book gifted by my friend. This is just one of the ways of celebration. It may vary from place to place. Please consult the elders in your family and follow your tradition. Beginners can follow this if you don’t have any specific procedure at home. Thanks for visiting this page.
Wish you all a very happy Ganesh chaturthi !
Thanks for visiting this page !
Technorati Tags: ganesh chaturthi pooja,ganesh chaturthi pooja mantra,Ganesh chaturthi pooja vidhanam,ganesh chaturthi pooja tamil,ganesh chaturthi pooja items,ganesh chaturthi pooja procedure,ganesh mantra,ganesh chaturthi puja vidhi in tamil,ganesh chaturthi puja stotram,vinayaka chaturthi pooja method,how to do ganesh puja,how to do ganesh puja at home,how to celebrate ganesh chaturthi,how to celebrate vinayaka chaturthi in tamil,how to celebrate ganesh chaturthi at home,how to worship ganesha on ganesh chaturthi,ganesh chaturthi preparation at home,how to worship lord ganesha during ganesh chaturthi,ganesh chaturthi pooja vidhanam,how to perform ganesh chaturthi puja at home


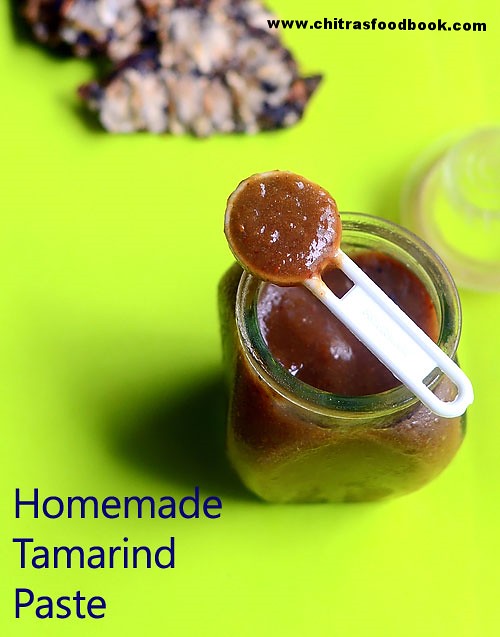
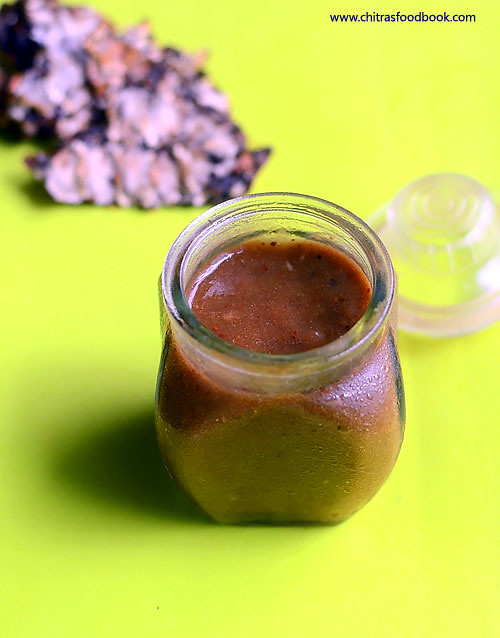
 . Recently when I was talking with my friend Shalini, she told about her homemade tamarind paste. She said its handy for quick cooking and the wastage of tamarind would be very much reduced. She told me to try it once to believe
 .Last week I made tamarind paste just for 1 week usage and stored in refrigerator.As she told, its really useful and I am impressed with this. It saves more time especially while cooking during busy morning hours. I am sure it would be a big help for working women. You can make it in bulk quantity and preserve for months by keeping in refrigerator. It would be much better than store bought tamarind pulp. Lets see how to make tamarind paste at home and store it.