Search Chitra's Food Book

Showing posts with label VARALAKSHMI VRATHAM RECIPES. Show all posts

January 14, 2016

Paal Pongal | Milk Pongal Recipe (Vellai Pongal)

Paal pongal recipe
Paal Pongal/Milk Pongal – when you hear this name you may think its a sweet pongal recipe using milk. But a big nooo! Its just a white pongal recipe in which rice is cooked in milk+water. We usually make this pongal in a pot along with sakkarai pongal for the festival. It looks super white and tastes creamy & rich. 

We mix this rice with Sambar or kootu and enjoy it. But traditionally we offer this to God by keeping a piece of jaggery, banana with few drops of ghee. If you wish to make it as sweet pongal, you can add sugar & cardamom powder to it. This post is my last minute contribution to Pongal Recipes in this year. Lets see how to prepare Vella pongal/Milk pongal recipe with stepwise pictures !!

Check out my other PONGAL RECIPES

Milk pongal recipe

Paal pongal/Milk pongal/Vellai pongal


Paal pongal/Milk pongal/Vella pongal How to make pongal using milk - Paal pongal recipe
Cuisine: Indian
Category: Lunch
Serves: 2
Prep time: 5 Minutes
Cook time: 15 Minutes
Total time: 20 Minutes
INGREDIENTS
1 cup = 240 ml
  • Raw rice - 1/2 cup
  • Milk - 1 cup
  • Water – 2 cups
  • Salt - a pinch
METHOD
  • Wash the rice and keep aside. In a pressure cooker base take milk + water and a pinch of salt. Add rice to it. Cook in low flame for one whistle. Remove and mash it well. Offer God by keeping a small piece of jaggery, banana & few drops of ghee.
Paal pongal
    Serve with Pongal Kuzhambu & kootu. Enjoy !


Make this creamy, rich Paal Pongal and have a great celebration !

Milk pongal recipe 
Continue Reading...


January 2, 2016

Kesari Bath Recipe-Karnataka Recipes

Karnataka Kesari bath recipe
2015 was a big year for me. My long time dream of buying an own house came true. My blogging life also went well. I got so many new readers & a good fan base. 

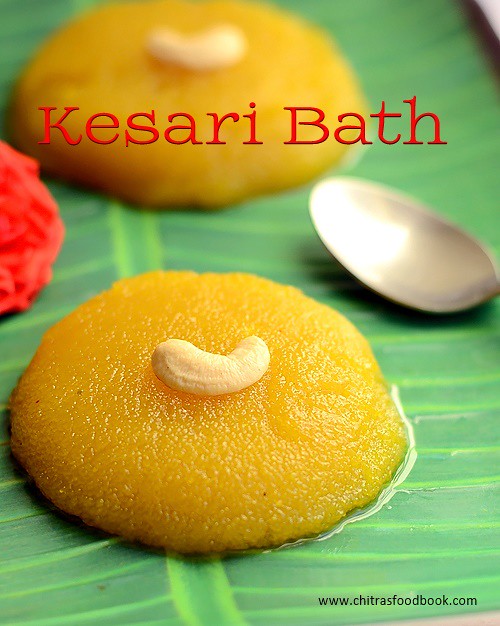
Thanks to everyone for your continuous support and encouragement. I wish & I hope 2016 would be much better by God’s grace. I am happy to start this New year post with Karnataka’s most popular Sweet, Kesari bath recipe.

In most of the hotels, kesari bath & khara bath are served together as “Chow Chow bath” for breakfast. I have tasted this kesaribath in brahmin’s coffee bar and many popular restaurants here. My Kannadiga friends make Kesari bath with milk & banana and offer it as prasad for Satya Narayana pooja. I will try to get that recipe from my friends and share it here.

I usually make Rava Kesari following my MIL’s fool proof recipe adding less ghee and more water. Yesterday for our New Year celebration, I tried Kesari bhath (Sooji Ka Halwa in Hindi) in Karnataka style adding more ghee and water. It came out really well and got credits from my family members. I was extremely happy to see the ghee dripping Kesari bath just the way it is served in hotels.

 Actually I wanted to serve in a banana leaf but i couldn’t get it. So I clicked it by keeping it in a banana leaf plate.Soon I will make Chow chow bath and post it with a good picture.

Lets see how to make Karnataka Kesari Bath Recipe with step by step pictures.

Kesari bath recipe

Kesari bath recipe


Kesari bath recipe How to make Karnataka style Kesari bath recipe
Cuisine: Indian
Category: Sweet
Serves: 2
Prep time: 5 Minutes
Cook time: 15 Minutes
Total time: 20 Minutes
INGREDIENTS
1 cup = 250ml
  • Rava/Sooji/Semolina - 1/2 cup
  • Sugar - 1 cup
  • Water - 2 cups
  • Melted Ghee - 1/3 cup
  • Cooking oil – 1 tbsp ( use odourless oil)
  • Cardamom powder - 1/2 tsp
  • Yellow food color -2 pinches
  • Cashewnuts - few to garnish
  • Cloves - 1 to 2 nos
How to make kesaribath - METHOD

  • Heat a kadai with mentioned quantity of ghee+oil.Roast the cloves and cashews till golden. Remove and set aside.In the same kadai, roast the rava till you get a nice smell but without changing its color. Switch off the stove and let the rava be in the same kadai.
Kesari bath recipe
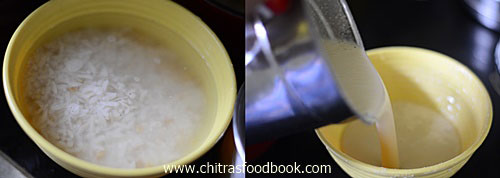
  • Boil 2 cups of water in a bowl adding food color. When the water comes to a roll boil, add this water to the roasted rava.Be careful,water splashes. Stay a feet away and carefully pour the water. Sorry, I missed to take the pictures for this step.
  • Mix the water and rava. Add a pinch of salt. Switch on the stove and keep the flame in medium. Mix well till all the water is absorbed by the rava. Close the kadai with a lid and cook for 3-4 minutes.
    • After the rava is cooked well, add the sugar.Mix well.
Kesari bath recipe
  • When the sugar is melted completely, mixture will become watery. So keep mixing till the kesari bath becomes thick and starts to leave the sides of pan. Add cardamom powder, roasted cashews, cloves and mix well.
Kesari bath recipe

Kesari bath recipe
  • Transfer it to a ghee greased bowl and flatten it with a ladle. It will fall like a ribbon and looks very loose in consistency. But It will become just right when warm. Sprinkle more cashews if needed and serve hot if you like. If you touch the kesari bath when its slightly warm, it should be non-sticky. Scoop it with a ladle and serve hot to enjoy its best taste!
Kesari bath recipe
Kesari bath recipe


Note
  • Adjust the quantity of sugar based on your tastebuds. You can use 3/4 cup of sugar for medium sweetness. I used 1 cup here.
  • You can add more water but do not add less than the mentioned quantity.
  • You can also replace yellow food color with orange color.
  • Use pineapple essence if you like pineapple flavored kesari.
Enjoy this ghee dripping sweet- Kesari bath with your family !
Kesari bath recipe

Continue Reading...


November 23, 2015

Maida Appam Recipe With Sugar - Karthigai Deepam Recipes

maida appam recipe

Maida sweet appam - Sweet maida maavu paniyaram recipe with step by step photos and video !
Sweet appam can be made using different ingredients.It can be prepared with maida,wheat flour or raw rice.I have already shared two versions using wheat flour & raw rice.Here is my third version of sweet appam using maida,banana &sugar.This is the most easy to make version among all the three.My Mil makes this appam for our surprise guest along with a bajji variety. My MIL makes deep fried version whereas I used paniyaram pan here.If you feel maida & sugar are unhealthy,u can replace it with wheat flour & jaggery.Lets see how to make this easy sweet appam recipe using maida & sugar for Karthigai deepam festival !
Please click HERE to check my other recipes for Karthigai Deepam.


sweet maida appam recipe

Maida appam with sugar


Maida appam with sugar Sweet appam with maida,banana & sugar
Cuisine: Indian
Category: Sweet
Serves: 8 nos
Prep time: 5 Minutes
Cook time: 10 Minutes
Total time: 15 Minutes


INGREDIENTS
1 cup = 200ml 

  • Maida/All purpose flour - 1/2 cup
  • Rice flour – 1 tbsp
  • Small banana - 1 no ( I used yelaki)
  • Sugar - 1/4 cup
  • Cardamom powder - 1/8 tsp ( 2 seeds)
  • Water - as needed
  • Cooking soda - A pinch
  • Salt – a pinch
METHOD
  • Take the ripe banana and mash it well with your  hands or grind in a mixie. To this, add maida, sugar, rice flour, cooking soda, salt and cardamom powder. Mix well without water.
sweet appam recipe with maida


  • Add water little by little and make a smooth, lump free batter. Batter should be thick but pourable. If the batter is too thin, appam may become flat. If its too thick, appam would be hard. So take care.
sweet appam recipe with maida

  • Heat a paniyaram pan adding oil in each hole. After the pan is heated,pour a small ladleful of batter in each hole.Keep the flame medium and cover cook for sometime.Flip it & cook for the other side too.Remove in a bowl.

sweet appam recipe with maida

sweet appam recipe with maida

sweet appam recipe with maida


  • I tried few appam by deep frying them.I used oil till 1/4 of the pan and deep fried one at a time.It came out well with golden brown color as u see in the picture below.So if you wish to deep fry,u can go ahead. But remember to deep fry the appam in less oil to get a good shape. I used my mini tadka pan. You can use any kadai.
maida sweet appam recipe


Enjoy !
Note
  • Replace maida with wheat flour & sugar with jaggery for healthy substitute.
Try this quick and easy maida appam for this festival.Happy Karthigai Deepam !
Sweet appam with maida


Continue Reading...


November 19, 2015

Nei Appam Recipe (Without Banana) - Ghee Appam Recipe - Karthigai Deepam Recipes

Nei appam recipe
This is a traditional nei appam recipe without banana, wheat flour (Ghee appam). It is prepared by soaking and grinding raw rice, urad dal and toor dal but it can be made instantly without fermenting the batter.  Karthigai Deepam festival has arrived. Just few more days to go. For every food blogger, festival starts one week earlier than the actual day because we need to try varieties of neivedyam recipes for the sake of blogging. Sometimes I feel lazy to try out new recipes but whenever I get some mails of appreciation and recipe requests, I feel myself refreshed and start to browse for some interesting recipes.Yesterday I got a mail to share Nei appam recipe using rice. 
Even though I had posted an easy and instant nei appam recipe with rice flour, rava and wheat flour, that was not the traditional recipe. Traditionally nei appam is made using rice and it should be deep fried in ghee or oil. In Kerala, they call nei appam as unniappam. So this year for Karthigai deepam, I wanted to share a nei appam recipe with rice as per my reader’s request. I adapted this recipe from my MIL’s sweet paniyaram recipe and I used my paniyaram pan to make this appam. So this is not a deep fried version. It came out very well and soft. The flavor of ghee & jaggery with cardamom was awesome. We all loved it
Friends, if you are looking for nei appam recipe with rice, do try this one. It needs 4-6 hours fermentation time based on the weather if you want to skip baking soda. For instant version, please click THIS LINK. For appam recipe using wheat flour, click THIS LINK.  Next week I will try to share a sweet appam recipe using maida ! Lets see how to make ghee appam/Vella appam recipe for Karthigai Deepam.
Nei appam recipe

Nei appam recipe


Nei appam recipe How to make nei appam recipe using rice and urad dal ! - Karthigai deepam recipes
Cuisine: Indian
Category: Sweet
Serves: 20 
Prep time: 120 Minutes
Cook time: 5 Minutes
Total time: 125 Minutes


INGREDIENTS
1 cup = 250ml
  • Raw Rice OR Idli rice - 1 cup
  • White round urad dal - 1 tbsp
  • Toor dal - 2 tsp
  • Poha/Aval - 2 tbsp
  • Methi seeds/Vendhayam - 1/2 tsp
  • Water - as needed
  • Salt - a pinch
  • Cooking soda - 2 big pinches
  • Grated jaggery – 1/2 cup + 2 tbsp 
  • Cardamom - 3 nos
  • Ghee - as needed ( to cook appam)
HOW TO MAKE NEI APPAM WITHOUT BANANA - METHOD
  • Wash and soak rice, methi seeds, urad dal, toor dal and poha together for 2 hours. Grind it in a big sized mixie jar adding grated jaggery and cardamom. The batter should be very smooth. So add water accordingly. Do not make the batter too watery. It should be of dosa batter consistency. As we are adding jaggery while grinding, it will leave some water. So use water carefully.
  • Remove the batter in a bowl and keep aside for 3-4 hours. Usually we grind the batter around 11am in the morning and make appam at night around 7. By doing this way, batter would be fermented slightly and gives soft appam. So soak the rice & grind the batter earlier at least 5-6 hours before making appam to get really soft appam. No need to refrigerate the batter. 

  • In the evening around 6pm, take the batter and mix it well. If you feel the batter is too thick, add some water to bring dosa batter consistency. Add 2 big pinches of cooking soda, mix well and set aside for 10 minutes.
  • Heat a paniyaram pan and add 1/2 tbsp of ghee in each hole.You can mix gingely oil + melted ghee and make this appam. When the ghee is heated, pour the appam using a small ladle. Fill the batter till half of each holes. This helps for even cooking. Keep the flame low and close the pan with a lid.
  • After 2-3 minutes,flip the appam and cook the other side by covering the pan. Prick it with a fork for even cooking. Appam looks golden brown, bulgy and soft. Insert a toothpick or back of a spoon and check for doneness. If the spoon comes out clear, appam is done. This appam stays good for a day. (color of appam may vary based on the color of jaggery. If the batter is well fermented, you will get nice golden colored appam as you see in the picture) Enjoy !
Note
  • Do not use thick batter for making appam. Appam will become hard.
  • You can add 2 tbsp of grated coconut while grinding the batter.
  • This appam tastes the best when the batter is ground 6 hours before making. So try to make it earlier. If the batter is properly fermented, you can omit cooking soda.
  • Sometimes my MIL adds a ladleful of fermented idli, dosa batter to avoid cooking soda.
  • You can mix gingely oil + melted ghee and make this appam.


Try this traditional Nei appam recipe for this Karthigai Deepam and Enjoy !
Nei appam recipe

Continue Reading...


November 11, 2015

Vazhakkai Bajji Recipe | Raw Banana Bajji - How To Make Bajji

Vazhakkai bajji

Hi Friends, Hope you all doing good. I am sure you all had a great Diwali celebration.My Diwali went very well in my new house with my in-laws and family. As I was busy with some personal works, I was not able to make any post here. For Diwali, I made Badam burfi, Doodh peda, Wheat halwa, Thenkuzhal and Ribbon pakoda for my family. Apart from these sweets, I also made Adhirasam, Suzhiyan and Vazhakkai bajji on Diwali day. We love to eat these deep fried stuffs more than sweets and other savories.

Actually I had planned to make this post before Diwali. But I couldn’t do it. So Iam sharing it today. Every year my mom prepares potato bajji, Brinjal/Kathirikai bajji, Onion bajji and my most favorite Valakkai bajji( Raw banana fritters) on Diwali day morning. I guess many of you make bajji and bonda with store bought bajji, bonda mix/powder. But my mom and MIL makes bajji mix on their own. 

Basically I love tea shop Vazhakkai bajji a lot. Eating hot Vazhakkai bajji with a sip of steaming hot tea on a rainy day is a pure bliss! Try and experience it without worrying about the calories. Lets see how to make this easy, yummy South Indian style Vazhakkai bajji recipe.


Check out my Onion bajji , Chilli bajji & Stuffed chilli bajji recipes.

Vazhakkai Bajji Recipe

Vazhakkai bajji/Raw banana fritters


Vazhakkai bajji/Raw banana fritters How to make Vazhakkai bajji / Raw banana fritters !
Cuisine: Indian
Category: Snacks
Serves: 10 
Prep time: 10 Minutes
Cook time: 20 Minutes
Total time: 30 Minutes


INGREDIENTS
1 cup = 250 ml
  • Besan flour/Kadalai maavu - 1 cup
  • Rice flour - 1/3 cup
  • Red chilli powder - 2 tsp
  • Red food color – 2 pinches (optional)
  • Hing/Asafetida - 1/4 tsp
  • Ajwain OR Cumin seeds/Jeera - 1 tsp
  • Salt - as needed
  • Cooking soda / baking soda - 2 big pinch
  • Water - 1 cup + 2 tbsp ( adjust)
  • Cooking oil - to deep fry
HOW TO MAKE RAW BANANA BAJJI - METHOD
  • In a wide bowl , mix all the flours, powders, Ajwain or cumin seeds, salt, baking soda and add water to make a slightly watery batter( like dosa batter). If you make it too watery, bajji will have tails. At the same time, thick batter yields hard bajjis. The batter should be slightly thick and flow like a ribbon. It should coat the raw banana pieces well. Adjust water and flour accordingly.
Raw banana bajji
  • Wash and cut the raw banana into two horizontally. Peel the skin and discard it. Slice the raw banana thinly and arrange in a plate. Dip the raw banana in bajji batter.
Vazhakkai bajji

  • Heat oil in a kadai and check with a drop of batter to find the correct heating point. i.e. If you put a drop of batter , the batter will rise immediately and floats on top. As soon as you get this heating point, simmer the flame and drop the raw banana slices coated well with batter.
Vazhakkai bajji
  • Deep fry till the color changes golden brown and the bubbles ceases. Flip it and again cook for a minute. Drain & remove in a tissue paper. Enjoy with tea/coffee!
Vazhakkai bajji
Vazhakkai bajji
Note
  • Addition of food color gives a nice color to bajji as u see in stalls.
  • My mom & mil adds cumin seeds but i used ajwain for an enhanced flavour. Use any as per ur wish.
  • Please don’t skip adding soda. It gives a  puffy, soft bajji. Make sure you don’t add too much because bajji will be very oily and it is unhealthy too..
  • Adjust the consistency of batter. Batter should not be too thin or too thick. If your batter has become too thin, add besan & rice flour in 3:1 ratio and adjust the batter. If it is too thick add more water. Always add the extra water using a tbsp & check it.

Enjoy puffy, hot Vazhakkai bajji as an evening snack with your family !
Raw banana bajji


Continue Reading...


October 13, 2015

Akkaravadisal (Akkara Adisal) Recipe - Iyengar Recipes

Akkaravadisal recipe
Navratri is starting from today. I hope most of you would be planning to make some sundal variety along with Sakkarai pongal for today’s neivedyam. Every year we make paasi paruppu sundal and sweet pongal for first day. This year for a change I tried Iyengar special sweet pongal recipe with milk popularly known as “Akkaravadisal/Akkara adisal”. Iyengars make this for Koodaravalli festival during tamil month MargazhiThe term Akkaram is a literary word for Sugar or jaggery and the word Vadisal is a descriptive term for cooking by steaming or boiling. 
Starting from this explanation till the recipe I have shared here are shared by my school friend Sumi Raghavan who is a Tamil (Iyengar) Brahmin.Whenever I look for Iyengar recipes, my first hand source is Sumi. She is so sweet to share her traditional recipes with me. Based on her recipe and method, I started to search for more ideas on net. You could find different recipes for this akkaravadisal. Some people use sugar candy ( Kalkandu) or sugar to make this sweet pongal. Some add equal amounts of jaggery and sugar. But I followed the recipe of my friend which is more of temple style. 
Actually I came to know about this akkara adisal from a priest in Thirukannapuram Perumal temple. He told us that every morning nearly 12 ladies prepare this akkaravadisal in a wide bronze pot ( Venkala paanai) adding lots of ghee and serve it as kovil prasadam to all the devotees during Margazhi month. Though I couldn’t taste the prasadam,I was able to feel its taste from the way he explained. So I badly wanted to try and share this recipe in my blog. As he told, the taste of this creamy pudding like Akkaravadisal was truly flavorful & very rich in taste. Don’t hesitate to add the amount of ghee mentioned here. Ghee and the edible camphor(Pachai karpooram) are the star ingredients of this recipe.
 So here you go authentic Iyengar style akkaravadisal preparation with stepwise pictures. Do make this for Koodaravalli and Navratri neivedyam and offer to God !! 

Akkaravadisal Recipe


Akkaravadisal Recipe Iyengar style akkara adisal recipe - Sweet Pongal with milk. 
Cuisine: Indian
Category: Sweet
Serves: Serves 4
Prep time: 30 Minutes
Cook time: 20 Minutes
Total time: 50 Minutes


INGREDIENTS

  • Raw rice(Good quality sona masoori) - 1/2 cup
  • Yellow moong dal - 2 tbsp
  • Milk – 4 to 5 cups
  • Water – 1/2 cup + 1/4 cup for melting jaggery
  • Grated jaggery - 1/2 cup ( use dark colored jaggery to get this color.)
  • Crushed Sugar candy or sugar - 1/4 cup
  • Cardamom - 3 nos (crushed)
  • Edible camphor/Pachai karpooram - 2 pinches
  • Ghee - 1/4 cup + 2 tbsp ( Rice & ghee ratio is 1:1, but I used less)
  • Cashew nuts - a fistful
  • Saffron threads - Few ( soak in 2 tbsp milk)
  • Salt - a pinch
HOW TO MAKE AKKARAVADISAL - METHOD
  • Wash and soak the rice, dal in milk for 30 minutes adding 4 cups of milk + 1/2 cup of water. Alternatively you can roast rice and moong dal in a tsp of ghee and soak in milk. But I din’t roast moong dal & rice. ( If you want to follow traditional temple method, cook the rice & dal in an open pot by stirring every now & then. Else it will burn in the bottom. If cooking in pot, quantity of milk would be more.)
  • Soak saffron thread in warm milk and set aside. 
Iyengar akkaravadisal recipe
  • Take a pressure cooker and add the soaked rice, dal, milk,,water, a pinch of salt to it. Put a small plate inside the cooker to avoid splashing while the cooker whistles. Pressure cook in very low flame for 2 to 3 whistles. It takes more time to cook as we are cooking rice in milk. So be patient.
Iyengar akkaravadisal recipe 
  • In the mean time, boil the jaggery adding 1/4 cup of water and let it melt. Strain the jaggery syrup using a filter , add sugar or crushed sugar candy ( kalkandu), mix well and keep aside.
Iyengar akkaravadisal recipe
  • After the steam is released from the cooker, remove the plate and mash the rice very well. Add 1/2 cup of milk and mix well to bring semi solid consistency. Add the jaggery syrup + sugar or crushed sugar candy to this. Let the mixture boil for a minute. Akkaravadisal should be in semi solid state unlike our usual sweet pongal. It will tend to thicken as time proceeds. So add more boiled milk ( Say 1/2 cup) and adjust its consistency at this stage or before you serve if needed. 
Iyengar akkaravadisal recipe
  • Roast the nuts in 1/4 cup of ghee and add to the pongal. Switch off the flame, add cardamom powder, saffron soaked milk, edible camphor / Pachai karpooram, mix well and offer to God.  Enjoy ! I drizzled 2 tbsp of ghee on the serving bowl to give a ghee dripping pongal look ;)
Iyengar akkaravadisal recipe
Note
  • Traditionally akkaravadisal is made by cooking rice in milk in a wide bronze pot. But I used pressure cooker to make it easily.
  • You can grind the rice coarsely and pressure cook it for easy and quick cooking. 
  • You can also add equal amount of rice & moong dal if you like. 
  • Ratio of rice & jaggery + sugar is 1: 1.5.
  • Adding edible camphor gives the temple style flavor. So don’t skip it. But do not add more. Just a big pinch would do.
  • For variations, you can add equal amount of sugar or sugar candy ( Kalkandu) mixed with jaggery.

Iyengar style akkaravadisal is ready to serve !
Akkaravadisal recipe
Continue Reading...