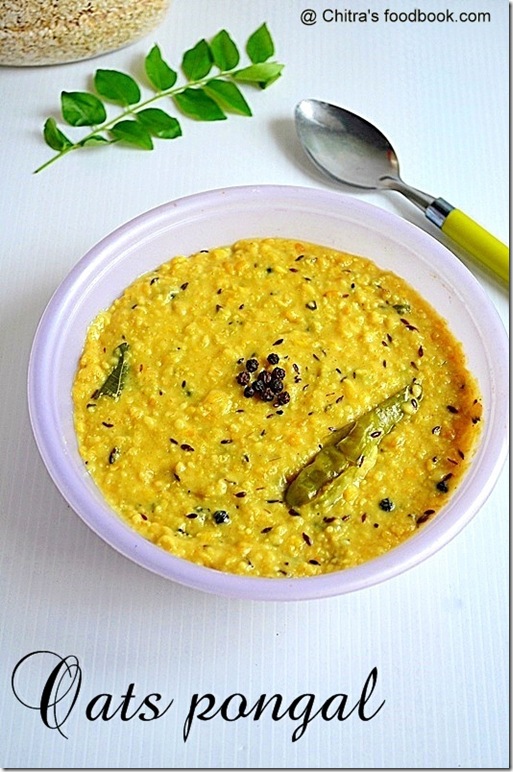
Oats pongal is Sendhil's most favourite oats recipes.I have been making this for long time but somehow I din’t post here. He says this is the best among all the oats recipes. I make this at least once in a week. Sometimes I pack this pongal for his breakfast when he leaves early from home. It stays soft for hours.
As I make in pressure cooker, I would say this is the easiest and healthy one pot breakfast recipe. But make sure u add lesser salt than the usual quantity because oats needs lesser salt than rice, adding more makes the dish salty.
INGREDIENTS 1 cup - 240ml
Quick Oats – 1 cup ( I have used Horlicks/ Kelloggs oats)
Moong dal – 1/3 cup
Turmeric powder – 1/4 tsp
Salt – As needed
Water – 2.5 – 3 cups
To temper
Oil / ghee – 2 tsp
Pepper corns – 1 tsp
Jeera / Cumin seeds – 1.5 tsp
Curry leaves – 1 sprig
Ginger – 1 inch piece (chop finely)
Green chilli – 1 no (slit)
Hing- 2 pinches
Ghee – 1 tsp ( to add in the end)
HOW TO MAKE OATS PONGAL - METHOD
In a pressure cooker base, heat 2 tsp of oil or ghee and add the pepper corns. After it starts to splutter, add jeera, green chillies, ginger & curry leaves. Saute everything for a second.
Then add the moong dal and roast it for a minute.Keep the flame low to avoid burning of spices & dal.
Add 2.5 –3 cups of water, Hing, turmeric powder & salt. After it starts to boil, add the oats. Mix well and close the cooker with the lid. Cook it for 1 whistle in low flame.
Switch off the flame, Open the cooker after the steam is released. U’ll see a layer of water on top of pongal.
Again switch on the flame & mix the pongal well till all the water is absorbed. Add a tsp of ghee and switch off the flame.
Serve hot !!
NOTE
U can make pongal in kadai too but u have to pressure cook the dal separately and add to the oats. I feel the above method easy for me to make everything in pressure cooker.
Please adjust the water quantity as per the consistency you need. I always add 1:3 oats & water ratio as my husband likes it mushy and wet.
Addition of turmeric powder is optional. I usually add it to differentiate between rice & oats pongal :)
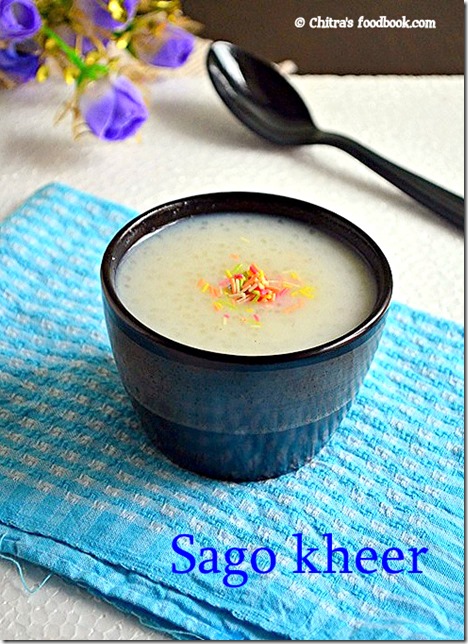
I love Nylon sabudana kheer with sugar a lot. But my husband hates it like anything. He can taste it only if the sabudana kheer is with jaggery. So this recipe appears very very rarely in my kitchen. Last week I made this for blogging purpose and enjoyed eating alone ;).
It was absolutely delicious and I was happy that I could make it perfect in my first attempt. I asked my mom & mil for making this payasam because they make this payasam instantly by roasting the nylon javvarisi ( small sized sago) we get in Tamil nadu. So this payasam can be prepared instantly without soaking sabudana. I followed their instructions and the result was , a perfect & delicious payasam. I used nylon javvarisi in this recipe.
U can also use white big ones known as maavu javvirisi in Tamil. For making this payasam with jaggery using white big sago, please check this link..I used sprinklers for decoration as I dint have cashews in hand. I have used milk and sugar in this recipe. For variations, you can replace them with condensed milk. For rich taste, you can also add coconut milk at the end.
INGREDIENTS
1 cup - 240ml
Sabudana / Sago/ javvarisi – 1/4 cup ( I used small sized, nylon javvarisi)
Water – 2 cups
Milk – 1 cup
Sugar – 1/4 cup (adjust)
Cardamom powder – 1/8 tsp
Cashews – few
Ghee – 1 tbsp
METHOD
In a kadai , add a tsp of ghee & roast the sago till it puffs up & turns white..The size will become slightly bigger. Do it in low flame with continuous stirring otherwise sago may be over roasted & burnt.Alternatively you can skin roasting and make it by just washing the nylon javvarisi thrice and cook in required water.
You can also use big, white sago if you don't have nylon javvarisi. But you should wash it twice, soak it overnight adding equal amount of water. ( ie. 1:1 ratio of big sabudana and water).
In a bowl, take 2 cups of water and cook this sago till it turns transparent. Keep stirring in regular intervals to avoid sticking to the bottom. Add little more water if needed. It took nearly 10-15 mins to cook.Time may vary..
After the sago is completely cooked and becomes almost transparent , add sugar. Mix well & boil for few seconds.
Finally add the milk , cardamom powder and boil for 3 minutes to thicken slightly. Roast the cashews in the remaining ghee & add to the kheer..Serve warm or cold..
This kheer tends to thicken when it cools down. So adjust the quantity of milk accordingly.
NOTE
For variations , you can add milk in the sago after its 90% cooked. Cook till done and then add sugar, cardamom powder and nuts. By doing this way, payasam tastes rich.
U can also add 1/4 cup of coconut milk before switching off the flame and it make this dessert more tasty.
If you want to soak the sago instead of roasting, soak it for 2 hours if nylon variety & over night or around 12 hours for white big ones..
List of Aadi 18 recipes /Aadi perukku recipes. Aadi 18 ( Pathinettam perukku) is a Tamil festival that falls on August 3rd, 2023. Recipes for aadi perukku lunch menu includes sakkarai pongal/ sweet pongal, 5 Rice varieties / Chitrannam (Ellu sadam/sesame seeds rice, lemon rice, Puli sadam/ Tamarind rice, Thengai sadam/coconut rice, and thayir sadam/ curd rice), Payasam recipes, Sundal recipes and vada.
I have shared all the links along with some special recipes like Aadi thengai paal, fire roasted coconut / Aadi thengai sudum pandigai in Salem & some parts of Tamil nadu. I hope these recipe links would be useful for preparing neivedyam. I have also given few tips on how to cook this aadi 18 lunch menu easily & quickly with some pre-preparations. Hope beginners would find it useful. Wish you all a very happy Aadi 18 :)
Please check THIS LINK to know how to perform aadi 18 pooja ( Pathinettam perukku in Tamil) at home in detail along with celebration pictures.
OUR CELEBRATION
We usually celebrate Aadi perukku at home by offering 5 rice dishes along with pepper vada. In the early morning ( before 6AM) we light the lamp, make 2 manjal pillayar and offer a bowl of raw rice mixed with jaggery. We (only ladies)tie a yellow rope by ourselves around our neck. In the afternoon, we offer 5 rice dishes along with vada, do the pooja and we eat it heartily ;) Some people make full meals like rice, dal, sambar, poriyal, kootu, thayir pachadi, vada and payasam instead of rice varieties. But I follow my MIL and make chitrannam on this day. I feel this is much easier than cooking full meals ;)
Please check THIS LINKto know how to celebrate aadi 18 at home in detail along with celebration pictures.
Every year we prepare Lemon rice or tamarind rice, Coconut rice, sweet pongal, sesame seeds rice, curd rice. Sometimes we make payasam with jaggery instead of sweet pongal and make Ellu sadam or milagu jeeraga sadham to make a count of 5. I have made a video on "How to cook 5 rice varieties for Aadi 18". I hope beginners would find it helpful. Please scroll through to check the video.
Some people also make kalkandu sadam instead of sweet pongal. My mom used to say we have to make 18 rice dishes for aadi 18 ;) . But I don’t know how far it is true ;).
In this post I have shared the links of all variety rice recipes , sweet pongal, payasam recipes and vadai ( two versions). Wish you all a very happy Aadi Perukku/Aadi 18 :)
HOW TO COOK AADI 18 LUNCH MENU
Please watch the above video to cook this menu easily. In this video, I have shared how to cook 5 rice varieties for aadi 18 easily within 1 hour. I have shown making lemon rice, coconut rice, sesame seeds rice, curd rice and sweet pongal. If you wish, you can make tamarind rice instead of lemon rice. Please check the video below for tamarind rice.
Usually we cook this lunch menu on (Aadi 18) festival day as we are doing the pooja only in the afternoon. We get lots of time in hand to cook this menu. We don't do any pre-preparations. Some people like working women or busy moms may like to do the pooja in the morning. For this, pre-preparations is essential. So I have shared the same below.
On the previous day afternoon or night, Soak the chana for making sundal. Wash and soak the urad dal for making vada. Add enough water to soak the dal and refigerate it for soaking. Do not freeze it. Use the same soaked water for grinding the vada batter in mixie. You will get great results. Please check the Urad dal vada link below for more details.
Start to make pulikachal paste for puliodharai. You can make this paste even before 2 days as it stays good upto 15 days under refrigeration. Store in an air tight box after the paste cools down and keep in refigerator till use. Do not use it for your regular cooking as its meant for neivedyam. I have shared my MIL's puliodharai recipe link below. It tastes great just like kovil puliodharai. Do give a try !
After doing the pulikachal paste, prepare the lemon rice paste and store in a box. Its not necessary to make both lemon rice & tamarind rice. Any one is fine as both tastes tangy.
Prepare ellu podi for sesame seeds rice by dry roasting sesame seeds & red chilli. Grind to a fine powder and store it.
You can also make Milagu jeeraga sadam/ Pepper cumin rice instead of sesame seeds rice. Please check the links for lemon rice & travel lunch recipes for Ellu sadam, milagu jeeraga sadam.
Then you can prepare the coconut rice mix. Don't worry, it won't spoil as we are roasting coconut along with the other ingredients. Refrigerate it in a box. Do the tempering for curd rice and refrigerate it.
Roast the moong dal in ghee for sweet pongal and keep aside. Melt the jaggery for sweet pongal adding required water, strain it and keep the jaggery syrup in an air tight box. No need to refrigerate it. I use 1:2 ratio of water and jaggery.
The next day morning, take bath and remove all the stored boxes. Let it come to room temperature. Start to prepare for neivedyam by cooking the rice. If you are cooking for 2 to 3 people, use 2 pressure cookers. In one cooker, add 1 cup raw rice, 2.5 cups of water. Add few drops of cooking oil in the water and cook in very low flame for 1 whistle. Use this for making lemon rice or tamarind rice, coconut rice, sesame seeds rice.
In second cooker, take 1 cup raw rice. Keep a small box inside the cooker and add 2 tbsp roasted moong dal with 1/2 cup water. ( If you are making sundal, place the soaked chana in a plate over the rice and cover the cooker). Add 5 cups of water to the rice and pressure cook in low flame for 1 whistle. Use this rice for making sweet pongal and curd rice. Both the rice gets done in 15 minutes simultaneously.
While the rice is cooking, You can decorate the pooja room.
As soon as the steam is released, open cooker 1. Take the rice from cooker 1 using a fork like ladle gently (Do not mash it). Spread it in the plate and add 2 tsp of sesame oil ( Nalla ennai). Let it cool down. Divide the rice in 3 plates for making rice varieties as per the quantity you need it. For my family, I make more puliodharai or lemon rice. I make very less thengai sadam and ellu sadam just 1/4 cup each.
Open cooker 2 after steam is released. Remove the moong dal box from cooker 2 and mash the rice when hot.Use this rice for making curd rice and sweet pongal. Mash when the rice is hot else it will be difficult. After mashing the rice, divide into equal portions or as per the required quantity. To the curd rice part, add 1/2 cup of warm milk or water. Add salt and mix well. Add the curd + tempering. Mix well. Add fresh cream or butter if you like. Garnish with fruits like grapes and pomegranate or coriander leaves if desired.
Take the mashed rice for sweet pongal and add the prepared jaggery syrup, cooked moong dal. Mix well and cook for a minute. Add ghee roasted cashews, cloves, cardamom powder, jathikkai/ nutmeg powder and required ghee. Mix well.
Now take the cooled rice and make lemon rice/ tamarind rice, coconut rice and sesame rice adding the prepared paste and powder.
After making all these rice varieties, take the soaking urad dal from the fridge and grind using mixie. Add the soaked water for grinding. Do not add salt. Grind fluffy batter and remove in a bowl. Add coarsely ground pepper, cumin and few torn curry leaves. Add hing. Mix well.
Heat oil to deep fry and make the vada. You can also fry some papad in the oil.
Now we have cooked all th 5 rice varieties, sweet pongal, vada and everything is ready for neivedyam. All these hardly takes 45 minutes if you have prepared all the paste on the previous day. If you are making everything on the same day, it takes around 1.5 hours. Make it as per your convenience and celebrate this festival in a grand manner at home. Get the blessings of GOD.
Please check the links for the recipes below. Thanks for visiting this page. Wish you all a very happy Aadi 18 :)
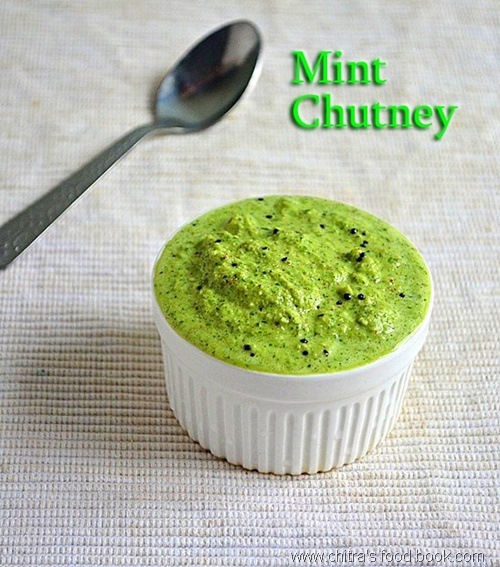
I make this mint chutney recipe(Pudina chutney in Tamil) for breakfast. Its a very tasty side dish for idli dosa. I have already posted amint chutney with tomato and this one is with coconut.Sendhil & Raksha love this chutney a lot. It tastes more like hotel chutney. As this is a two step recipe, I have not posted step by step pictures.For step by step pictures,please refer my Green chutney recipeusing coriander leaves if interested.
Mint chutney recipe
Delicious mint chutney recipe for idli,dosa
Cuisine: IndianCategory: Side dishYields: Serves 2
Green chillies – 3 – 4 nos ( add 5 for spicy taste)
Tamarind – A small piece
Fried gram dal – 1 tsp
Small onion – 2 nos (optional)
Garlic cloves – 2 nos
Turmeric powder – A big pinch
Salt & water – as needed
To temper
Cooking oil – 1 tsp
Mustard seeds – 1/2 tsp
Urad dal – 1/2 tsp
METHOD
In a kadai,heat oil,saute the green chillies,mint leaves,turmeric powder,small onion, garlic cloves,tamarind and fried gram dal.Lastly add the grated coconut ,saute for a minute & switch off the flame.Grind everything together adding the required salt & water.
Temper & add them to the chutney bowl.Mix n serve !
Enjoy with idli,dosa !
Note
For variations,u can try without sautéing coconut.
Addition of turmeric powder& sautéing mint leaves gives a nice green color to the chutney.Please don’t skip it.
You can grind everything raw and temper the chutney.
Lemon rice (elumichai sadam in Tamil) is my most favourite among all the variety rice recipes for lunch. Its a very simple and a healthy rice recipe that can be prepared quickly for lunch box. I can have a plateful of lemon rice without any side dish like thogayal or pickle. But my mom makes a thick chutney with coconut and fried gram dal ( pottukadalai) as a side dish for lemon rice. My dad never eats lemon rice without this chutney and a pickle. Once I tried this combo for my husband and he too liked it. Recently we went to Meenakshi amman temple in Bannergatta. We had lemon rice as prasadam and it tasted out of the world. I would say it is the best lemon rice I have ever tasted. It was mild yellow in color & I found they had used raw rice & added some coriander leaves along with dals & chillies.. Usually I use steamed rice for making lemon rice. But after tasting that prasadam , I too started using raw rice and added some coriander leaves.
As aadi 18 festival is nearing , I thought of posting this lemon rice recipe. This is one among the 5 rice varieties ( lemon rice , puliyodharai , coconut rice , sakkarai pongal and curd rice) we offer to God on aadi perukku along with pepper vada and payasam.. Do try this chutney & lemon rice combo , u will love it..
INGREDIENTS 1 cup - 250ml
Raw rice – 1/2 cup (Good quality sona masoori) OR (steamed rice , basmati rice)
Big sized Lemon – 1 ( adjust based on the size & tanginess of lemon)
Salt – as needed
Hing / asafetida – 1/4 tsp
Turmeric powder – 1/4 tsp
To temper
Cooking oil – 1 tbsp
Mustard seeds – 1 tsp
Urad dal – 1 tbsp
Chana dal – 1/2 tbsp
Peanuts – 1 tbsp (optional)
Red chillies – 2 nos
Green chillies – 2 nos
Curry leaves – few
Coriander leaves – 1 tbsp ( to garnish)
Gingely oil – 1 tbsp ( to add while mixing)
METHOD
Pressure cook raw rice adding 1: 2.5 cups of rice and water ratio. Add a drop of oil before cooking. Cook it separate & fluffy. Spread them in a plate & let it cool down.
In a bowl, squeeze the lemon juice by removing the seeds. Add salt , turmeric powder & hing. set aside.
In a kadai , heat oil and temper the mustard seeds. After it splutters completely , add the dals & peanuts. Fry till they turn golden brown. Then add the pinched red chillies & slitted green chillies, curry leaves and a pinch of hing.
Saute well , add the lemon juice , switch off the flame immediately & transfer to a bowl. Add 2 tsp of water in the kadai, give a swirl and add to the lemon juice mixture..
Add this mixture & gingely oil to the rice , mix well. Check for salt. Garnish with coriander leaves..Initially it tastes more tangy..But all the taste blends well when its rested for 30 mins to 1 hour before serving.
NOTE
The water quantity may differ based on the quality of rice..If u use basmati rice, use 1:2 cups of water..
u can add also add the lemon juice directly in the rice instead of adding to the tadka..
Addition of peanuts is optional. I dint use here. I dint add coriander leaves as it was out of stock. But addition of coriander leaves gives a nice taste..
Add gingely oil while mixing the rice.
POTTUKADALAI CHUTNEY / FRIED GRAM DAL CHUTNEY - SIDE DISH FOR LEMON RICE
INGREDIENTS 1 cup - 250ml
Dalia/fried gram – 1/4 cup
Grated coconut – 1 tbsp
Green chillies – 2 nos
Salt – As needed
Garlic cloves – 2-3 nos
METHOD
Grind all the above ingredients to a thick paste adding less water..Serve !
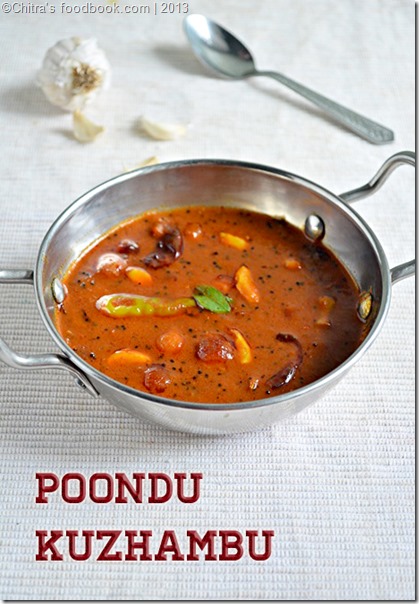
Poondu kulambu / Poondu kuzhambu recipe is an easy to make, flavouful side dish for rice.I tried this recipe from “ The Hindu ” Food safari magazine. As this garlic kuzhambu recipe was given by a chef, I tried it confidently. It came out very well and was finger-licking good. We all loved it. Bachelors can also try this recipe. U can store it for 2-3 days.The taste improves day-by-day. Sambar powder is not necessary for this kulambu. I have used more Small onion/ Chinna vengayam as given the original recipe. You can adjust it as per your preference. Friends, try this easy poondu kuzhambu recipe without coconut and share your feedback with me.
INGREDIENTS
To make puree
Tamarind – Small lemon size
Tomato – 1 no
To add in the puree
Red chilli powder – 1.5 tsp
Turmeric powder – 1/4 tsp
Salt – As needed
Water – 2 cups
To saute in oil
Gingely oil – 2 -3 tbsp
Mustard seeds – 1 tsp
Fenugreek seeds – 1/2 tsp
Urad dal – 1 tsp
Green chilli – 1 no
Red chilli – 2 nos
Curry leaves – few
Garlic cloves – 1/8 cup ( 20 cloves)
Small onion – 10 nos Or 1 big onion ( cube cut)
Grated Jaggery – 1 tsp ( to add in the end)
METHOD
Soak tamarind in little warm water & grind it along with a tomato. Make it a puree. To this puree , add salt , 2 cups of water , red chilli powder & turmeric powder.
In a kadai , heat oil and temper all the above said ingredients one by one in the same order. Then saute onions and garlic cloves till they change golden brown and emits a nice smell.
Now add the tamarind puree mixture , stir well and allow it to boil in medium flame till the gravy reduces to half & thickens. Lastly before switching off the flame , add the grated jaggery, add little more salt if necessary..
Switch off the flame, transfer to a serving bowl and close it with a lid.
Serve after 30 minutes..Tastes great with plain rice and papad !!
It thickens to a paste when it cools down.It tastes the best when served the next day. So you can make in large quantity , store in an air tight bottle , refrigerate it and enjoy for a week !
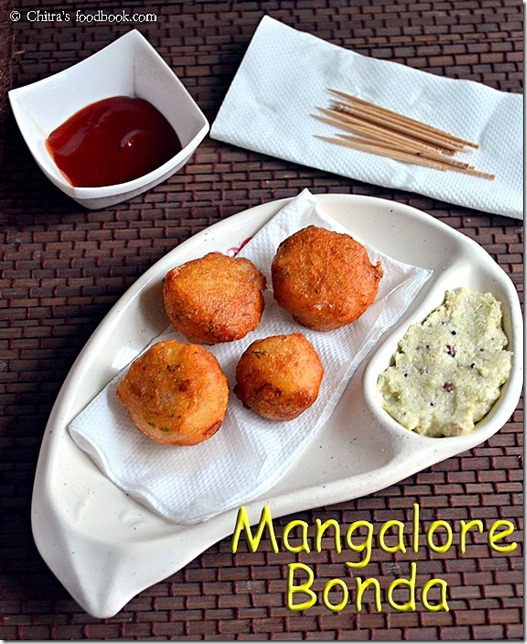
Mangalore bonda recipe is a famous Karnataka tea time snacks. It is also known as Goli baje & Mangalore bajji. Yesterday I wanted to try an Instant bonda for my daughter’s evening snacks. As I have already tried aloo bonda and mysore bonda , I thought of trying something different and interesting. So I quickly went through my cook books and tried this mangalore bonda recipe given by Mrs.Mallika badrinath. As the name says, Mangalore bonda is a famous tea time snacks recipe popular in Mangalore, udupi and South Canara region. Authentic Mangalore bonda version calls for resting the batter for 3 to 4 hours for proper fermentation. But I made an instant version by adding sour curd to the dough. It was very nice n crispy. Sendhil and Raksha loved it a lot. One thing you should keep in mind while making this bonda is “It should be served hot” to enjoy its actual taste ..Do try this instant snack in this weekend and let me know how it turned out .
Mix all the ingredients given above except cooking soda. Keep it closed for 30 minutes to 1 hour.. ( actual recipe called for 5 to 6 hours of soaking).. Do not add water while making the dough. If needed add 1 tbsp maximum.. Use only the curd to hold the dough..
After an hour , add cooking soda & mix well.. Heat oil , take a medium sized ball from the dough & deep fry them till golden brown..DO NOT OVER FRY, IT MAY CHANGE THE TASTE..
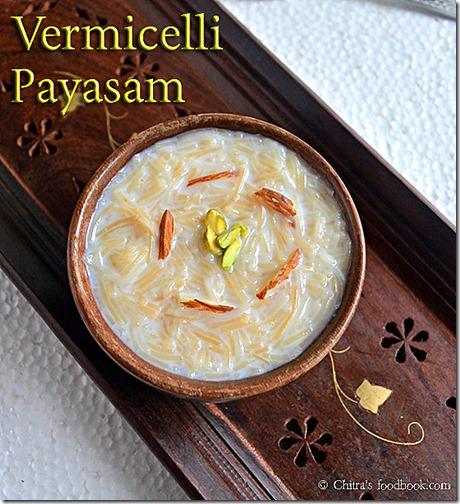
Semiya payasam must be the favourite payasam for most of the people in Tamilnadu. Its our family favorite too. People make it for all the special occasions like birthday, wedding anniversay and other occasions at home. Yesterday I made this semiya payasam without condensed milk (Milk maid) for my birthday and I enjoyed every mouth to the core. Its very easy and can be made in a jiffy. Many variations can be made to this payasam recipe by adding finely chopped nuts or badam powder or saffron milk , condensed milk/ milkmaid, khoya and make it taste more delicious. Its a simple but rich Indian dessert recipe. I have already shared Kerala style semiya payasam recipe in my Kerala Onam sadya post using milk.. Here I have shared the basic method in Tamilnadu style. Do try and let me know your feedback..
Semiya payasam without condensed milk
Semiya javvarisi payasam / sago vermicelli kheer in Tamilnadu style.
Roast cashew nuts and dry grapes till golden. Remove in a plate.
Roast semiya for 2 minutes. Remove in a plate.
Roll Boil 2 cups of water in a vessel. Add the roasted semiya.
Cook in medium flame for 10 to 15 minutes till its soft.
Add sugar, cardamom powder. Mix well and boil till sugar melts.
Switch off the flame once payasam becomes thick.
Add boiled milk at room temperature to the hot payasam. Add half the quantity of milk for thick payasam.
Lastly add the roasted nuts. Mix well and serve!
HOW TO MAKE SEMIYA PAYASAM - METHOD
Roast cashews till golden and dry grapes till bulgy in a tsp of ghee and set aside. Add the remaining 2 tsp ghee in a pan and roast the vermicelli till golden brown. ( I skipped this part as I used MTR Roasted vermicelli)
In a wide bowl , take the water and roasted vermicelli and allow it to cook for 10-15 minutes till it becomes soft to touch and breakable. There should be very little water left with the semiya.
Now add the sugar and mix well till sugar dissolves completely. Let it boil in low flame for few seconds. When the payasam becomes thick, add the elachi powder or rose essence and milk. Stir well, give a boil in low flame and switch off the flame.
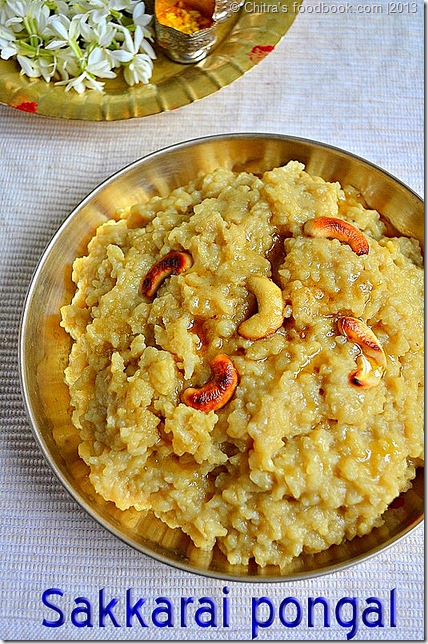
In this post, I have shown how to make sweet pongal in pressure cooker easily. Usually I make aval payasam or moong dal payasam for Friday pooja. Today being Aadi velli, I made this sweet pongal ( Chakkara pongal/sakkarai pongal in Tamil) in a pressure cooker. You can make the same in instant pot too. I usually make sakkarai pongal for aadi velli, aadi perukku & thai pongal. For the other occasions, we make rice payasam mostly.
I have already posted an authentic, traditional sakkarai/ sweet pongal about how to make sakkarai pongal in venkala paanai (pot). In this post, I have mentioned our usual method of making sweet pongal using pressure cooker. To make perfect sweet pongal, always use good quality raw rice & dark colored jaggery ( paagu vellam) to get the best results in color & taste. Its very flavourful , tastes similar to Kovil pongal/temple pongal and you’ll love it for sure. Try this & let me know dearies.
Sweet Pongal Recipe
Sweet Pongal recipe-Sakkarai pongal -How to make Temple style sweet pongal recipe at home using pressure cooker.
Cuisine:South Indian
Category: Sweets
Serves:3
Prep time:10 Minutes
Cook time:20 Minutes
Total time:30 Minutes
INGREDIENTS 1 cup - 200ml OR 240ml
To pressure cook
Raw rice – 1/2 cup
Yellow Moong dal – 1 tbsp ( add 2 tbsp for more dal flavor)
Water – 2.5- 3 cups (varies as per the quality of rice)
Salt – a pinch
For syrup
Jaggery – 3/4 cup ( use 1 cup for more sweetness)
Water – 1/2 cup
For Flavor
Ghee – 3 tbsp
Cardamom – 2 nos
Edible camphor – A pinch
Jathikai / nutmeg – A pinch
Cloves – 2 nos
Cashewnuts – 5-7 nos
Raisins / Dry grapes – 5 nos (optional , I dint use)
HOW TO MAKE SAKKARAI PONGAL IN PRESSURE COOKER - METHOD
In a kadai , heat 2 tsp of ghee and roast the cashews , raisins, cloves & jathikai. Powder the jathikkai and set aside.
In the same ghee , roast the moong dal till golden brown with a nice aroma. Wash the roasted moong dal and set aside.
In a pressure cooker base, take the washed rice & 3 cups of water. Add the roasted moong dal along with a pinch of salt. Pressure cook for 4-5 whistles till rice & dal turns mushy. Open the cooker & mash the rice , dal very well with a ladle..
In the meanwhile , prepare jaggery syrup. In a wide bowl , take the jaggery with 1/2 cup of water and allow the jaggery to melt completely. Strain the impurities and again boil the syrup till it becomes frothy. Remove & add this syrup to the cooker.
Mix well and add 2 tsp of ghee to avoid the pongal sticking to the bottom. Stir very well for 4-5 minutes till all the syrup gets mixed.
Pongal will start to thicken and leave the sides of the cooker . At this stage add the remaining 2 tbsp of ghee and the roasted cloves , cardamom powder, edible camphor powder & roasted jathikai powder.. Mix well & switch off the stove. Initially it will look semi solid in consistency. But it will thicken as time proceeds. Before serving, you can reheat it adding little milk or water.
If your pongal looks dry when warm , add little ghee & milk , reheat it and serve ! It tastes divine !! Enjoy !
Note
Always add more ghee at the end for a nice flavour. It also makes the pongal soft & non sticky.
Use good quality ghee & rice for better flavour n taste. Adding jathikkai & cloves gives a superb smell. Don't skip it
Milk can be added if pongal looks dry or hard. But addition of milk reduces the shelf life, color will slightly change and also the sweetness gets reduced. For the above recipe you can add 1/4 cup of milk.
Use dark colored paagu vellam to get a nice color.


