Search Chitra's Food Book

October 23, 2013

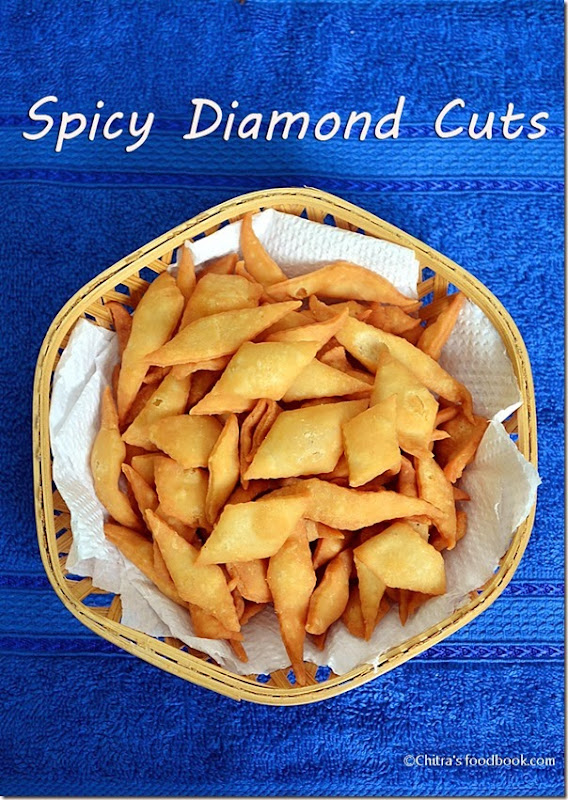
SPICY DIAMOND CUTS | SPICY MAIDA BISCUITS RECIPE – DIWALI SNACK RECIPES

spicy maida biscuits
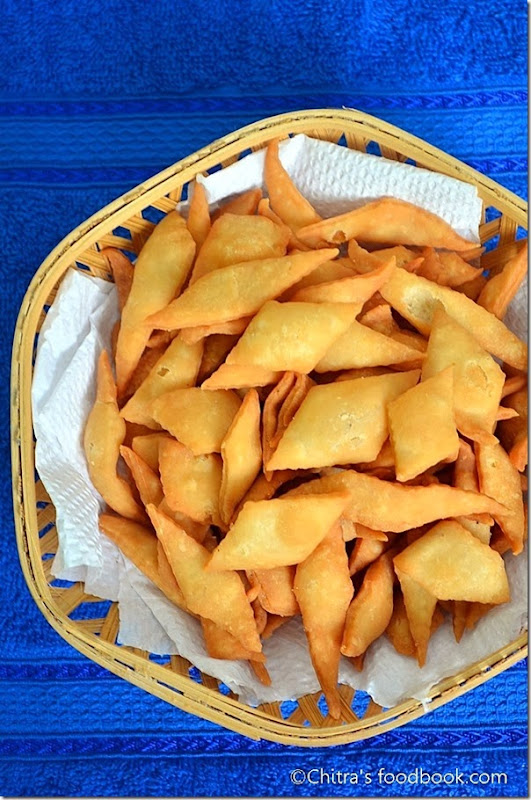
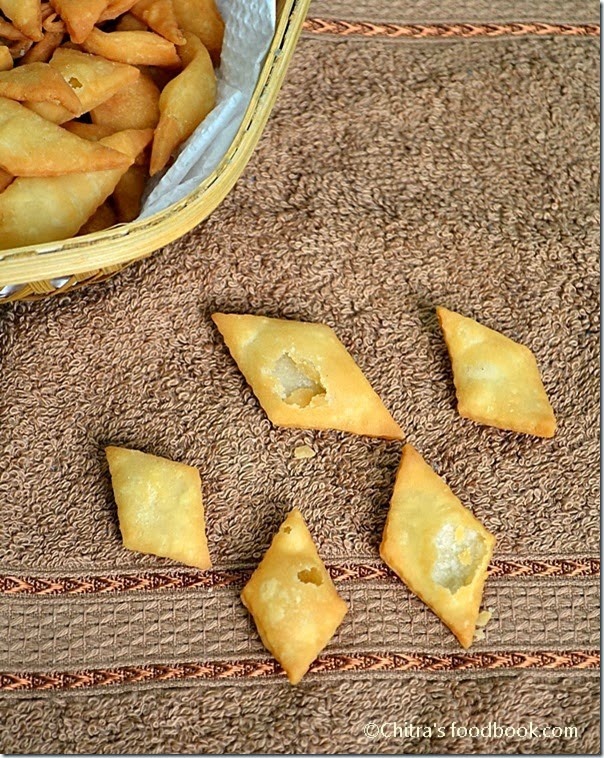
Maida khara biscuit /spicy maida biscuits / Diamond cuts is a very easy and tasty diwali snacks recipe.. I learnt this recipe from my MIL.My mom makes a similar one called “thukkada”, Tirunelveli special snack with wheat flour.  I’ll share it soon. This one is with all purpose flour/ maida. I hope most of you make this snack at home. Generally we all add red chilli powder and the color of this biscuit would be golden brown. I told my mil that i wanted white colored chips. She told me to use green chillies instead of red chillies. As she said , my biscuits were half white in color and not red/golden brown. Thanks a lot aunty. If you try sweet maida biscuit , you can make this one along with it. Both can be made together in 45 minutes..Do try this version. U’ll love it. It comes out crispy and tasty..
maida kara biscuit

INGREDIENTS
1 cup - 250ml
  • All purpose flour / Maida – 1.5 cups
  • Warm oil – 1/4 cup
  • Salt & water  – as needed
To grind
  • Green chillies – 2 nos
  • Ginger – 1 inch piece
  • Garlic cloves – 5 nos
Oil – to deep fry

METHOD
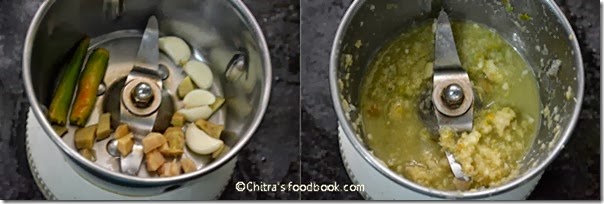
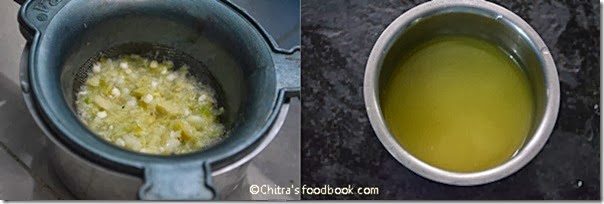
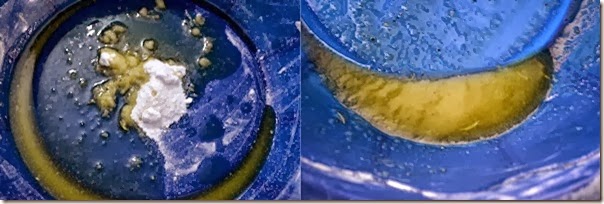
  • Grind all the ingredients given under”to grind” to a smooth paste adding 1/4 cup of water. No problem if it is ground coarsely.Strain the ground mixture completely and collect the water. Discard the ground mixture.
spicy maida biscuit
spicy maida biscuit
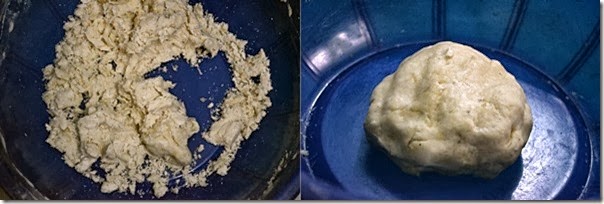
  • In a wide bowl, take the maida , warm oil , salt and ground masala water. Mix well to make it crumble. Add more water and make a dough.Dough should be plaible and soft. Knead well for few minutes and keep covered for 15 minutes.
spicy maida biscuit
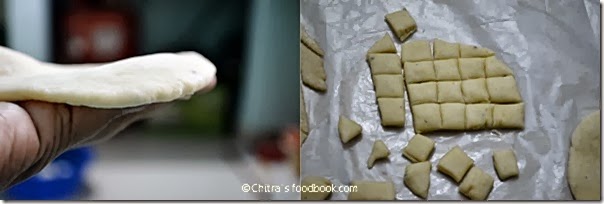
  • Make 5 even balls out of the dough and roll chapathi dusting with maida.Make thin circles and cut them into diamonds using a samosa cutter.
spicy maida biscuit
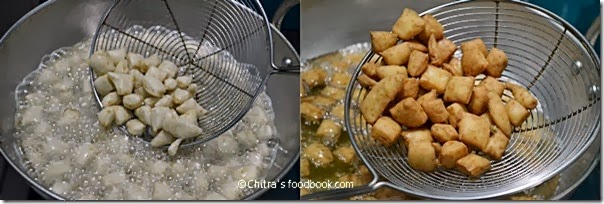
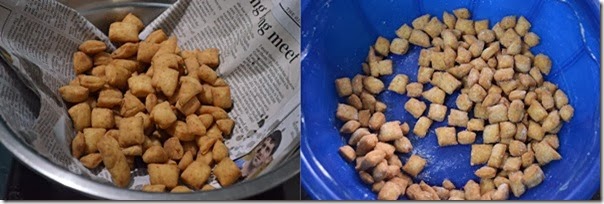
  • Heat oil .Pinch little dough and put in oil.If it rises immediately , oil temperature is right.Take the cut diamonds together and drop in oil. It will be separated in the oil as it gets cooked.Turn every now and then.Deep fry till the bubbles cease.Deep fry them in batches.Remove in a tissue paper and store in an air tight box after it cools down completely.
spicy maida biscuit

TIPS
  • Oil should be luke warm and not too hot.Vanaspathi/dalda can be used instead of oil. If so use 3 tbsp..
  • Dough should not be sticky. It should be soft and pliable.Dust with maida while making chapathi. Roll chapthis thinly to get a crispy biscuit.
  • Deep fry in low to medium heat oil to get crispness as well as color.
  • These biscuits tastes great by next day .It needs minimum half day for all the flavours to infuse well.

spicy diamond cuts
Continue Reading...


October 21, 2013

SWEET MAIDA BISCUITS RECIPE– MAIDA BISCUIT - EASY DIWALI SWEETS

sweet maida biscuit
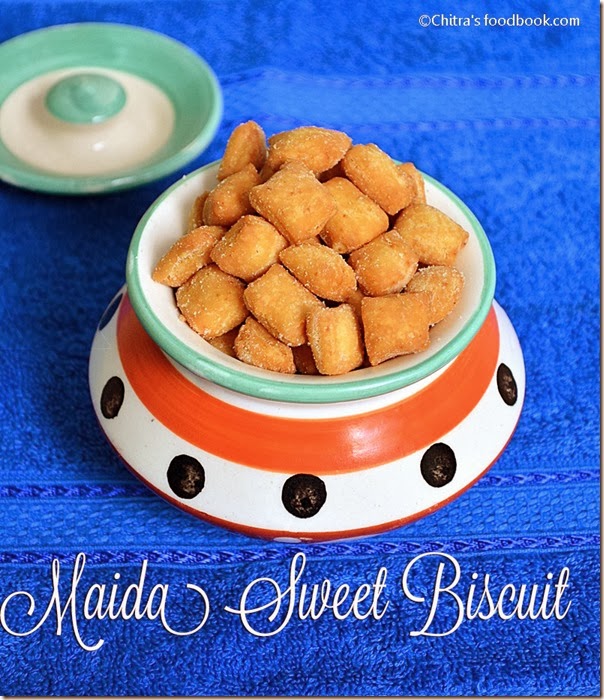
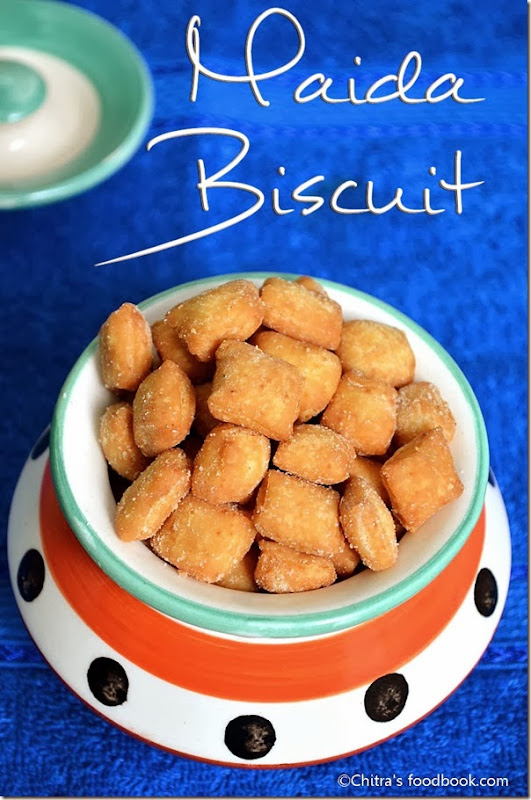
Maida biscuits is an easy sweet recipe which is loved by all in our family. My MIL usually makes this sweet maida biscuits /sweet diamond cuts in a different way. I’ll share that version in my next post. But this recipe is much more easier than my mil’s version. Most of you would have seen these biscuits in South Indian mixture recipe. I am not a big fan of mixture. So I take the mixture in a bowl and I pick only these biscuits and peanuts from it and enjoy munching. 

When I was browsing to see the variety of maida biscuit recipes, I saw this one in Nalini’s cooking. I immediately bookmarked this recipe as I wanted to try this on my own for a long time since before marriage. I made some slight changes and tried yesterday for the fist time. I am completely happy with the results. It came out crunchy and tasty with mild sweetness. Thank you so much Nalini. I would suggest all the beginners to try this easy sweet and snack recipe. Sendhil and Raksha loved this biscuit a lot. I am sure all the kids would love this to munch watching TV.  Try and let me know how u liked it dearies..
maida biscuit recipe

INGREDIENTS
1 cup - 250ml
  • All purpose flour/Maida – 1 cup
  • Melted Butter – 2 tbsp
  • Powdered sugar – 3 tbsp + 2 tbsp (to sprinkle on top)
  • Boiled Milk – 3 tbsp (in room temp)
  • Cardamom powder – 1/4 tsp
  • Cooking soda – a pinch
  • Salt – a pinch
  • Water – as needed
  • Oil – to deep fry

METHOD
  • In a bowl, take melted butter, sugar , salt , cooking soda and beat well with your hands till it becomes creamy.
maida biscuit tile1
  • To this add maida , cardamom powder and milk. Mix well to make a crumbly mixture. Lastly add water gradually and make a soft , stiff dough like we make for chapathi. Knead well for few minutes and set aside covered for 15 minutes.
maida biscuit tile2
  • Make 5 even sized balls out of the dough and dust it well with maida. Roll 1/4 inch thick chapathi and cut them into small squares using a knife.
  • Allow the squares to dry for 15 minutes before deep frying.
maida biscuit tile3
  • Heat oil in a kadai and deep fry the square biscuits in batches. U can put all the biscuits together in oil ( no need to put one by one) . They get separated in oil as they cook. The most important thing is u should deep fry these biscuits in low to medium flame for even cooking and browning. Else they turn brown quickly without cooking inside. While frying , turn it twice or thrice only. Do not flip often as it may break the biscuit. Remove when the bubbles cease.
maida biscuit tile5
  • Drain them in a paper. Sprinkle powdered sugar on top. Mix well. 
maida biscuit tile6
Allow it to cool completely as these biscuits tastes super crunchy only after cooling down. It tastes soft when hot.
Store in an air tight box after it cools down. Enjoy!!

TIPS
  • Sprinkling sugar on top is optional. It is not mentioned in the original recipe. This biscuit tastes sweet by itself.
  • Frying in medium heat oil is more important to get the crispness and uniform browning. Remove the biscuits after the bubbles cease well. But some bubbles may still be there. no problem!
  • U can make diamond biscuits instead of squares. Its your choice !

maida biscuits recipe
Continue Reading...


October 16, 2013

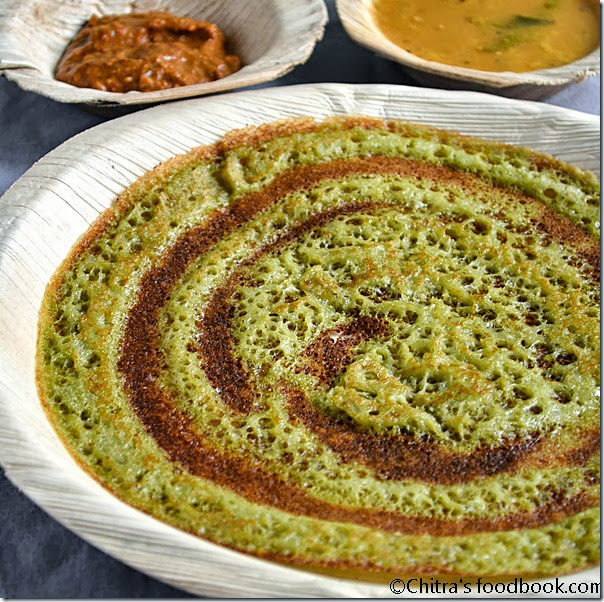
MUDAKATHAN KEERAI DOSAI | BALLOON VINE LEAVES DOSA - BREAKFAST RECIPES


mudakathan --dosai-001
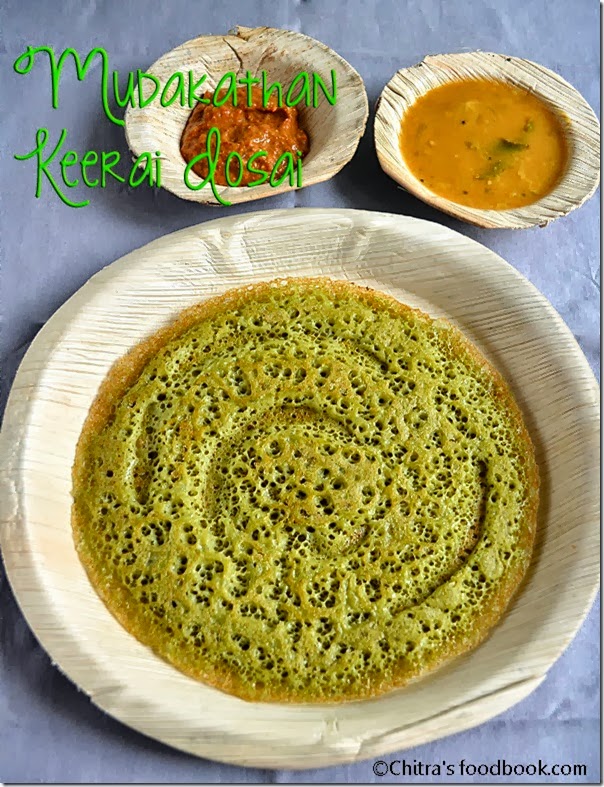
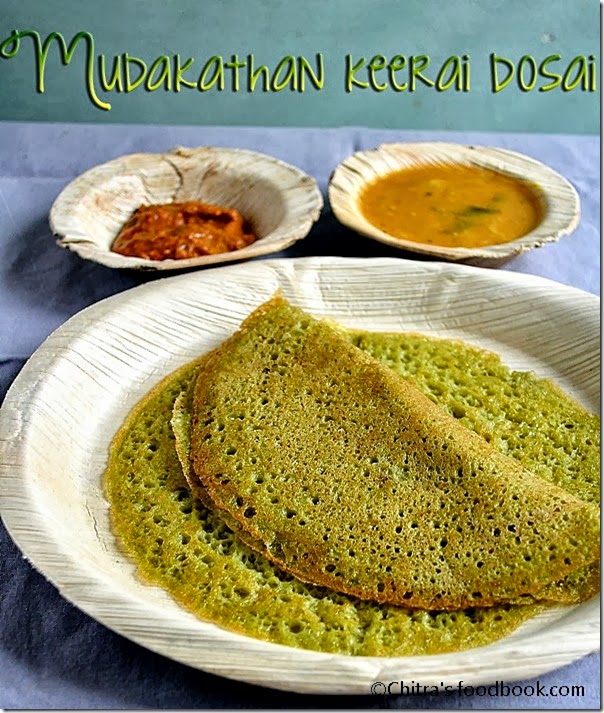
Mudakathan keerai /Balloon vine leaves/Harivay Soppu/buddakakara - I have never heard about this keerai and this dosa recipe till my marriage. When i was newly married my MIL made it once by taking the mudakathan leaves from our backyard. I tasted that for the first time ..I loved its color , taste and flavor very much.After so many years , my MIL made it recently buying these leaves from US (Uzhavar sandhai , this is how Sendhil calls. Whenever I ask him to take me to US , he immediately says like this).I got a bunch from her and made on my own for the first time. It just came out perfect !! It comes out very soft as well as crispy even though we add less urad dal.Apart from its amazing health benefits , i just love this keerai for its flavor. Do try this dosa if u get mudakathan keerai. U’ll start making it often..Please click this link if u interested to know its health benefits..
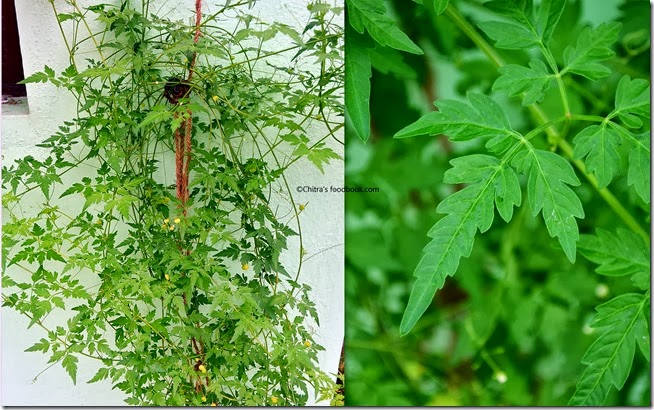
Here is a picture of mudakathan keerai from our backyard.Click on the image to see an enlarged view..

mudakathan plant collage

INGREDIENTS
1 cup - 250ml
Makes 12-15 dosas
  • Mudakathan keerai – 2 cups
  • Boiled rice/idli rice – 1.5 cups
  • Urad dal – 2 tbsp
  • Methi seeds – 1 tsp
  • Salt & water – as needed

METHOD
  • Wash and soak the rice , dal and methi seeds together for 2 hours.Remove the mudakathan leaves from stalk , wash twice and set aside..
  • First grind the leaves adding enough water. Then add the rice n dal and grind it to a smooth paste adding ice cold water . The batter looks green and smooth..
mudakathan dosai tile1
mudakathan dosai tile2
  • Allow it to ferment for 12 hours minimum or overnight.
  • The next morning mix the batter well. Heat dosa pan and spread a thin or thick dosa . Drizzle a tsp of gingely oil and cook for sometime till it turns golden brown a bit.Flip the dosa , cook again , remove and serve ..
mudakathan dosai tile3
Tastes great with coconut chutney or tomato chutney !!
mudakathaan dosa recipe-001

Crispy mudakathan dosai 
mudakathan keerai dosa

Continue Reading...


October 14, 2013

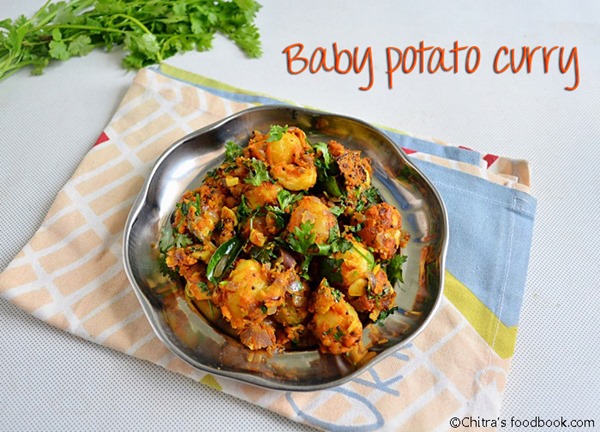
Baby Potato Curry|Madurai Masala Recipe-Side Dish For Rice

baby potato curry
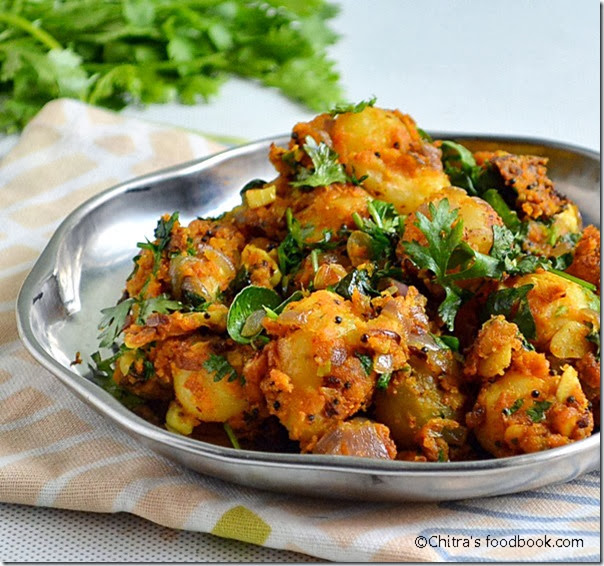
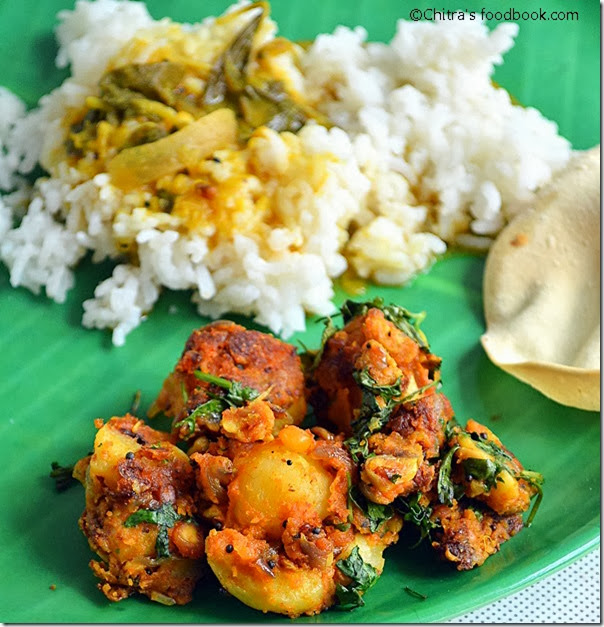
This Madurai style baby potato poriyal is my first post on baby potato recipes. I got this recipe from my friend Shalini. She told this is the recipe of famous  “Madurai masal”.. I tried it for the first time and loved it a lot.. It was a great accompaniment for dal , sambar and rasam rice..Even kids would love this dish. Try this tasty baby potato curry for rice. U’ll love it for sure !!

baby potato-curry

babypotato plate-001
INGREDIENTS
  • Baby potato – 10 nos
  • Salt & water – as needed
To grind
  • Fried gram dal/pottukadalai – 1.5 tbsp
  • Red chilli powder – 1.5 - 2 tsp
  • Tamarind – Small berry size
  • Fennel seeds – 1/2 tsp
  • Turmeric powder – 1/4 tsp
  • Garam masala powder – 1/4 tsp (optional)
To temper
  • Cooking oil – 2 -3 tbsp
  • Mustard seeds – 1/2 tsp
  • Urad dal – 1/2 tsp
  • Big onion – 2 nos
  • Ginger – 1.5 inch piece
  • Garlic cloves – 7 nos (finely chopped)
  • Curry leaves – few
To garnish
  • Coriander leaves – handful

METHOD
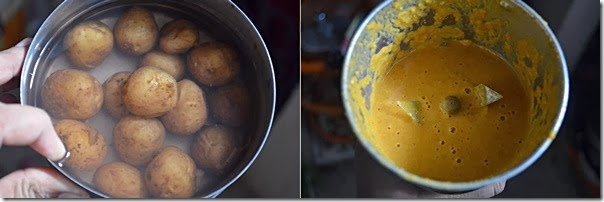
  • Pressure cook baby potatoes adding required water and salt. Cook for 1-2 whistles. Peel the skin and set aside.
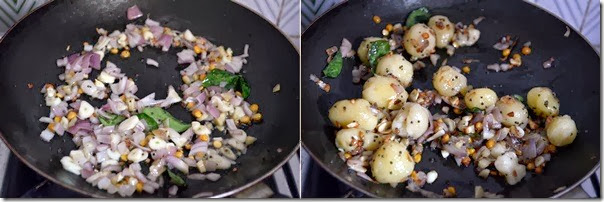
  • Grind all the ingredients given under “to grind” to a smooth paste.Set aside.
baby potato tile1
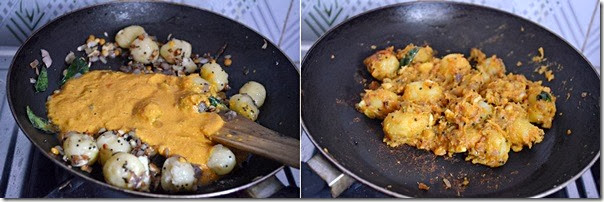
  • In a kadai , heat oil. Temper mustard seeds , urad dal , big onions, ginger ,garlic pieces and curry leaves.. Saute till onions turn transparent..
baby potato tile2
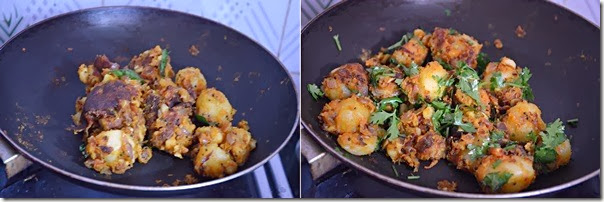
  • Now add the baby potatoes , mix well for sometime. Then add the ground masala paste.Masala paste should coat the baby potatoes.Mix well and saute for few minutes till u get a nice roasted masala smell..
baby potato tile3
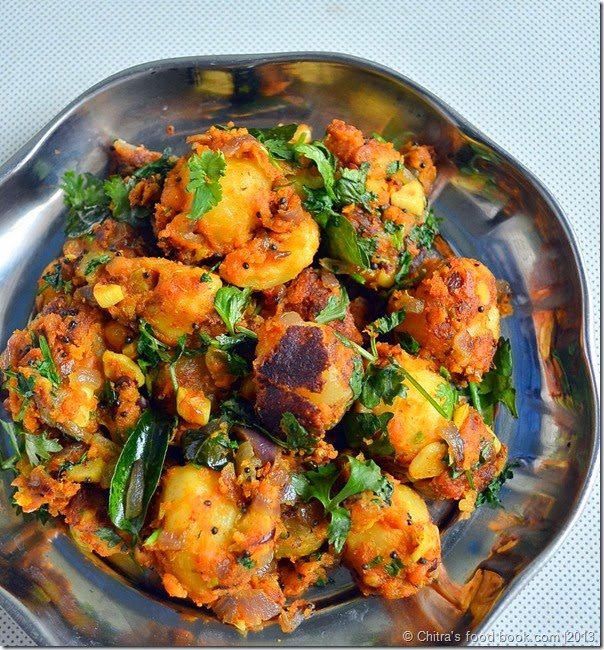
  • It takes nearly 10-12 mins in low flame to become dry and roasted.Masala turns golden brown in color ..
baby potato tile4
  • Garnish with lots of coriander leaves. Serve with rice !!

Adding coriander leaves is a must for garnishing.It gives a nice flavor. Serve after 30 minutes for all the flavours to infuse.Enjoy with sambar sadam , paruppu or rasam sadam..
baby potato lunch plate
U can try this recipe using potatoes too. In that case , cube cut potatoes and add..
Continue Reading...


October 11, 2013

Rava Kesari Recipe - Hotel Style Rava Kesari Without Milk (With Video)

Rava kesari
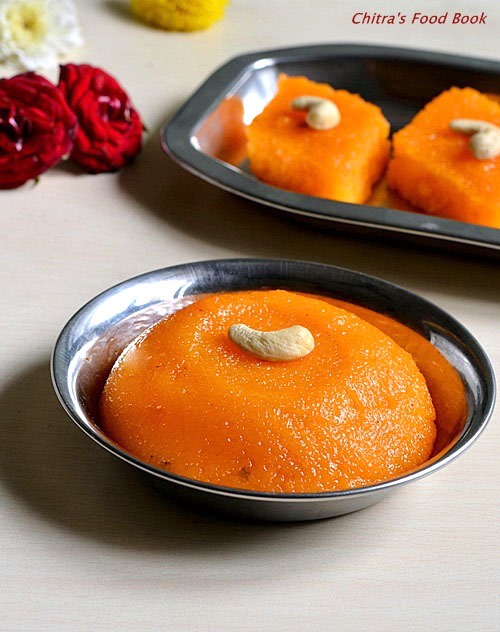
Rava Kesari also known as Kesari bath is an easy and most popular South Indian sweet recipe. In Tamil nadu, people make it very often for festivals, pooja and for special occasions. Rava kesari recipe is prepared using sooji (semolina in English), sugar, water and ghee. It can be prepared with milk or without milk. But the basic rava kesari recipe is without milk.  Once you make this basic kesari perfectly, you can make different types like Rava kesari with milk / paal kesari, Pineapple kesari, Mango kesari, semiya kesari etc. 

Making a soft, shiny and lump free rava kesari like hotel (Saravana bhavan, Adayar ananda bhavan) must be the dream of many beginners in cooking. Me too not an exception :). To me, my mom and MIL makes the best kesari. It tastes great with super soft and shiny texture without much ghee. I learnt this fail proof, super soft rava kesari recipe from my MIL. This recipe would be ideal for beginners. You don’t have to worry about lumps or uncooked rava. Also the quantity of final product will be more for less rava. You can also use fine rava (chiroti) like Karnataka hotels.

The secret of soft rava kesari is the quantity of water. Usually people add rava and water in the ratio of 1:2.5 or 1:3. But I used 1:5 ratio. Addition of more water helps the rava to cook well and soft like rava kichadi and you can make it without lumps. Most of us fail in this step. Also Rava has to be cooked well else kesari will turn hard and chewy. 

I have shared all the possible tips, tricks and a video for the same. Hope it will be useful for beginners. Please go through the “Notes” section for tips to make without lumps and to check the correct consistency of kesari. Experts please excuse, this post is not for you.

My mom makes kesari especially for our guests. Kesari and urad dal vada with coconut chutney will be in the evening tiffin menu for sure. It is a classic combo. Our guests enjoy a lot. Do try this combo for your guests and they’ll love it.
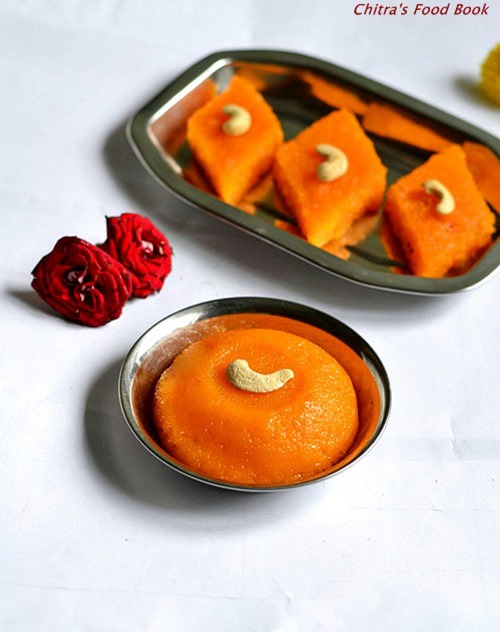
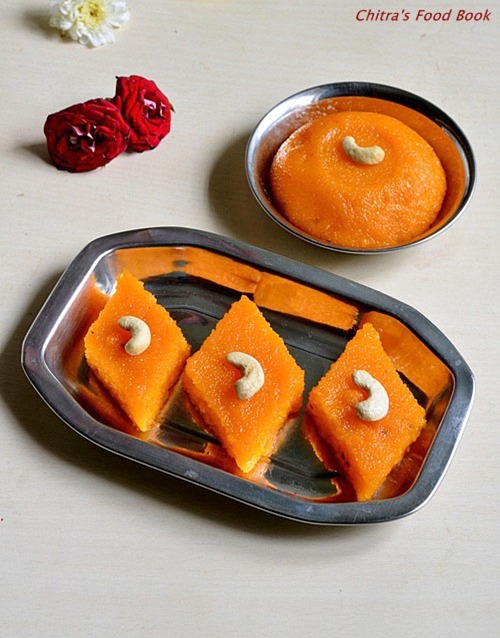
Rava kesari can be served as scoops or pieces just like the pictures. So which one you like, scooped one or our traditional diamond shaped kesari. OK, lets see how to make hotel style rava kesari with step by step photos and video.

Do check out my North Indian style Sooji halwa, Karnataka style kesari bath and Microwave Rava kesari.

Also check out my collection of different types of rava kesari recipes.


rava kesari recipe

Rava kesari recipe


Rava kesari recipe Rava kesari recipe / Kesari bath - Easy n delicious South Indian sweet recipe which gives you soft, lump free kesari. Its a fool proof recipe ideal for beginners.
Cuisine: Indian
Category: Sweet
Serves: 4
Prep time: 5 Minutes
Cook time: 15 Minutes
Total time: 20 Minutes


INGREDIENTS

1 cup = 240ml
  • White rava/Bombay rava/ Upma rava - 1/2 cup
  • Water - 2.5 cups
  • Kesari color/Orange food color - 2 pinches
  • Sugar - 3/4 cup - 1 cup ( use 1 cup for more sweetness)
  • Melted ghee - 4 tbsp ( 3 tbsp + 1 tbsp OR 3 tbsp ghee + 1 tbsp cooking oil)
  • Cardamom powder – 1/4 tsp
  • Cashews – 5 nos

HOW TO MAKE RAVA KESARI - METHOD


  • Grease a plate with a drop of ghee all over the plate and sides and keep it ready. 
  • Heat a non-stick kadai and add 1 tbsp of melted ghee. Roast the cashews till golden and set aside.
  • In the remaining ghee,add the rava. As soon as you add the rava, it should sizzle. So ghee should be heated properly. Roast the rava in medium flame for 2-3 minutes till it gives a nice roasted smell. Remove in a plate. 
  • In the same hot kadai, add 2 cups of water & 2-3 pinches of kesari color (adjust based on the color you need)
Rava-kesari-recipe-step1
  • When the water starts to roll boil, simmer the flame completely and add the rava from the plate using one hand and stir it simultaneously using the other hand. Do it slowly. Don't worry, lumps won’t form here as we are using more water. After you add all the rava, mixture will be watery. So mix it well till the rava absorbs most of the water and becomes slightly thick as you see in the picture. Add a tsp of ghee to the rava mixture. It prevents rava sticking to the pan.
Rava-kesari-recipe-step2
Rava-kesari-recipe-step3
  • Then cover the kadai with a lid and let the rava cook for 5 minutes. Keep the flame medium. Rava will be cooked well and if you take it with a ladle you should not see any white particles.
Rava-kesari-recipe-step4

  • Then add sugar and mix well. As soon as you add sugar, mixture will become watery. So keep mixing. It will splash. Be careful. Keep mixing for a minute till all the sugar is melted and gets mixed with rava.When it starts to leave the sides of pan, immediately add the remaining 3 tbsp of ghee, cardamom powder, roasted cashews and mix well. 
  • As soon as all the ghee is mixed well, remove it immediately and pour it in the ghee greased plate. Do all these process quickly. Everything gets over in 2-3 minutes. Do not wait for the kesari to leave the kadai completely or release ghee in the sides. 
  • The consistency of rava kesari will be like watery paste and it will fall like ribbon not like a ball. It will set and becomes thick once its completely cool. So don’t panic.
Rava-kesari-recipe-step5
Rava-kesari-recipe-step6

  • To check the doneness of kesari, after pouring the mixture in the plate, touch it with your finger. If it is non-sticky, kesari is perfect. Else pour the mixture back to the kadai and mix it for a minute. Then remove it. If you keep mixing for long time to leave the sides completely and roll like a ball, kesari will become hard and chewy.
  • Let it set well for 10-15 minutes and it become warm. Now you can make pieces to square or diamond if you want OR serve in scoops adding a tsp of ghee. Remove once its cool or warm enough to handle.
Rava-kesari-recipe-step7
Rava-kesari-recipe-step8

Enjoy !


Note

    1. First and most important point is, rava should be roasted properly. It should be cooked well and soft. Else kesari will be a super flop. Usually rava takes minimum 4-5 minutes to cook based on the quantity you use.
    2. 5:1 water, rava ratio works fine for me. If you want to reduce the water quantity, you can use 4:1 ratio.
    3. If you add sugar to the uncooked rava, rava will not cook completely and kesari will become hard.
    4. Adding the right amount of sugar gives soft kesari. If you add less sugar, add more ghee. U can also substitute cooking oil for ghee if you you calorie conscious. Use half ghee and half oil. But do not use kadalai ennai OR coconut oil. Use flavorless oil.
    5. If you want, you can add all the ghee for roasting and make kesari. It works well for microwave kesari.
    6. If you keep on stirring after kesari leaves the sides, it will become hard and chewy. So keep an eye on the consistency. As soon as it starts to leave the sides of pan, add the ghee, mix and remove. It will harden as it cools down.
    7. To check the correct consistency, touch the kesari after you pour it in the plate. If it is non-sticky, kesari is done!! If not, again keep on fire and mix for a minute. It will be done. Kesari hardens when it cools down.So make pieces when it is warm.
    8. If you want to serve as scoops in a bowl, take a ladle ful of kesari when it is hot, add a tsp of ghee n serve hot. No need to cut pieces in that case.
    9. To reheat the kesari, just take the required amount of kesari in a non-stick kadai, add a tsp of ghee and mix it for a minute. It will be non-sticky and glossy. Remove and serve in a bowl. I personally like scooped kesari more than pieces.


How to make rava kesari

Enjoy this delicious, soft kesari for special occasions and make it even more special !
sooji kesari
Continue Reading...

October 10, 2013

South Indian Coconut Chutney Without Chana dal

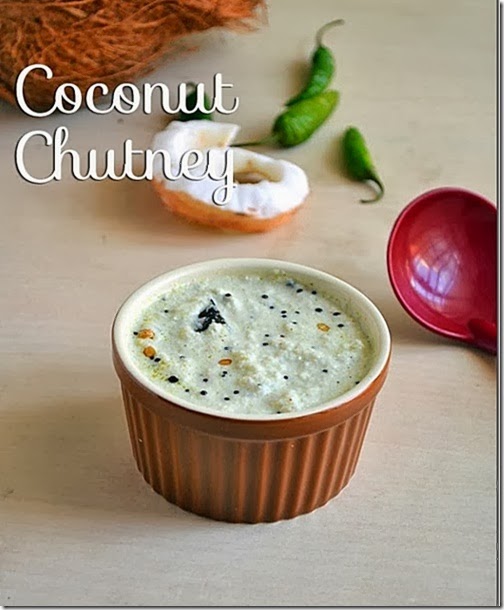
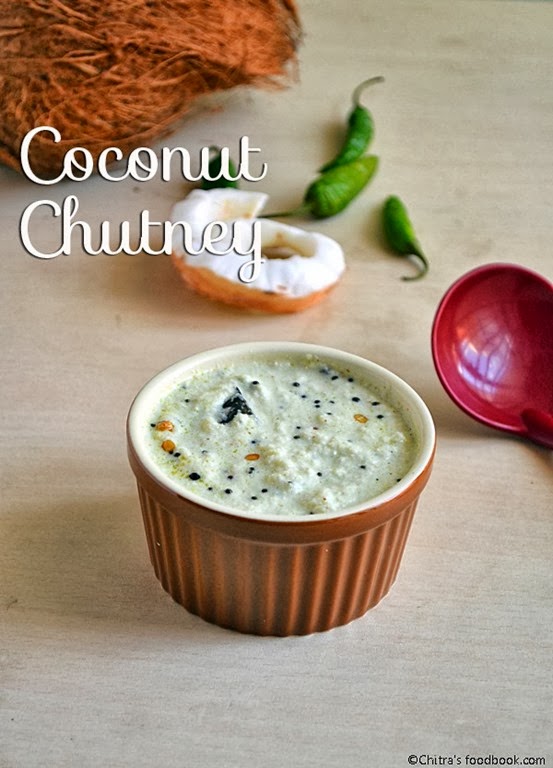
coconut chutney
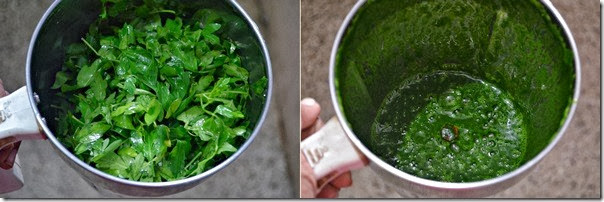
Coconut chutney ( thengai chutney in Tamil) is the most popular South Indian Chutney recipes. Today I have shared a basic white coconut chutney recipe without onion and garlic. But  I have used ginger for flavor. I have also given some tips to make the coconut chutney white in color. Hope its useful. Recently I got some mails from my readers to post No onion No garlic recipes. So I sorted those recipes from my recipe index and kept a separate tab ( please click the tab under my blog title) for quick reference..As I have very less number of No onion No Garlic recipes, I thought of sharing some simple and easy dishes for day-to-day cooking during this festival season. Let me start with this simple South Indian coconut chutney recipe which I make almost thrice in a week for idli/dosa. I learnt this from my MIL. Its a very simple thengai chutney recipe and it tastes great with ginger flavor. My mom’s coconut chutney is completely different from this version. She adds small onions while tempering. My father loves that chutney a lot. Soon i’ll share that recipe. Refer the “Notes” section for tips to get white coconut chutney .
Click here if u want to see my hotel style coconut chutney and red chutney recipes.
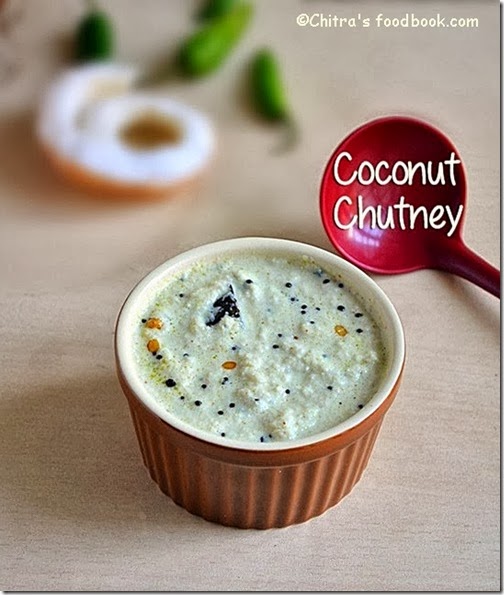
 Coconut chutney recipe

Coconut chutney recipe


Coconut chutney recipe White coconut chutney recipe - The best side dish for south Indian breakfast recipes.
Cuisine: Indian Category: Side dish Yields: Serves 2-3
Prep Time: 5 Minutes Cook Time: 3 Minutes Total Time: 8 Minutes


INGREDIENTS
1 cup - 250ml
To grind
  • Grated coconut – 1/2 cup
  • Green chillies – 3-4 nos (if small add 4,else 2-3 would be enough)
  • Ginger – 1 inch piece
  • Tamarind – 1pinch
  • Salt and water – as needed
To temper
  • Cooking oil – 2 tsp
  • Mustard seeds – 1/2 tsp
  • Urad dal – 1 tsp
  • Red chilli – 1 no (pinched)
  • Curry leaves – few
METHOD

  • Scrape the white part of coconut and grind it along with chillies,ginger, salt and water to make a smooth paste.Remove and transfer to a serving bowl.
  • In a small tadka pan, temper the above said ingredients and add to the chutney.Mix well and serve with idli,dosa!

Note

Tips for white colored coconut chutney

DO’s:
1. Always use freshly grated coconut.. Do not grate the brown part. More coconut less pottukadalai/Fried gram  is also a must for white chutneys.
2. Add less water for getti (thick )chutney, add the quantity necessary to run your mixie.
3. Indian mixer mate or small jars are a must. American Oster mixer comes with a small jar attachment which also works well.
4. Use small green chillies and always use less green chilies for white color chutney and increase the spiciness by tempering with more red chilies. This answers the question "Why my chutney looks green"?
Don’ts:
1. Ready made flakes or desiccated flakes or frozen grated coconut will work but don't except taste and color. Mostly pale white color with oily look.
2. No microwaving for reheating, just thaw to bring back to room temperature. Reheating makes it release more oil and which results in stinky coconut smell.
3. Blender will not work for thick chutney and adding more water will make it thin but consistency will be still coarse.
4.In cold places , coconut leaves oil while grinding chutneys. To avoid this , use hot water or warm water for grinding chutneys. It comes out white & smooth without leaving oil.

For variations,u can saute and add mint leaves or coriander leaves along with little turmeric powder and make super green chutney :)


Continue Reading...

October 8, 2013

MOONG DAL SUNDAL / PAASI PARUPPU SUNDAL / PAYATHAM PARUPPU SUNDAL - EASY SUNDAL VARIETIES

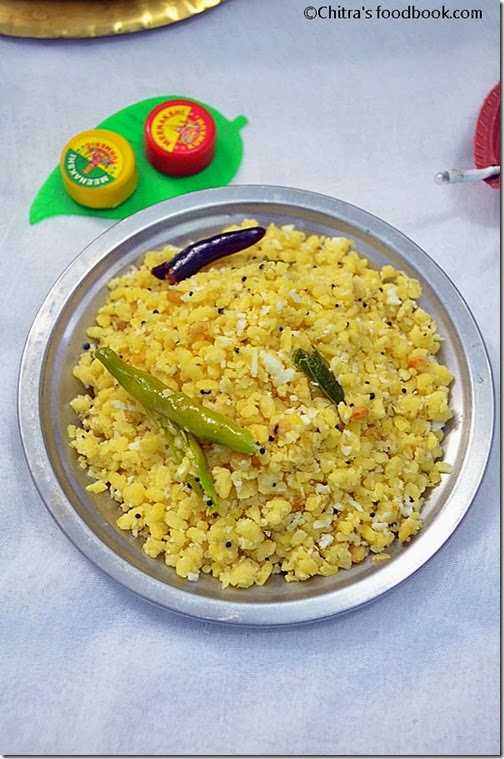
Moong dal sundal - Paasi paruppu sundal

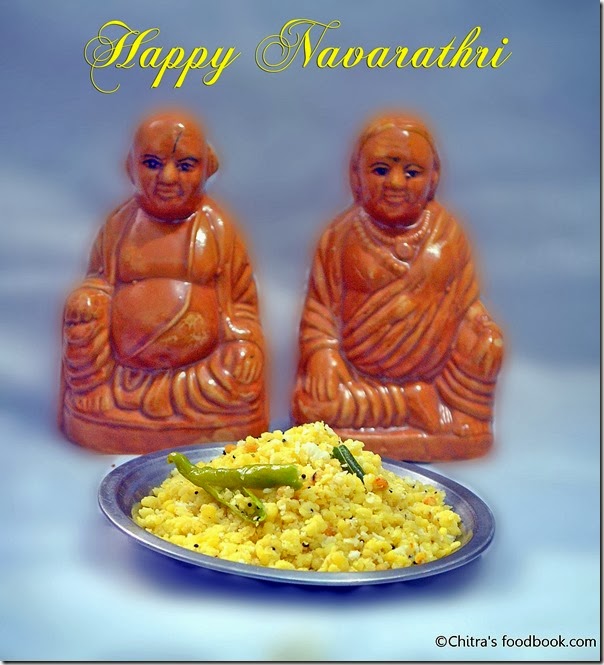
Moong dal sundal / Paasi paruppu sundal is one of the easiest sundal recipes that can be made in minutes.This yellow moong dal sundal ( Payatham paruppu in Tamil) can be done without soaking and the dal gets cooked in no time. Only thing is dal should be cooked perfectly.It should not be over cooked. Yesterday we kept golu and we made sweet pongal & this sundal for first day neivedyam..Do try this easy sundal for navratri.U’ll love it for sure

moong dal-sundal


Moong dal sundal recipe


Moong dal sundal recipe Paasi paruppu sundal/Moong dal sundal recipe for Navratri
Cuisine: Indian
Category: Snacks
Serves: Serves 2
Prep time: 10 Minutes
Cook time: 20 Minutes
Total time: 30 Minutes


INGREDIENTS
1 cup - 250ml
  • Yellow moong dal / paasi paruppu – 1/2 cup
  • Salt & water – as needed
To temper
  • Coconut oil – 1.5 tbsp
  • Mustard seeds – 1/2 tsp
  • Urad dal – 1 tsp
  • Red chilli – 1 no
  • Green chillies – 2 nos
  • Curry leaves – few
  • Asafetida/hing – 1/4 tsp
METHOD
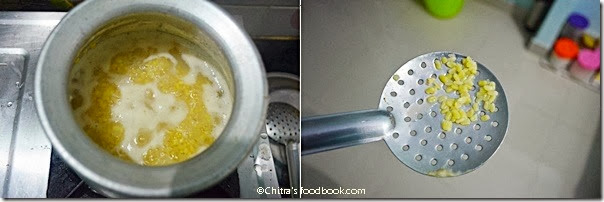
  • In a bowl , take the required quantity of water and add the moong dal , turmeric powder , salt .Let it cook in high flame for8-10 minutes.Stir in between to see the dal is cooked perfectly.Dal should break but not be mushy. It should be just blossomed.Remove and drain the excess water using a colander.
moong dal sundal tile1

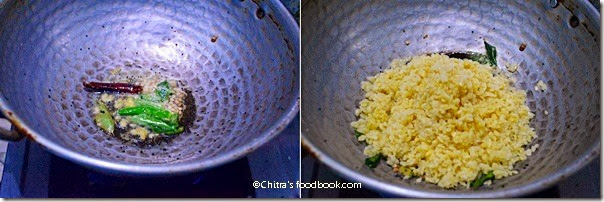
  • In a kadai , heat oil and temper mustard , urad dal , chillies , curry leaves and hing. Saute for a minute till dal turns golden brown.Now add the cooked moong dal and mix it gently.
  • Lastly just before switching off the flame , add the grated coconut.. Stir gently and switch off the flame.
moong dal sundal tile2
Offer to Durga and get her blessings , Enjoy !


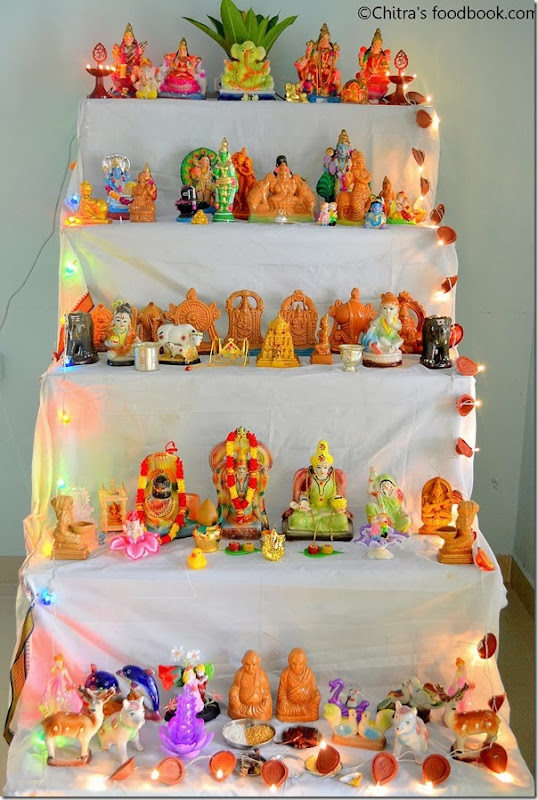
Here is the picture of this year's golu at our home :)
kolu picture
Continue Reading...


October 5, 2013

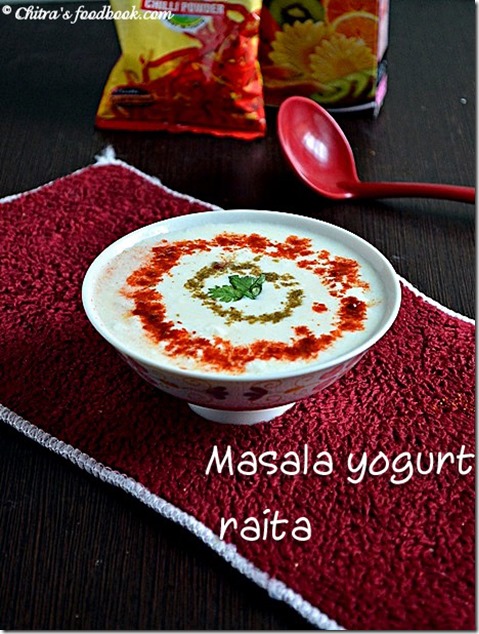
MASALA DAHI RAITA | MASALA YOGURT RAITA RECIPE


masala---raita

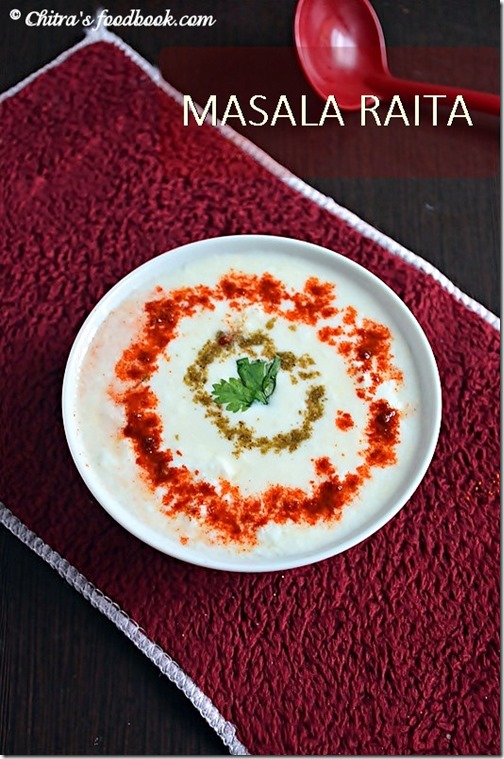
I was really bored of making onion raita for stuffed parathas.When i was telling this to Sen , he immediately suggested me to try this simple masala raita as served in punjabi hotels..I googled some recipes, got an idea & tried it. We loved it a lot..Its a very simple & easy to make recipe..Do try this raita for a change and let me know how u liked it.

INGREDIENTS
1 cup - 200ml

  • Fresh curd – 1 cup
  • Roasted jeera powder – 1/4 tsp
  • Red chilli powder – 1/2 tsp
  • Pepper powder – 1/4 tsp (optional)
  • Chat masala – 1/4 tsp
  • Coriander leaves – 1 tbsp
  • Sugar - 1/2 tsp ( optional)
  • Salt –As required

METHOD

  • In a bowl , take the curd & add the salt. Mix well. Just before serving mix in red chilli powder , chat masala, jeera powder . Garnish with coriander leaves.


masala--raita recipe copy

Continue Reading...