Poha ladoo/Aval laddu is one of the easiest laddu recipes that can be prepared in minutes. If you are looking for a simple , kids friendly sweet recipe for this Gokulashtami/Krishna Janmashtami prasad, you must try this laddu. It is prepared with just 3 main ingredients and you can do many variations in this recipe. For healthier options, you can use Red poha/Red aval and Jaggery.
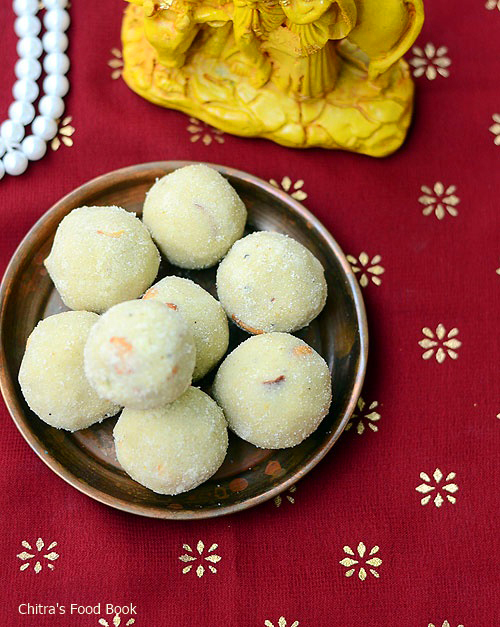
You can also add roasted coconut, rava, fried gram dal along with poha to get a good yield and make this ladoo. When I gave this laddu to Sendhil, he told its tasting the same like Rava ladoo. Yes the method of preparation and its taste are very similar to Rava Laddu. Do try this easy recipe for tomorrow’s festival and share your feedback with me. Wish you all a very happy Krishna Jayanthi celebration !! If possible I will share an interesting seedai recipe tomorrow as my last minute entry.
Lets see how to make this easy aval urundai with simple steps.
If interested check out my other easy ladoo recipes.
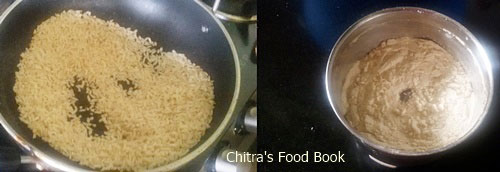
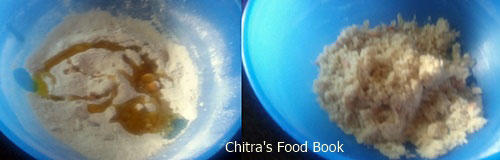
Dry roast the thick aval/Poha in a kadai for 3-4 minutes in high flame with constant mixing. Please stay nearby and do this else aval may burn. So do it patiently till aval starts to puff up slightly with a nice smell. Its color will be slightly golden brown. Remove & let it cool ( you can roast 2 cardamom & 1 clove along with this. But I powdered it with sugar without roasting them.)
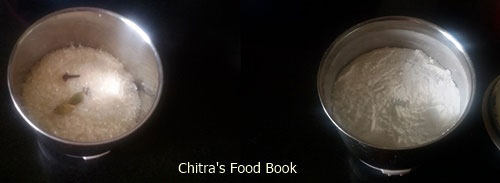
Powder the sugar along with cardamom & clove. Take in a bowl. Powder the poha and mix with sugar powder. Mix them well.
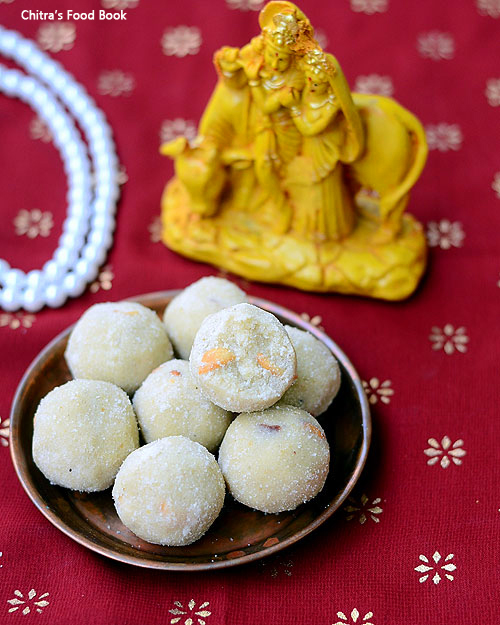
Heat the ghee and roast the chopped cashews. Add this ghee to the mixture. Mix well with a ladle till it turns warm. Now make balls and arrange them in a plate. Aval laddu is ready !
Enjoy !
Note
You can replace thick poha with thin poha.
You can also use powdered jaggery instead of sugar.
If you want more yield,u can powder fried gram dal or roasted rava along with poha and make this laddu. Check out some easy ladoo recipes below..
Yesterday I got a request from a reader to make a post on Krishna Janmashtami celebration / Gokulashtami celebration at home. So I have discussed how to celebrate Krishna Jayanthi/Gokulashtami/Krishna Janmashtami at home by Indians especially South Indians in a very simple way. I have also shared a video on how to draw Krishna feet using rice flour paste. Pooja procedures I have given here is based on my family's tradition. It may vary from place to place. So take this as a reference and get the guidance from your family elders.
As you all know, Krishna Jayanthi is celebrated as the birthday of Lord Krishna. It’s a most important and sacred day for Hindus. People pray to Lord Krishna on this day and seek his blessings for a happy and good life.Krishna Janmashtami is observed on Ashtami – the eighth day of Krishna Paksha month/Shravana month i.e between mid August & early September. This year 2023, it falls on September 6th Wednesday evening. It is celebrated all over India.
In Tamil nadu, Kerala, Karnataka and North Indian temples, Gokulashtami is celebrated in a grand manner. Festivities begin before dawn and extend all day until midnight, the exact moment of the anniversary of Krishna’s appearance. Many people observe fasting on this day till midnight and worship Lord Krishna. After Janmashtami pooja, they break their fasing by eating sweets and prasad offered to God. As a fasting rules, people consume only fruits, milk and drink lots of water. In my house, we don't have the practice of fasting on this day.
At home, we do a simple pooja in the evening i.e after 6 pm. On those days, my MIL used to do the pooja around 11 pm at night. So its better to do the pooja anytime after 6 pm till midnight. Midnight is the exact time that Krishna appeared on this planet, so it is the most auspicious and spiritually inspiring time to perform pooja.
Temples prepare at least one hundred and eight different food dishes on Janmashtami. At home, Tamil people do the pooja by offering flowers, neivedyam recipes like seedai , murukku, laddu, appam, payasam/Kheer etc and performing Mangala aarti to Lord Krishna Idol or photo. If you are not able to prepare all these dishes,don’t worry - Krishna says in the Bhagavad-gita, “If you offer me with love a leaf, flower, fruit or water, I will accept it.”
So offer whatever you can - it’s just your love and devotion that matters.
Please click herefor the full collection of Krishna Janmashtami recipes of my blog ! I have also shared a No cook Aval panchamirtham recipe with fruits to make a simple neivedyam.
Fruits like apple, pomegranate,Orange,banana, guava etc
One coconut for neivedyam
Betel leaves and nuts (Vetrilai paaku)
Oil and ghee to light the lamp
Rice flour and colors for drawing Rangoli and Krishna feet.
To offer in front of GOD
A small cup of milk, curd, butter, Poha/Aval mixed with jaggery or sugar.
These offerings are must and should even if you don’t prepare sweets and snacks. Ingredients for making neivedyam recipes
Raw rice and Rice flour ( for making seedai , murukku and paal payasam )
Sesame seeds or cumin seeds
Coconut
Jaggery ( For vella seedai and appam)
Banana ( for appam)
Sugar ( for Milk payasam)
Milk ( for payasam/Kheer)
Urad dal and Roasted gram dal ( Pottukadalai ) ( For making seedai, murukku)
Butter/Ghee for snacks
Cooking oil ( to deep fry)
HOW TO CELEBRATE KRISHNA JANMASHTAMI
Do the shopping two days before the festival and finish making the deep fried neivedyam recipes like vella seedai , Uppu seedai , Kai murukku etc on the previous day of festival. Store them in an air tight box after everything cools down completely else they may turn soggy. DO NOT TASTE IT UNTIL YOU FINISH POOJA.
Wash the lamps and other pooja vessels on the previous day night and keep the turmeric, kumkum dots.Put the threads and oil the lamp. Suppose if you don’t have enough time, you can do this job the next day morning or afternoon as we are going to do the pooja only in the evening after 6 pm. So its your choice.
On Gokulashtami afternoon, mix the ingredients for sweet appam and make payasam in cooker. Cook the appam around 5.30 pm. Around 4 pm in the evening, sweep the house and entrance. Draw Rangoli in the entrance and in front of the Pooja room. Draw the krishna feet from entrance till pooja room. Decorate the krishna idol by keeping flowers and garland. Make him ready for celebration :) HOW TO DRAW KRISHNA FEET
In many houses in South India, people draw footsteps of Lord Krishna from the entrance of the house to the Puja room. These footsteps are drawn with rice flour paste and drawing these footsteps is a sign of welcoming Lord Krishna to home. Women draw patterns of tiny footsteps like those of infant Krishna. I have given a video below on how to draw krishna feet using rice flour. Please watch it to draw easily.
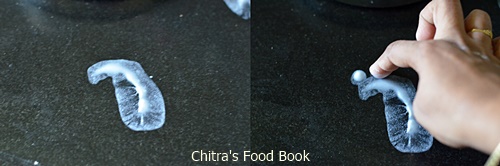
How to draw Krishna Feet - Video
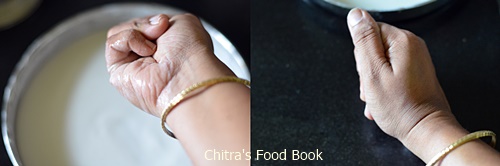
Take a broad plate such that your hands should fit in. Dilute the rice flour adding enough water and make the paste. Do not make it too thick or too thin. Its consistency should be like dosa batter. Now fold your hands as if you are punching someone😉. Dip your side of the hand in the rice paste. It will be coated with the paste. Now make the impression on the floor. Keep 5 dots for fingers. Draw the right leg first. Repeat the same procedure using your left hand for drawing left leg. Do this alternatively. Draw both the legs together near the entrance and pooja room.
Refer the stepwise pictures for clear understanding. For drawing legs of baby Krishna, fold your hands tightly and make the impressions as shown in pics. If you want to draw slightly bigger legs, watch this video. Alternatively, you can ask your kids to make impressions on the floor. They would enjoy doing this and help you out .
POOJA
After you finish the decoration and neivedyam preparations i.e after 6 pm, place the decorated Krishna on a plank/Peeta. Offer all the neivedyam recipes, fruits, curd, milk, butter in front of the God. Light the lamp and do the pooja, perform Mangala harathi. You can sing Krishna songs or read Bhagavad Gita/Sri Krishna Ashtakam OR simply chant “Om Namo Bhagavate Vasudevaya “means “Om, I bow to Lord Vasudeva or Lord Krishna’'in front of the GOD.
To perform a simple pooja without any special neivedyam recipes, just garland the Krishna idol, garland it. Light the lamp, Place a small cup of milk, curd, butter, Poha/Aval/rice flakes mixed with jaggery or sugar. Do the pooja and mangala harathi. Please check the picture below for reference.
The next morning, do the pooja with a simple neivedyam like dry grapes or candy (kalkandu). Remove the idol at a good time of the day ( Avoid Rahu kalam and Yama kandam ).
DISCLAIMER : The details I have shared here is purely our family’s method of celebration. It may vary from place to place based on your traditions. So please take this as a reference, consult the elders of your family for more guidance.
Thanks for visiting this page. Wish you all a very happy Gokulashtami :)
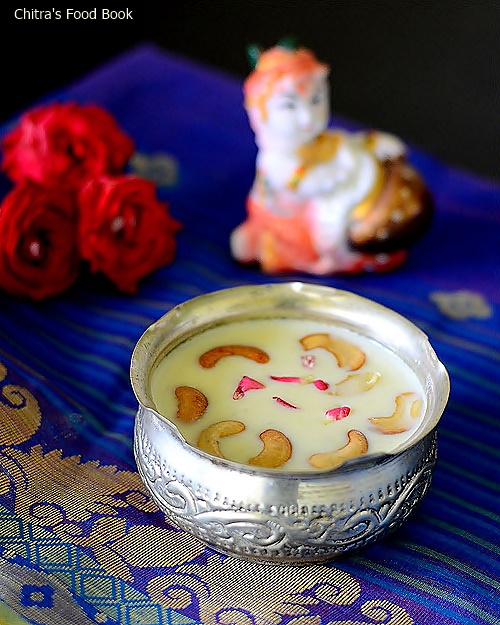
Paal payasam / milk kheer is a must and should neivedyam recipe for Krishna Jayanthi. Even if you don’t make seedai, murukku and appam , a glass of this simple & yummy milk kheer along with a small cup curd and butter is enough to please Lord Krishna & to get his blessings. It’s a very easy payasam recipe that can be made in pressure cooker. I have been making this payasam for years but I wonder how I missed this post in my blog. Few years back, I shared the most popular Kerala Paal payasam & Bengali Chaler payeshrecipes. But this paal payasam recipe is of Tamil nadu style without using condensed milk(Milk maid). Paal payasam is prepared by the people all over India in various names. In North India,this is called as Chawal kheer/Rice ki kheer. There might be slight variations in the method of preparation. Some people add vermicelli or sago along with rice. However its made,the taste would be awesome and you can enjoy creamy,rich kheer. Lets see how to make this simple and easy dessert recipe – South Indian Paal Payasam. Do try this for Krishna Jayanthi and don’t forget to share your feedback here. I have added a video for beginner's reference.Do watch it :)
Paal Payasam recipe for Gokulashtami/Krishna Janmashtami
Cuisine:South Indian
Category:Sweet
Serves:Serves 2-3
Prep time:5 Minutes
Cook time:20 Minutes
Total time:25 Minutes
INGREDIENTS
1 cup =250ml
Milk - 2 cups ( 1/2 litre)
Basmati rice or raw rice - 2 tbsp
Sugar – 1/3 cup ( 1/2 cup for more sweetness)
Cardamom powder - 1/2 tsp
Ghee - 1 tbsp
Cashews - to roast
METHOD
Heat 1 tsp of ghee and roast the rice till it puffs up slightly.Grind it coarsely.Make sure you don’t powder the rice.It should be just broken into two.So pulse twice for short time.
Boil milk in a small pressure cooker. Add a small plate or spoon to avoid spilling & burning of milk.When the milk starts to boil,add the rice.
Pressure cook it in very low flame for 2-3 whistles.Open the cooker after the steam is released.Mix well and boil the milk.Remove the plate using a ladle. Add sugar,stir well and boil for sometime to thicken the payasam slightly.Add cardamom powder.Do not over boil because this payasam will thicken as time proceeds.So let it be watery.
Roast the cashews in 2 tsp of ghee and add to the payasam.Mix well and enjoy !
Note
Adding more rice makes the payasam to become pongal.So add the mentioned quantity of rice.
Adjust the quantity of sugar based on your taste.Add 1/4 cup for less sugar & 1/2 cup for more.
You can also add saffron threads soaked in warm milk.It will give a nice flavor & color to this payasam.
Try this creamy,rich paal payasam recipe for this Gokulashtami !
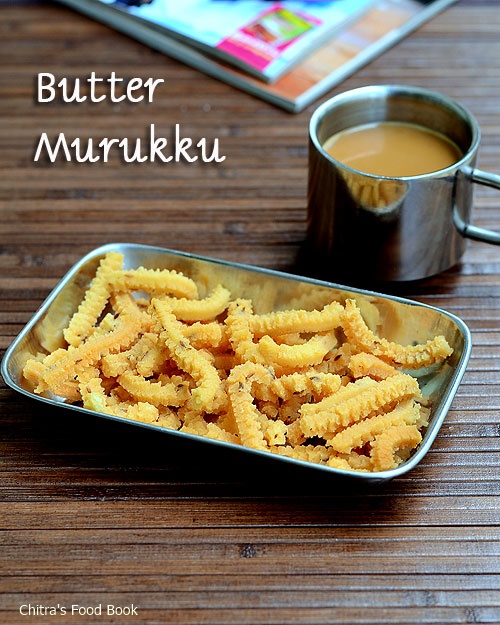
Butter murukku recipe / Vennai murukku in Tamil and Benne Murukku/ chakli in Kannada is one of the popular South Indian murukku varieties.
Gokulashtami is around the corner. As I have already shared Vella seedai , Uppu seedai ,Kai murukku , thattu vadai and Appam recipes , I wanted to try some other easy neivedyam recipe. Yesterday I came across this super crunchy butter murukku recipe/Benne murukku under easy Diwali snacks recipe.I bookmarked it immediately and tried it on account of Krishna jayanthi. The results were too good. We loved it a lot and the whole box got emptied in minutes. Making kai murukku may be difficult to some of you in this festive season. It needs a lots of practice & patience. In that case, this butter murukku comes to rescue. As Lord Krishna is fond of butter, this recipe suits this festival very well. Its so easy to make and you don’t need to prepare soaked & ground processed rice flour or urad dal flour for murukku dough. Just store bought idiyappam flour, roasted gram flour and besan flour would do. I tried this recipe from 7aum suvai by making a small change in the ratio of flours to make white colored murukku. It came out well with crispy, melt in mouth texture. Friends, If you are looking for some easy murukku recipes for this Gokulashtami, Diwali and other festivals you can go ahead with this recipe. You can make it successfully even if you are a beginner. It’s a good tea time snack & for packing kids snacks box. Lets see how to prepare butter murukku recipe with step by step pictures. Check out my collection of Gokulashtami Recipes HERE
Butter murukku recipe
Crispy,easy butter murukku recipe - For gokulashtami & diwali festivals
Cuisine:Indian
Category:Snacks
Serves:-
Prep time:10 Minutes
Cook time:15 Minutes
Total time:25 Minutes
INGREDIENTS
1 cup = 250 ml
Rice flour - 1 cup ( store bought flour/Idiyappam flour)
Besan flour/Kadalai maavu - 1.5 tbsp
Gram flour/Pottukadalai maavu - 1.5 tbsp
Soft Butter - 2 tsp ( at room temp, unmelted)
Cumin seeds - 1 tsp
Asafetida/Hing - a big pinch
Salt and water - as needed
Cooking oil - to deep fry
HOW TO MAKE BUTTER MURUKKU METHOD
In a wide bowl, take the rice flour, gram flour, besan flour, butter, salt, hing and cumin seeds.Mix everything well. Add water little by little and make a non sticky dough. Cover the dough till you make murukku. Do not let it dry.
Now take the star mould and fill the murukku maker with a ball of dough. Heat oil to deep fry and check the oil temperature by dropping a pinch of dough.If it raises to the top immediately,oil temperature is right.Keep the flame low and press the murukku.
Cook in medium flame till the bubbles cease.Fry it patiently else murukku will turn brown with a burnt smell.Remove in a tissue paper using a slotted ladle.Store in an air tight box once its cool down completely.
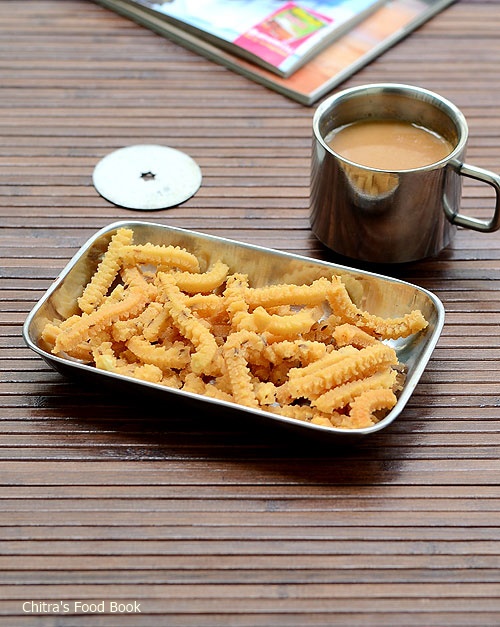
Enjoy with tea/coffee.
Note
As per the original recipe,2 tbsp of besan and 1.5 tbsp of gram flour is used.But I added them in equal ratio to get white colored murukku.
Do not replace butter with oil or ghee.As the name says,butter murukku should be made with butter.
You can replace cumin with sesame seeds or ajwain.But flavor would vary.
Try this easy murukku recipe and enjoy with tea/coffee !
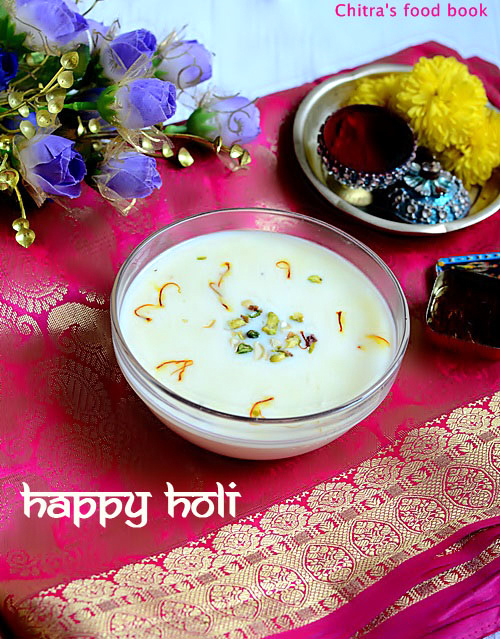
Wish u all a very happy HOLI
On this holi day,i have come up with an easy peasy kheer recipe which can be made under 15 minutes.This paneer ki kheer/cottage cheese pudding also known as Chenna kheer is an awesome bengali dessert recipe which they usually make it for festivals like dussehra,Durga pooja,Diwali and Navratri.Actually i had planned to share paneer burfi or Balushahi/Badusha recipe today as my Holi special dish.But unfortunately,all the pics gots deleted from my SD card by mistake.I struggled to retrieve it but i couldn’t.I became very much disappointed but still i don’t want to give up making a sweet post on this festival day.Suddenly I remembered about this Paneer kheer recipe which i had tried for my last year’s Holi lunch menu.It was a super hit recipe in my house.So i prepared the same and refrigerated it to serve chill for my daughter and husband this evening.I am sure they will love it.Friends,if u have not planned anything for today’s celebration and if u wish to make something special and rich,this paneer kheer is a wise choice.You can make it in the next 15 minutes if u have store bought paneer ready in hand.Of course,freshly made chenna/Paneer tastes the best but still store bought paneer works fine.Its one of the best ways to make our kid consume paneer and as u all know,its a protein rich, healthy recipe for them.Try this easy paneer payasam for this festival of colors & have a fun filled,colorful celebration !!
Lets see how to make this paneer ki kheer..
Easy paneer kheer recipe
Paneer kheer/Paneer payasam recipe-Easy n delicious dessert recipe for celebrations.
Cuisine:Indian
Category:Sweet
Serves:Serves 3
Prep time:5 Minutes
Cook time:10 Minutes
Total time:15 Minutes
INGREDIENTS
Fresh paneer block - 100 gms/Grated paneer - 3/4 cup
Milk - 2.5 cups ( 500ml)
Sugar – 4-5 tbsp
Corn flour or rice flour - 1.5 tsp ( dissolve in 2 tbsp of water)
Wash and grate the paneer using a small holed grater.Set aside.Boil the milk in a pan and when it comes to boil,add sugar and corn flour water.
Allow it to roll boil for 5 minutes.In the mean time,chop the nuts and keep it ready.Add the cardamom powder and condensed milk.Lastly add the grated paneer and give a boil for 2 minutes.U will find the kheer becomes thick.Switch off the stove and add few drops of rose essence.Refrigerate for an hour and serve chilled OR enjoy it warm by sprinkling the chopped nuts and few saffron threads!
Looks rich and colorful,tastes rich and delicious!!
This kheer tends to thicken as it cools down.So dilute it by adding more milk & sugar if u wish.
Note
You can add freshly made chenna/paneer too.It tastes even more delicious and gives melt in mouth texture.
When u use store bought paneer,make sure u use the fresh ones.Else u may get a tangy taste.
Never boil the kheer for longer time after adding paneer because paneer may turn chewy.
Adding cardamom seeds & rose essence gives a nice flavor to the kheer.So do not skip it.
I used saffron threads only for photos.I did not add it in the actual recipe.
Enjoy this creamy paneer kheer with your loved ones.Tastes even more delicious !! Happy Holi
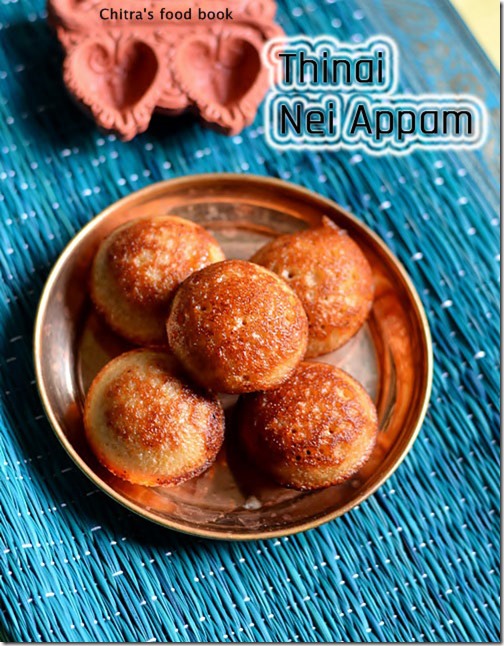
People in Tamil nadu usually make pori urundai and nei appam for Karthigai deepam.As i had already shared varieties of appam recipes like appam recipe using wheat flour,instant nei appam and appam-deep fried version,i wanted to try an appam using millet as we are fond of eating millets nowadays.Actually i wanted to try with kuthiraivali,varagu or saamai but then i changed my mind to try with Thinai as Lord Muruga is fond of thinai,Right??. So i tried with thinai(Foxtail millet in English,Kangni/Rala in Hindi,Navane in Kannada,Korra inTelugu,Thina in Malayalam) & it came out very well.I made this appam using paniyaram pan.Actually i made one batch with ghee and remaining with oil.Both were tasting awesome.We liked it very much.I am glad i could make a healthy nei appam recipe using millets.Tomorrow i will try to share how to make nel pori urundai recipe.Please click this link to view full collection of Karthigai deepam recipes in my blog.Happy Karthigai Deepam
Thinai nei appam recipe
Nei appam recipe using Thinai/Foxtail millet
Cuisine:Indian
Category:Sweet
Serves:12-15 nos
Prep time:2 Hours
Cook time:10 Minutes
Total time:2H 10Minutes
INGREDIENTS
To grind
Thinai/foxtail millet - 1/2 cup
Wheat flour - 2 tbsp
Banana - 1 no ( small-yelakki,poovan)
Grated jaggery - 1/2 cup( use 1/3 cup for normal sweet)
Cardamom - 2 nos
Grated coconut - 2 tbsp
Rice flour - 1/2 tbsp
Cooking soda - a big pinch
To cook
Ghee/Nei - as needed
METHOD
Wash and soak the thinai/Foxtail millet for 2 hours.After 2 hours,grind it to a slightly coarse paste adding cardamom & little water.To this,add wheat flour,rice flour,Chopped Banana,grated jaggery,grated coconut and grind to a smooth thick paste adding required water.Batter should be of pourable consistency.
Leave the batter for 2-4 hours.Before making appam,add a big pinch of cooking soda and mix well.Heat paniyaram pan and add a tsp of ghee in each hole.Pour a small ladle of appam and cover cook it for few minutes in medium flame.Flip it and again cook for a minute.Remove and serve hot !
Enjoy !
Note
Adding rice flour is optional.This appam itself comes out slightly crispy outside and soft inside.
U can also add rave in place of rice flour.
Adding cooking soda and banana is essential.It gives u the soft appam.Suppose if u ferment the batter for 8 hours,then cooking soda is not needed.
Serve & eat hot to enjoy its best taste.
Make this healthy,Lord Muruga’s Favourite Thinai Nei appam for this Karthigai Deepam and get his blessings !

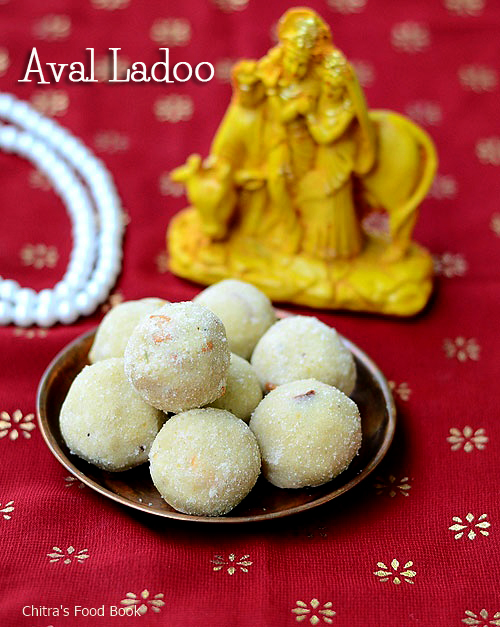
 Aval laddu/Poha ladoo recipe - Easy Gokulashtami Recipes


 .I struggled to retrieve it but i couldn’t
 .I became very much disappointed but still i don’t want to give up making a sweet post on this festival day.Suddenly I remembered about this Paneer kheer recipe which i had tried for my last year’s
  !!
!!


[6].jpg)