Search Chitra's Food Book

Showing posts with label KARNATAKA RECIPES. Show all posts

July 10, 2015

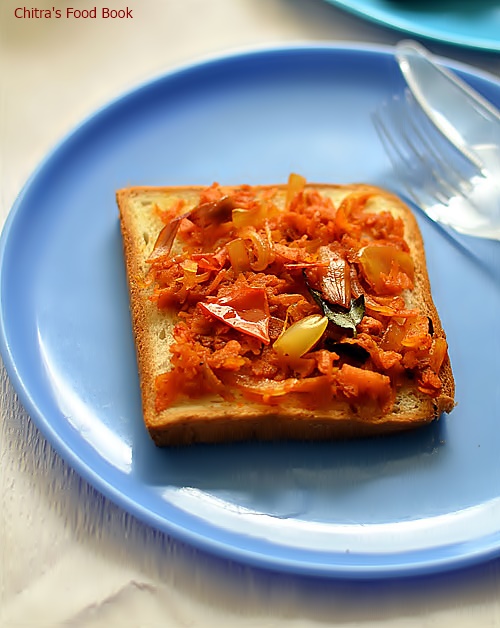
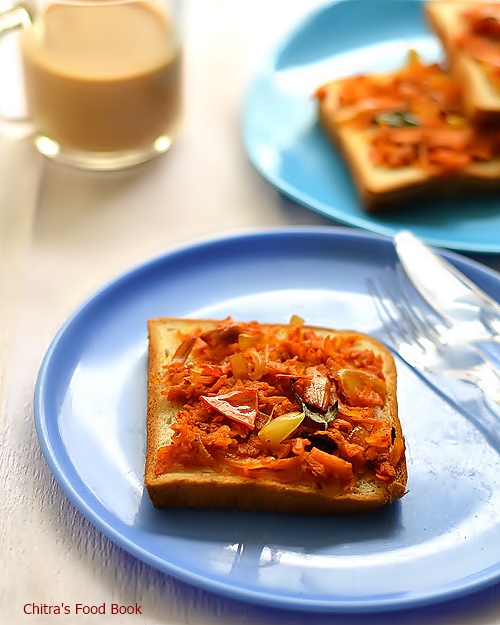
Iyengar Bakery Bread Toast - Bangalore Style Masala Vegetable Sandwich Recipe

Iyengar bakery bread toast
 Iyengar Bakery’s masala vegetable bread toast also known as open sandwich is very popular in Bangalore. I have tasted this many times but never thought of sharing this simple and easy bread recipe here.You can call this as “Indian Bruschetta”, hehe. Yesterday I bought a pair of toast from the bakery and relished it with tea. I got tempted to make it at home. This morning I made it for Raksha and Sendhil’s lunch box. Yes, this sandwich tastes good even if it cools down. The spicy vegetable masala used here is a very simple one with onion,tomato and grated carrot. So no kid would say NO to this combo. I have made it as an open sandwich. You can even grill this sandwich recipe.I am sure it would taste great in all the ways. Last year I shared Iyengar bakery style benne biscuit recipe which is super hit in my blog. I am happy to share yet another Iyengar Bakery style recipe in my blog. I have made this sandwich with milk bread.You can also replace it with whole wheat bread.I hope you will try this recipe and like it. Lets see how to prepare this yummy and easy bread sandwich recipe.

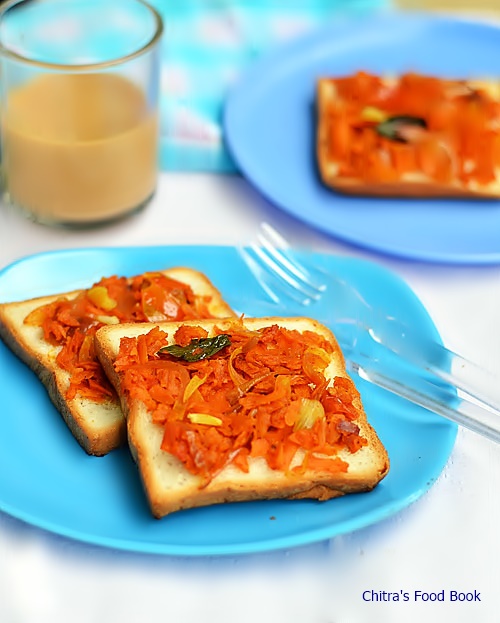
Iyengar bakery vegetable masala toast

Iyengar Bakery Bread Toast Recipe


Iyengar Bakery Bread Toast Recipe Masala vegetable toast - Iyengar Bakery Style Recipe
Cuisine: Indian
Category: Snacks
Serves: Serves 3
Prep time: 10 Minutes
Cook time: 20 Minutes
Total time: 30 Minutes


INGREDIENTS

  • Bread slices - 5 no
  • Carrot - 1 big
  • Big onions - 2 nos
  • Tomato - 1 no
  • Green chilli – 1 no
  • Capsicum - 2 tbsp ( chopped)
  • Curry leaves - few
  • Grated cabbage - a fistful ( optional)
  • Turmeric powder - 1/8 tsp
  • Cumin powder – 1/4 tsp
  • Red chilli powder - 1/2 tsp
  • Garam masala powder - 1/2 tsp
  • Tomato ketchup / sauce - 1 tbsp
  • Salt - as needed
  • Cooking oil - 2 tbsp
  • Cumin seeds - 1/2 tsp
  • Ghee or oil - to toast the bread
HOW TO MAKE IYENGAR BAKERY MASALA TOAST - METHOD
  • Wash and grate the carrot using a grater.Slice the onions and chop the tomatoes. Chop & slit the green chilli. Set aside.
  • Heat oil in a kadai, splutter cumin seeds and saute the onions,green chillies, capsicum, curry leaves, grated carrot together. Lastly add the tomato pieces and mix well till it starts to turn mushy.
Iyengar bakery bread sandwich

  • Add salt, turmeric powder, chilli powder, cumin powder, garam masala powder, tomato sauce and mix well.
Iyengar bakery bread toast
  • Heat a dosa pan and toast the bread slices by adding oil or ghee. Apply the masala on one side.Serve hot !
Iyengar bakery bread toast

Enjoy !
Note
  • Adding grated cabbage is optional. If you don’t want to add onions, you can use cabbage in place of it.
  • I used more carrot for my daughter’s sake. But in Iyengar bakery original recipe,they had used more onions than carrot. So change the quantity of ingredient as per your liking.
  • You can replace garam masala powder by chat masala powder.

Enjoy this easy sandwich for your tea time !
Iyengar bakery vegetable masala toast


Continue Reading...


July 3, 2015

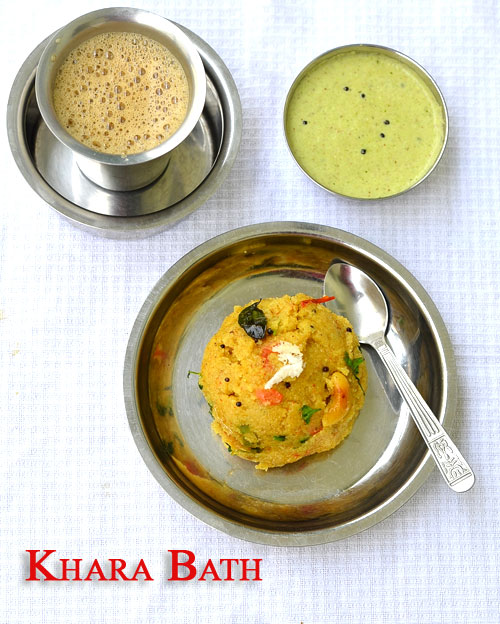
Khara Bath Recipe-South Indian Breakfast Recipes

Khara bath recipe
Khara bath is the most popular Breakfast recipe in Karnataka. Kharabath is nothing but Semolina/Sooji/Upma Rava cooked in lots of ghee and oil with vegetables and spices. In Bangalore, there is no breakfast menu without khara bath in hotels. It is also served as “Chow Chow bath” along with a scoop of Kesari bath. I have also shared Chow Chow Bath recipe here.

Among all the hotels that serve khara bath, Brahmin’s coffee bar kharabath is the most popular one. Any body who visit Bangalore for the first time would wish to try Idli, khara bath, coconut chutney and filter coffee in brahmin’s coffee bar. I am happy that I have tasted it twice with my School moms friends in Gandhi Bazaar.

After tasting there, I have tried several times to recreate the same at home by referring so many recipes and youtube videos. But nothing came up to the mark. Recently I came across Shanthi mam’s recipe using bath powder which was very different from other recipes I had tried. So I bookmarked and tried it today for our breakfast. It came out really well and I was completely happy with the result. I won’t say it tasted 100% like Brahmin’s coffee bar ones. But it was close it. Sendhil liked it a lot and he was full of praises. What else I need to post this recipe.

To get the actual taste of karabath, you must add more ghee, oil. So please don’t hesitate to use it. After all we are going to make it once in a while. Don’t worry about the Calories and just enjoy this Karnataka delicacy at home.

Lets see how to make Karnataka most popular Kharabath recipe with stepwise pictures !
Check out my other Yummy Karnataka Recipes HERE
Continue Reading...


May 26, 2015

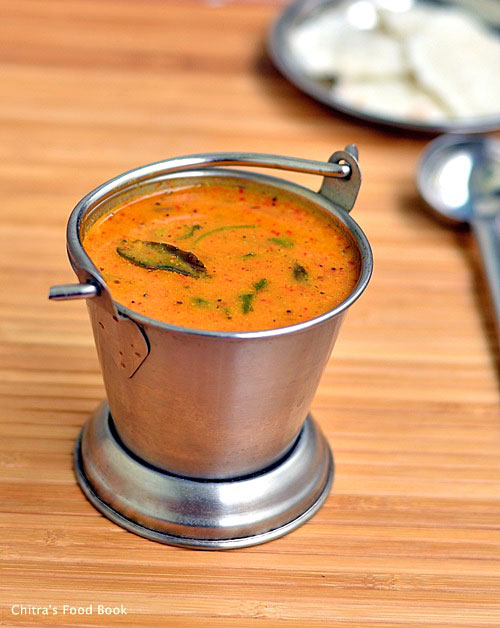
Udupi Sambar Recipe-Hotel Style-No Onion No Garlic Sambar

Udupi hotel sambar
Last week I tried this Udupi hotel sambar recipe for idli and that too without onion,garlic brahmin version after years.I came across this recipe in “The Hindu” Food safari section.The recipes I have tried from that section is always a super hit in my home.The best example is my soft kulcha recipe.The taste & cooking method of this udipi sambar is very close to my Hotel idli sambar using freshly ground sambar powder.So Sendhil & myself liked it a lot and relished with idli,dosaHappy.Try this recipe if you are looking for a no onion no garlic side dish for idli,dosa & pongal.You will love it !Lets see how to make this Karnataka Udupi's most popular sambar recipe with step by step pictures.
Continue Reading...


May 25, 2015

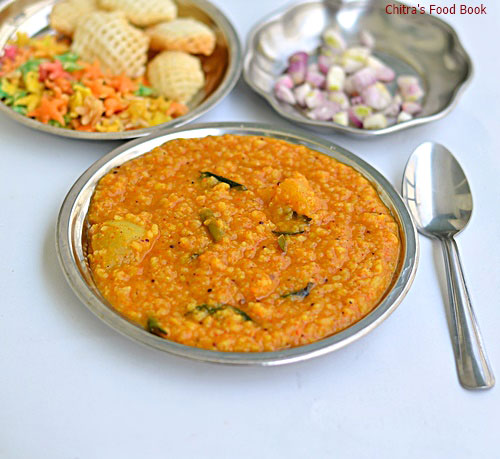
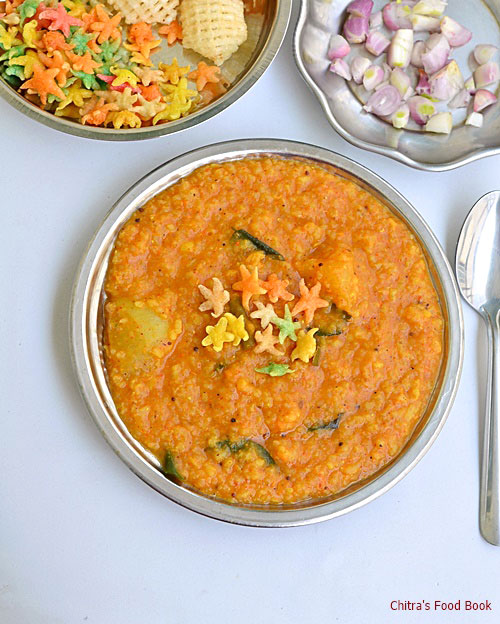
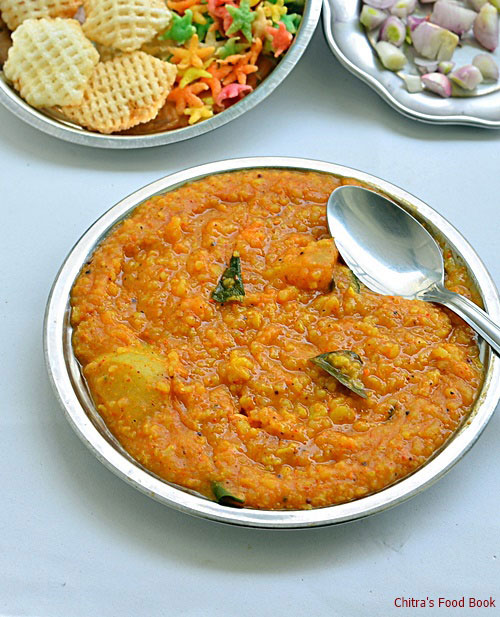
Bisi Bele Bath Recipe-Karnataka Special Bisibelebath - Sunday Lunch Recipes Series-17

Bisi bele bath recipe
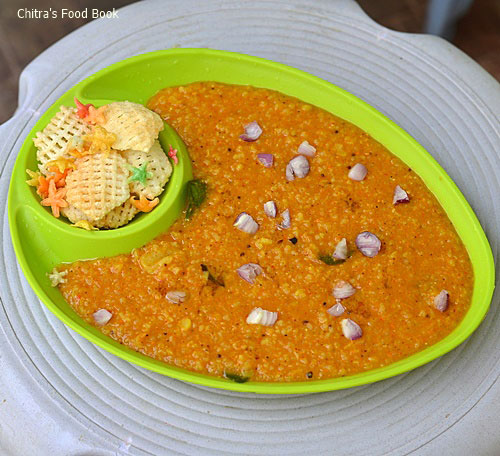
This week’s Sunday lunch recipes is not a biryani post as u all expected.Instead I made Bisi bele bath as per a reader’s request.I posted Homemade bisi bele bath powder few months back and completely forgot about it.But one of my readers reminded me and asked to share bisi bele bath recipe using that powder.Though I have been making it very often,I have not shared this easy recipe here.So I made bisi bele bath and curd rice for our Sunday lunch yesterday just to make this post.It came out really well and tasted similar to the ones made using MTR bisibelebath powder.I referred this You tube video for the recipe,made some changes to make the cooking method even more easy.I have not tasted the authentic bisi bele bath recipe in MTR restaurant but I am a big fan of my (school moms) friend Megha’s bisibelebath.She uses store bought bisi bele bath powder mostly.I am glad this recipe turned out very similar to hers and most importantly I was able to bring the watery consistency.Generally bisi bele bath is served with kara boondi on top.It is one of the best side dish for bisi bele bath. But in my family, both Sendhil & Raksha loves to have it with ghee & raw onion topping. Do try this easy recipe and make this for your lunch box. Don’t forget to reheat it before you eat because bisi bele bath has to be eaten hot as its name suggests(bisi-hot,Bele-dal,Bath-Rice recipe)
Bisi bele bath recipe

Bisi bele bath recipe

Bisi bele bath Recipe - Karnataka Style


Bisi bele bath recipe using Homemade bisi bele bath powder Karnataka style Bisi bele bath recipe using Homemade bisi bele bath powder
Cuisine: Indian
Category: Rice recipes
Serves: Serves 3-4
Prep time: 10 Minutes
Cook time: 20 Minutes
Total time: 30 Minutes


INGREDIENTS
1 cup - 200ml

  • Raw Rice or steamed rice - 3/4 cup
  • Toor dal - 1/2 cup
  • Turmeric powder - 1/4 tsp
  • Water- 6 cups for rice+dal ( Totally I used around 9 cups)
  • Salt - as needed
  • Cooking oil – 2 drops
  • Knol Khol/Kholrabi- 1/2 no
  • Brinjal - 1/2 no (long variety)
  • Beans - 5 nos.
  • Carrot - 1 no (optional)
To grind
  • Bisi bele bath powder - 4 tbsp
  • Grated coconut - 1/4 cup
  • Tamarind - Big gooseberry size
  • Jaggery - 1 tsp
  • Water - to grind
To temper
  • Cooking oil - 1 tsp
  • Mustard seeds - 1/2 tsp
  • Curry leaves - few
  • Hing - a pinch
  • Roasted peanuts - 2 tbsp
Ghee – 1-2 tbsp
METHOD

  • Take rice,dal,chopped vegetables,salt,turmeric powder,2 drops of oil and 6 cups of water. Cook it for one whistle in very low flame.Remove the lid and mash the rice,dal mixture very well.Add 1 cup of water to it and set aside.
Bisi bele bath recipe
  • Now take the bisi bele bath powder,grated coconut and soaked tamarind along with little water in a mixie jar. Grind it to a smooth paste.
Bisi bele bath recipe
  • Take the ground paste,add 2 cups of water and some salt to it. Mix well and boil the mixture in a kadai.Add some jaggery.Let the mixture roll boil for 5 minutes.You will get a nice smell.
Bisi bele bath recipe
  • Now add the masala to the rice+dal mixture. Mix well and add 1 more cup of water.Check for taste and add more salt & bisi bele bath powder if needed.
  • Let it boil nicely for 2-3 minutes. Lastly add 1 tbsp of ghee.Mix well.Adjust the consistency of rice by adding more water.It should be pourable.So add more water based on that and check for salt.Temper mustard,curry leaves, roasted peanuts and hing in a kadai and add to the rice.Mix well and serve hot !!
Bisi bele bath recipe
Yummy,hot bisi bele bath is ready.Serve with kara boondi or raw onions as I did !

Note
  • Add more bisi bele bath powder based on the spice level.
  • You can add more jaggery if you like sweet taste.
  • No need to use carrot or raddish .But you can use peas,chow chow/chayote if u wish.Skip Kholrabi if u don’t like it.
  • Taste the bisi bele bath and adjust the salt whenever needed
  • Addition of ghee at the end gives a great taste.So don’t skip it.
Bisi bele bath recipe

Enjoy eating hot,hot bisi bele bath with kara boondi or Raw onions.Tastes great !!
Bisi bele bath recipe

Continue Reading...


March 22, 2015

Ugadi Lunch Menu-Karnataka Style

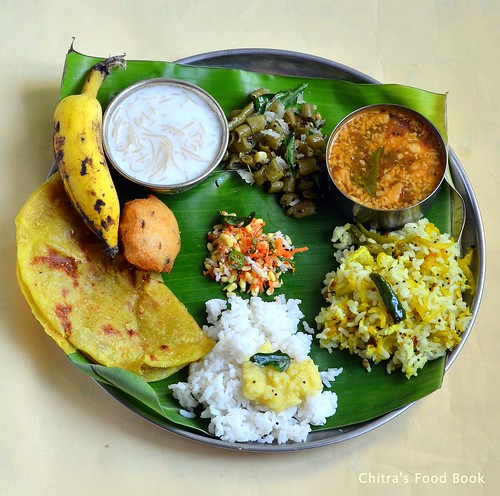
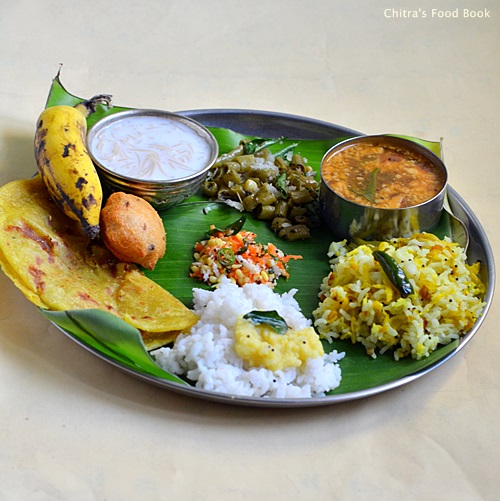
Karnataka lunch menu
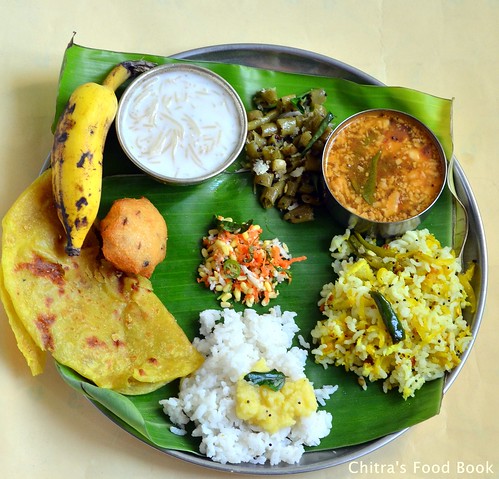
Friends, this week I have shared a Karnataka style Ugadi lunch menu instead of Sunday biryani recipe.  Yesterday I made this simple yet delicious lunch menu for Ugadi celebration. So I thought of sharing that platter here. Its been my long time wish to post a Karnataka style lunch menu in my blog. So I took Ugadi festival as an opportunity and made a simple lunch menu.

After I prepared Holige successfully, I asked my friends to suggest me an easy lunch menu idea for Ugadi festival. Based on their suggestions, I made Obbattu, Obbattu saaru, Mavinakayi chitranna, Mysore Bonda, Beans palya, Shavige payasa, dal, plain rice and the most popular Kosambari recipe. Also Megha suggested me a very easy recipe for Obbattu saaru.

As I had made Obbattu in the previous day, making this menu was easy for me. In this post, I have shared the recipes of Kosambari( using moong dal ) and beans palya. I have made a separate post for Obbattu saaru and Mavinakayi chitranna. I have given links for all these recipes below. Please check it. Ok, Now lets see this yummy Karnataka lunch menu recipes for Ugadi festival.

Check out my other lunch menu posts here . 

Wish you all a very happy Ugadi !!

 Ugadi lunch menu

Ugadi Lunch Menu


Ugadi Lunch Menu Ugadi Lunch Menu Recipes-Karnataka style
Cuisine: Indian
Category: Lunch menu
Serves: 2
Prep time: 30 Minutes
Cook time: 1 Hour
Total time: 1H30M


INGREDIENTS
Kosambari recipe
  • Yellow moong dal - 2 tbsp
  • Carrot - 1 no small
  • Green chilli - 1 no
  • Cucumber- a small piece
  • Coriander leaves - 2 tbsp
  • Grated coconut - 3 tbsp
  • Salt - as needed
To temper
  • Cooking oil - 1 tsp
  • Mustard seeds - 1/4 tsp
  • Curry leaves - few
  • hing/asafetida - a pinch ( optional)
Beans palya recipe
  • Beans - 20 nos
  • Grated coconut - 1/4 cup
  • Green chillies - 2 -3 nos
  • Salt & water - as needed
To temper
  • Cooking oil - 1 tbsp
  • Mustard seeds - 1/2 tsp
  • Urad dal - 1 tsp
  • Curry leaves – few
Click these links for other recipes
METHOD

  • I assumed that you have made obbattu/Holige the previous day and shared the procedure of making other dishes below.
  • Wash and soak moong dal for 30 minutes to make kosambari. Wash and soak urad dal for mysore bonda for 45 minutes in enough water.  You can also make vada instead of bonda. 
  • To make this menu, pressure cook one cup of rice along with moong dal in a small closed container. Soak tamarind in water for 20 minutes. Pressure cooking rice and dal will be done in 15 minutes.
  • In another burner, boil the vermicelli and let it cook. In the mean time, wash and peel the skin of raw mango. Grate it and finely chop the green chillies. Heat a pan and do the tempering, add green chillies and grated mango.
  • Saute well adding salt and turmeric powder. Mix well till mangoes get cooked. Lastly add the grated coconut, saute for a minute and switch off the flame. After the pressure is released, spread the rice in a plate and let it cool. Add this maavinakayi paste and mix well adding sesame oil. Adjust salt and garnish with coriander leaves. Please refer my mavinakayi chitranna recipe post for another method.
  • Now vermicelli will be cooked well, add milk, sugar and roasted nuts and remove from the flame. Set aside.
  • To make kosambari, take the soaked moong dal, drain the water completely and add grated coconut, grated carrot, finely chopped cucumber, green chillies and coriander leaves. Mix well. Add salt just before serving otherwise this mixture will leave more water while serving. So add salt only before serving. Lastly do the tempering and Kosambari is ready.
  • For beans palya,wash and chop the beans into small circles. Heat oil in a kadai and temper mustard seeds, urad dal and curry leaves. Add finely chopped green chillies and beans. Add the required salt and saute well for few minutes. Sprinkle some water and cover cook the beans till its done. Mix it once or twice in the middle. Add the grated coconut in the end, give a stir and switch off the flame. Beans palya is ready.
  • Lastly you can do the obbattu saaru by using the reserved holige pooran dal water. Please check the link for obbattu saaru recipe above. By now, urad dal would have been soaked well. Grind the batter and make bonda. Serve saaru and bonda really hot to enjoy its best taste. So I made it at the end.
You can finish the entire process within an hour if  you plan it right. Serve everything hot and enjoy !

Try this easy yet yummy lunch menu and enjoy Habbada Oota on this auspicious day !

 Ugadi lunch menu
Continue Reading...


March 19, 2015

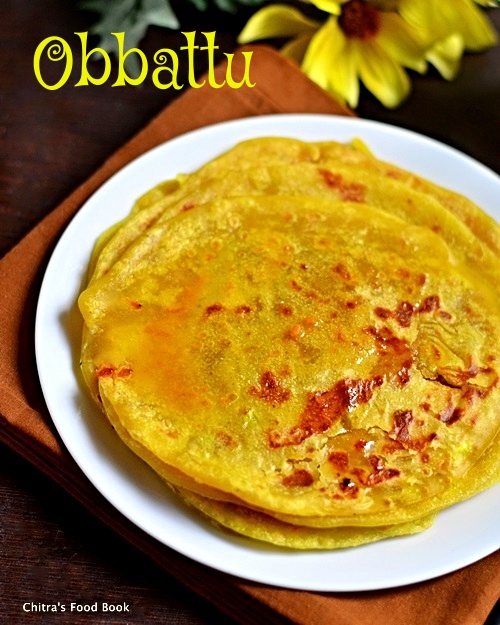
Karnataka Style Holige/Obbattu/Puran Poli Recipe

OBBATTU RECIPE

Karnataka style Holige also know as Obbattu in Kannada, bobbatlu in Telugu, Puran Poli in Hindi, Paruppu Boli in Tamil is a very popular sweet in Karnataka, Andhra and North India. Of course each recipe has its own variations. People in Karnataka should make this sweet for festivals like Varamahalakshmi pooja, Ganesh chaturthi and Ugadi.  

We Tamil people don’t celebrate Ugadi but being in Bangalore for the past ten years, I wanted to celebrate Ugadi at least by making holige. Holige/Obbattu is considered to be one of the most important Neivedyam recipes for Ugadi. People in Karnataka & Andhra make it along with Mango pachadi or Maavinkayi chitranna and vada. Here in Bangalore, people make this holige not only for offering GOD, its a must serve sweet in weddings, Sathya Narayana pooja etc. I

n Karnataka,  people make it with two different stuffing. One using dal ( bele obbattu) and the other one with coconut (Kayi holige). But the most famous one is bele obbattu. In Tamil nadu, we call this as Boli /Poli and we make the same stuffing with chana dal. In North India, it is called as Puran poli. I am not a big fan of this sweet recipe but I love Obbattu saaru (a spicy rasam kind of gravy made from the stuffing and the cooked dal water)so much. My husband Sendhil loves obbattu like anything. He loves to have it hot hot drizzled with a tsp of ghee. I have tasted holige in my school moms friends houses and in marriage feasts. 

My friends make it extremely soft and tasty. So with the help of Megha and Tara’s recipes, I tried holige after a long time to make a special post for Ugadi festival. By God’s grace, it came out well and soft as I expected but not 100% like my friends. No worries. Practice makes a man perfect.After this successful attempt, I am pretty much confident of making it perfect next time. But I became very happy when Sendhil gave thumbs up with a broad smile on his face. So its a hit recipe in my home. I have mentioned all the possible tips and tricks shared by my friends. Hope it will be useful for beginners. 

Now lets see how to make Karnataka special Holige/Obbattu recipe with stepwise pictures in detail ! Please don’t forget to go through the “Points to remember” before you start making it.
Wish u all a very happy Ugadi !.
Points to remember
  1. Please be generous in adding oil. Oil helps you to get a really soft holige. So use the mentioned quantity of oil strictly. U can add more oil but definitely not lesser the given quantity.
  2. My friend Tara use the combination of maida and chiroti rava in the ratio of 2:1 for making the dough but Megha uses only maida. Here I used only maida as I din’t have chiroti rava in hand.
  3. You should knead the dough at least for 5-7 minutes adding oil in regular intervals. Its a very important step.
  4. Holige/Obattu dough needs to be fermented and soaked in oil at least for 8 hours to achieve the best result. i.e. If you want to make obattu in the evening around 6 pm, I suggest you to make the dough in the morning around 7 am. This tip was shared by Tara. This time I fermented the dough for just 4 hours as I wanted to click the pictures before sun light goes off. Next time I am planning to soak the dough overnight.
  5. Rolling the dough along with stuffing also plays a major role in bringing out soft obattu. Do not roll the holige too thin or too thick. You can either pat it using your hands or use a rolling pin by keeping the dough between two greased obbattu sheets which is easily available in Market. If you don’t get it, use oil sheets, milk cover or any plastic sheets. You can use banana leaf as well. 
  6. Make sure the size of maida dough should be half the size of stuffing ball. This helps in uniform spreading of stuffing all over the holige. Suffing should be more than the outer covering.
  7. Always cook the obbattu in medium flame and never forget to drizzle a tsp of oil around the corners and all over the obbattu to get a shiny look.
  8. To keep the obbattu stay soft for long time, always stack the cooked obbattu one over the other after they turn warm. Keep it covered till you eat.
  9. Last but not the least,serve the obbattu adding few tsp of melted ghee topped with it. If desired, you can add warm milk too. This is how it is served in Wedding feasts here. This combo is just out of the world ;)).
  10. You can keep this holige for a week and enjoy !
Obbattu recipe

Obattu/Holige recipe


Obattu/Holige recipe How to make obattu/Holige recipe for Ugadi festival
Cuisine: Indian
Category: Sweet
Serves: 10 nos
Prep time: 8 Hours
Cook time: 5 Minutes
Total time: 8H5Minutes


INGREDIENTS
( 1 cup - 250ml)

  • Maida/All purpose flour - 1 cup (levelled)
  • Cooking oil - 1/4 cup + Extra while cooking holige ( total 1/3 cup) 
  • Turmeric powder - 1/8 tsp
  • Salt - a pinch
  • Water – to make dough ( I used nearly 1/2 cup + 2 tbsp.But it may vary)
For stuffing
  • Toor dal or chana dal – 1/cup
  • Grated/powdered jaggery – 3/4 - 1 cup
  • Grated coconut - 1/4 cup
  • Cardamom - 2 nos
  • Water - as needed
METHOD

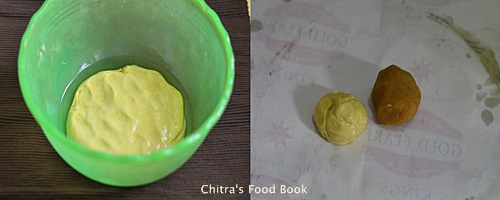
  • Prepare the dough part first. For this, take 1 cup of flour and add turmeric powder and  a pinch of salt to it. Mix well. Make a dent in the center and add water little by little. Make a sticky dough.
Obbattu recipe
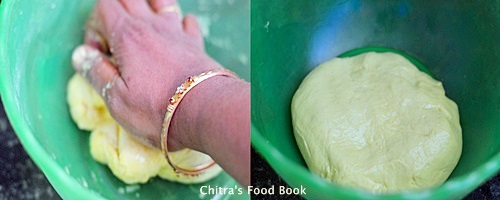
  • Take 1/4 cup of oil in a bowl and add 1 tsp of oil to the dough. Start kneading using your palm. Knead it for a minute and add another tsp of oil whenever the dough sticks to your hands. Repeat the same thing until the dough is completely soft. I used nearly 6-7 tsp of oil. Knead the dough for 6-8 minutes. No problem if the dough is loose and sticky. 
Obbattu recipe
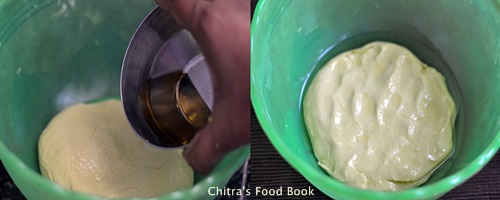
  • Now pour the remaining oil over the dough. The dough would be immersed in oil and it will be soaked. So add 1 tbsp more oil if needed. Close the bowl with a lid and leave it for 6-8 hours minimum.
Obbattu recipe
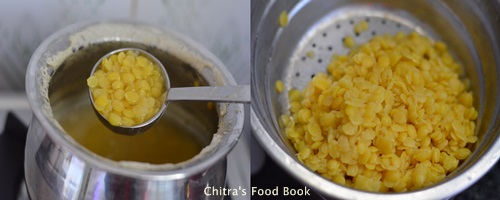
  • Next comes the stuffing part. Boil toor dal in an open bowl or pan adding 4 cups of water. Let the dal cook till it blossoms and not mushy.i e.the dal should be mashable by hands but it should look firm and stay in shape. You can also pressure cook but cook in high flame for one or two whistles. Make sure dal is not mushy. It should blossom and cook. People here don't pressure cook dal for making holige. So I too followed the same. 
Obbattu recipe
  • After the dal is cooked, drain all the water and collect it in a bowl. Use this dal water for making obbattu saaru.
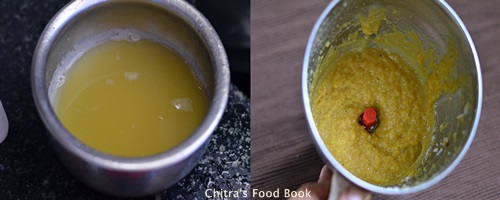
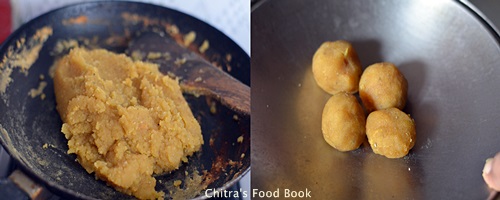
  • Now take the cooked dal, grated coconut, grated jaggery and cardamom in a mixie jar and grind it well to make a paste.
Bele obbattu recipe
  • If you feel the mixture is watery and too wet to handle,saute & cook the mixture in a hot pan till it becomes like a whole non-sticky mass without moisture content. If the mixture is hard and non sticky, cooking the stuffing is not needed. Take the stuffing and make lemon sized balls out of it. Cover the balls and set aside. Reserve 2 balls of stuffing to add in obbattu saaru. 
Bele obbattu recipe
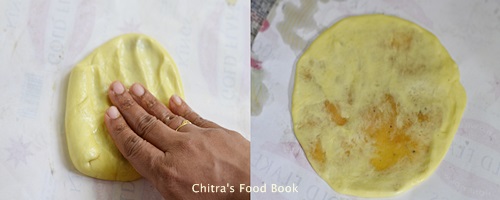
  • After the obbattu dough is rested for 8 hours, take it and pinch a big gooseberry sized ball out of it. The size of dough ball should be half the size of stuffing ball. Stuffing ball should be bigger than dough ball. Keep the ball in a greased obbattu sheet ( U get in shops) and spread it lightly like a poori. Make sure the corners are thinner than the center portion. Now keep the stuffing ball in the middle and cover the stuffing with the dough. You can use banana leaf for rolling holige but obbattu sheet works the best. 
Obbattu recipe
  • Press it using your hands and pat it as much as possible distributing the stuffing evenly all over the holige. Make it medium thin Or thick as you like (If you make polis too thick, it may turn out hard).
Obbattu recipe
Obbattu recipe
  • Heat a dosa tawa (Iron griddle is best) and drizzle few drops of oil. When the pan is heated, take the obbattu sheet and invert it over the tawa. Just drop the holige and remove the sheet. Spread it well. Cook it by adding a tsp of oil. Cook both the sides in medium flame till holige cooks with golden brown spots. Remove in a plate and serve it hot hot adding milk and Ghee generously. Tastes great!!
Obbattu recipe
  • Repeat the same for all the dough and stuffing. Always Stack the holige and store it. It will stay good for a week provided you cook the stuffing part without moisture.

Note

  • Please refer “Points to remember” given above before you start making obbattu. All the best !!

Enjoy making this Karnataka’s most popular Obbattu for Ugadi Habba. 

Wish you all a very happy Ugadi festival celebration !!

Obbattu recipe

Continue Reading...


March 10, 2015

Bisi Bele Bath Powder Recipe-Karnataka Style Homemade Bisibelebath powder

how to make bisi bele bath powder

Authentic Karanataka style Bisi bele bath recipe is in my try list for years i should say.I have tasted it in few restaurants here and in some of my friend’s houses.But still i have not yet tasted this awesome bisi bele bath in its birth place,yes in MTR restaurant. I had been to MTR once with my friends but unfortunately i couldn’t taste bisi bele bath in their full meals menu. Instead they served some veg pulao which i didn’t like it too.I found from the waiter that bisi bele bath is available only on Sundays. Long back i had shared South Indian style bisi bele bath recipe but that’s just our Tamil nadu version.So i always look for the recipe of authentic Karnataka style bisibelebath and i have tried quite a few of them from various blogs.Of course they tasted good but still i felt something was missing. When i asked to share the correct recipe to my school moms friends,some of them told me to use MTR bisi bele bath powder (BBB powder) but Nagalakshmi shared her family recipe with powder. Based on the ingredients she told & by watching an youtube video, i tried this bisi bele bath powder at home for the first time.I also prepared bisibelebath rice using this fresh,flavorful,homemade powder. It came out really well & the taste was awesome!!It was just upto the mark as i expected.We all loved it especially my in-laws.So this powder is the star ingredient to make a perfect bisi bele bath. Hence i wanted to showcase this powder recipe by making a separate post.Once u make n store this powder, u can prepare bisi bele bath in just 15 minutes.Ok,lets see how to make bisi bele bath powder at home easily.Sorry,i couldn’t take stepwise pictures as i was in a hurry.I will try to update this post with step by step pictures.My next target is to make a perfect vangibath powder. Hope I will do it very soon.

Please check out my Bisi bele bath recipe using this powder.

bisi bele bath powder


Bisi bele bath powder recipe


Bisi bele bath powder recipe Homemade bisi ble bath powder recipe - Fresh n flavorful !
Cuisine: Indian
Category: Homemade powders
Serves: 3/4 cup
Prep time: 5 Minutes
Cook time: 10 Minutes
Total time: 15 Minutes


INGREDIENTS

  • Chana dal - 2 tbsp
  • Urad dal – 2 tbsp
  • Coriander seeds/ dhania – 4 tbsp
  • Jeera/ cumin seeds – 1/2 tbsp
  • Mustard seeds – 1/2 tsp
  • Methi/ fenugreek seeds – 1/4 tsp
  • Poppy seeds/ gasagase – 1/2 tbsp
  • 1 inch cinnamon sticks – 4 nos
  • Cloves – 3 nos
  • Marati moggu/Caper – 1 no( optional)
  • Dry byadgi red chillis - 15 nos
  • Red chillies (smooth skin/guntur) - 10-15 nos
  • Cooking oil – 1 tbsp
METHOD

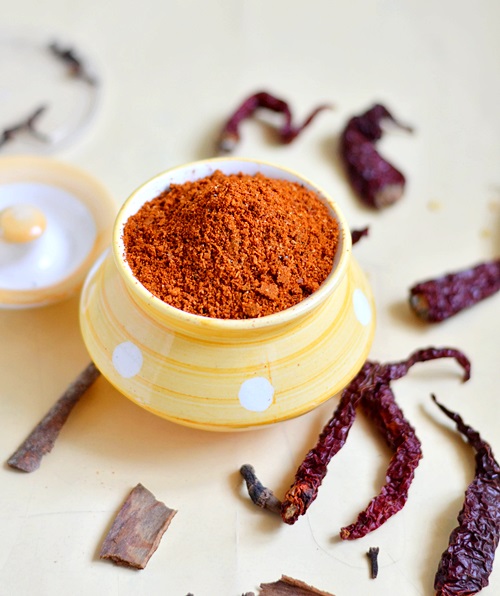
  • Take all the ingredients given above.Heat oil in a kadai and roast all the ingredients in medium flame till u get a nice aroma.Roast it patiently in medium flame else the ingredients may get burnt.
  • Once they cooled down,grind them in a mixie jar.Store in an air tight box after the powder is completely cooled down.Use a clean,dry spoon to handle.


Note

Adding byadge red chillies is a must to get the nice red color in bisi bele bath powder as well as rice.So do not skip it.
Add more red chillies based on the spice level u need
Stays good for a month as we have not used coconut.But use clean,dry spoon while u handle.Also store in an air tight box.


homemade bisibelebath powder

Make n store this flavorful homemade bisi bele bath in an air tight box.Stays good for a month !
Bisi-bele-bath-powder

Continue Reading...


February 27, 2015

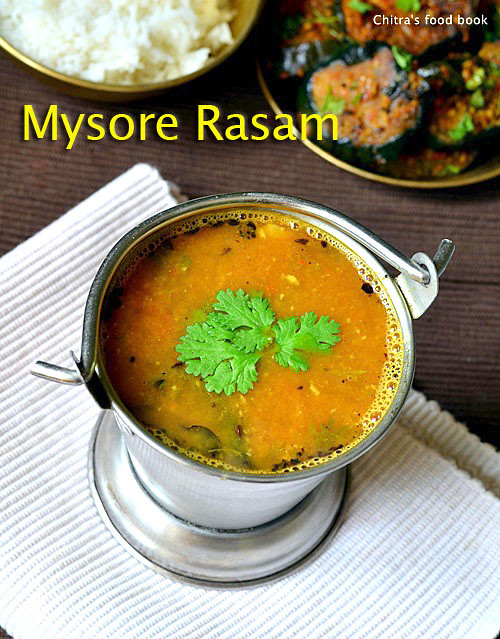
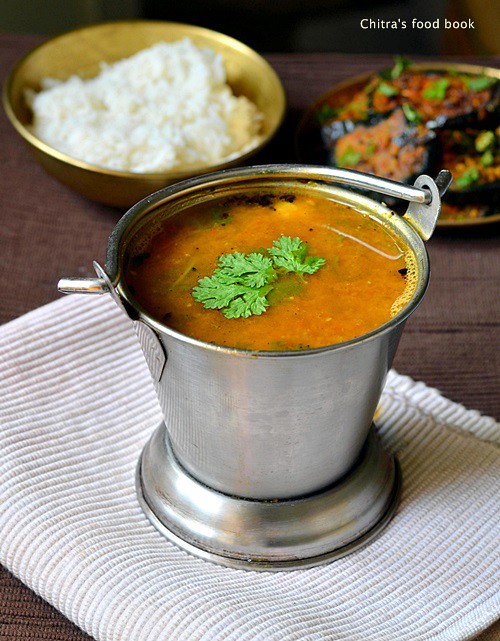
Mysore Rasam Recipe - Arachuvitta Rasam - Rasam Varieties

Mysore rasam recipe

Mysore rasam is one of the most popular rasam varieties. In tamil, we can call it as “Arachuvitta rasam”.  In most of the South Indian houses, rasam recipe makes it presence almost everyday for lunch. We love to make varieties of rasam recipes. Me too not an exception in this. So I keep trying some new, interesting rasam recipes in my kitchen. This mysore rasam recipe was in my bookmarked list for long time.I never thought this would taste soo good, refreshing and flavourful.
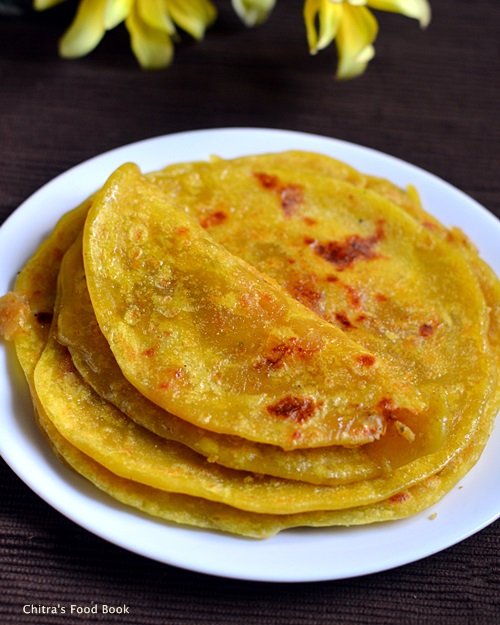
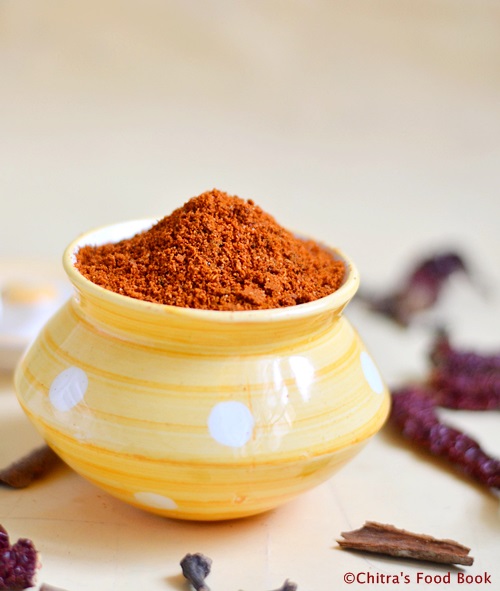
When I tried it last week for the first time, I felt its taste was very close to the rasam I had tasted in hotels and brahmin marriage feast here in Bangalore. My Kannadiga friends make a similar rasam using saaru pudi/ rasam powder and they call it as “Bele saaru”. I am not sure whether this is the authentic mysore rasam recipe but it tasted really good. So I made it again for my in-laws.This recipe became an instant hit among my friends and family. 
Unlike our usual rasam, mysore rasam has a slightly thick consistency and it tastes spicy too. Its the freshly roasted and ground rasam powder that makes the difference. For this recipe, I watched Vahchef’s video and some more websites too. Also I made few changes in the quantity of ingredients based on my family’s taste. I just loved this rasam and I can even drink this as a soup. I’ll be surely making it very often.You too give a try and share your feedback. Lets see how to make this super flavorful and the most popular Mysore Rasam Recipe.

Check out my easy rasam recipe using Instant rasam powder !

Mysore rasam recipe

Mysore rasam recipe


Mysore rasam recipe How to make flavorful, spicy mysore rasam for rice
Cuisine: Indian
Category: Lunch
Serves: 3
Prep time: 10 Minutes
Cook time: 15 Minutes
Total time: 25 Minutes


INGREDIENTS


  • Tamarind - Medium gooseberry size
  • Tomato - 1 no (big)
  • Sambar powder - 1 tsp
  • Green chillies - 1 or 2 nos (adjust)
  • Water - 2-3 cups
  • Cooked toor dal - 2 tbsp ( dilute it)
  • Grated jaggery - 1 tsp
  • Salt & turmeric powder - as needed

To roast n grind


  • Cooking oil - 1/2 tsp
  • Chana dal - 1 tsp
  • Urad dal - 1/2 tsp
  • Curry leaves – 5 nos ( I din’t add)
  • Dhania/Coriander seeds - 2 tsp
  • Red chilli - 1 no
  • Pepper corns - 1/2 tsp
  • Cumin seeds/Jeera - 1/2 tsp
  • Grated coconut - 1.5 tbsp
  • Hing/Asafetida- a pinch

To temper


  • Ghee - 1 tsp
  • Mustard seeds - 1/2 tsp
  • Curry leaves - few
  • Coriander leaves - to garnish
  • Grated coconut - very little ( to garnish, completely optional)

METHOD - HOW TO MAKE MYSORE RASAM


  • Reserve 2 tbsp of cooked toor dal. Mash it well by adding 1/4 cup of water. Grind tomato to a smooth paste using little water & keep aside.

  • In a wide bowl, take the tamarind extract adding 2 cups of water. To this add tomato puree, sambar powder, slitted green chillies, turmeric powder, salt & hing. Let it boil for 5 minutes.
Mysore rasam recipe
  • Heat little oil in a kadai and when it gets heated, roast & grind all the items given under”to roast n grind”. Add the grated coconut at the end of roasting. Mix well & let it cool. Grind everything to a smooth paste adding enough water.
Mysore rasam powder
  • Add this paste & cooked toor dal to the rasam. Add little jaggery and allow it to boil well. It will give a nice smell & becomes slightly thicker than usual rasam. Switch off the flame & garnish with coriander leaves.
Mysore rasam recipe
  • Temper the mustard, cumin seeds in ghee and add to the rasam. Mix well and close it with a lid to retain the aroma.
  • Give a standing time of at least 30 minutes to one hour before serving. It helps to infuse all the taste. If you want to serve it hot, you can reheat it at the time of serving. Mix it with plain rice in a bowl adding a drop of ghee. Tastes divine !
Mysore rasam

Enjoy !


Note


  • I used one big Bangalore tomato. Please use 2 nos if your tomato is small. Make sure it is ripe.
  • Adjust the quantity of sambar powder as per your taste. U can also skip adding sambar powder & add more chillies & dhania while roasting.
  • Adding jaggery gives a mild sweet taste to this rasam and also helps to balance the tanginess. So don’t avoid it.
  • This rasam would be slightly thicker than our usual rasam. So boil it well. Hope you can find it in the next picture.

Mysore rasam recipe

A bowl of hot rice with rasam accompanied by a papad is a divine lunch me!! What say friends?? 


Continue Reading...