Search Chitra's Food Book

September 23, 2016

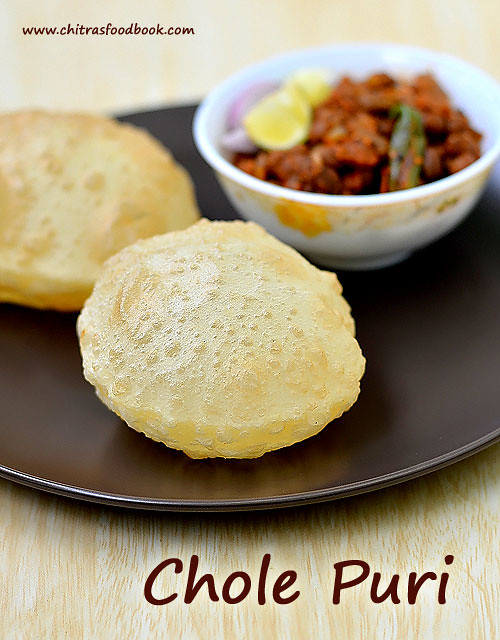
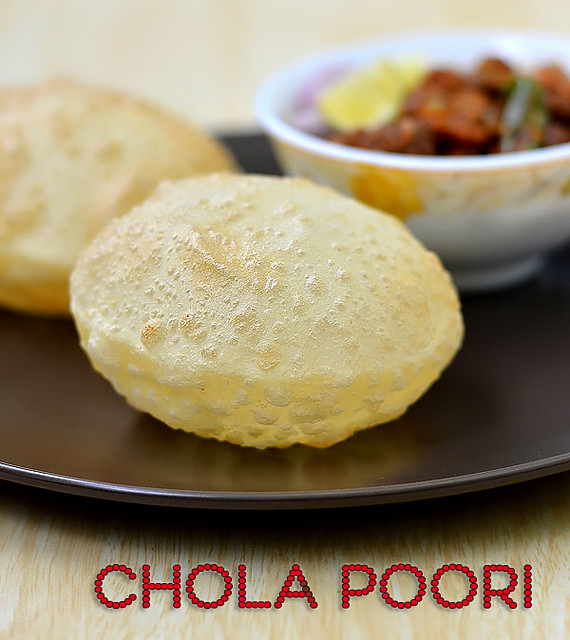
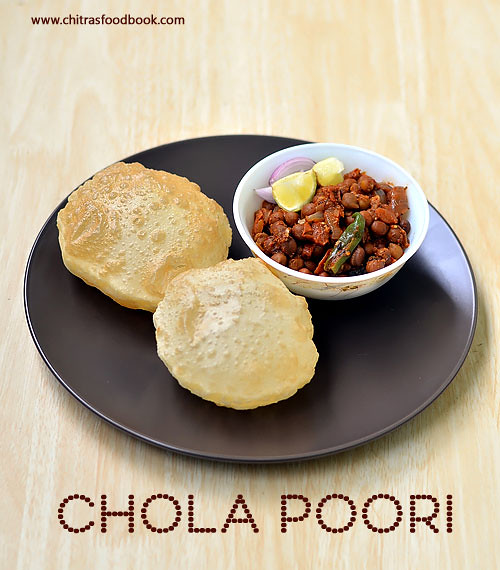
Chola Poori Recipe – How To Make Chola Puri

Chola poori recipe
Recently I tasted a big sized, puffy Chola poori with chana masala in Hotel Saravana bhavan, Salem. Actually speaking, Punjabi special chole bhatura was in my try list for years. But I haven’t tasted it so far. Soon I must taste it in North Indian restaurants to know its actual taste and then experiment at home. I think Chola poori must be an adaptive version of chole bhatura in South. So I tried this Tamil nadu style chola poori at home. I was thinking chola poori is called as chole bhatura in Hindi. But there are variations in the ingredients for dough and preparation for making bhatura and chola poori. 

For making bhatura yeast, baking powder or soda water is used whereas chola puri is made without yeast or any raising agent. Only curd/yogurt is used. Bhatura dough needs a resting time of 3-4 hours whereas this one needs just 30 minutes. The method of preparation of chola poori is quite similar to our plain wheat flour poori. All the tips and tricks we follow for wheat flour poori is applicable to this as well.I got this awesome recipe from this blog. I have tried it thrice during weekends. It comes out very well with a puffy looking, soft texture. 

We all know the best, popular side dish for chola poori is chana masala or chole masala. So I prepared Punjabi chole following this recipe from my Punjabi thali post and served with chola poori. It was a yummy combo.We loved it to the core. Friends, do try this easy chola poori recipe. Don’t mind about calories, just enjoy with chana masala. Serve it for weekend breakfast or dinner. 

Ok, Lets see how to make Chola poori recipe with stepwise pictures. I will try to make a detailed video post soon.

Check out my beetroot poori and Palak poori recipes if interested !
Chola poori

Chola poori recipe


Chola poori recipe How to make Chola poori recipe - Delicious breakfast recipe for weekends
Cuisine: Indian
Category: Breakfast/Dinner recipe
Serves: 12-14
Prep time: 30 Minutes
Cook time: 2 Minutes
Total time: 32 Minutes


INGREDIENTS
1 cup - 240ml
  • Maida/All purpose flour - 2 cups
  • Sooji/Rava – 1/4 cup ( Semolina, Upma rava)
  • Wheat flour/Atta – 1/4 cup
  • Cooking oil - 1 tbsp
  • Fresh Curd/yogurt – 2 tbsp
  • Salt - as needed
  • Water - as needed
  • Cooking oil - to deep fry
METHOD

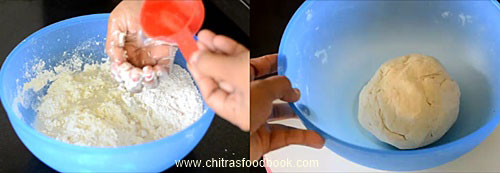
  • In a wide bowl, sift the maida and wheat flour.To this, add sooji, Oil, salt and curd. Mix well with your fingers. Oil and curd should spread well with flour and the mixture looks crumbly. ( Sooji helps to maintain puffiness for long time. Wheat flour helps to make perfect round shape. Oil  & curd is to give softness to the poori)
    How to make chola poori
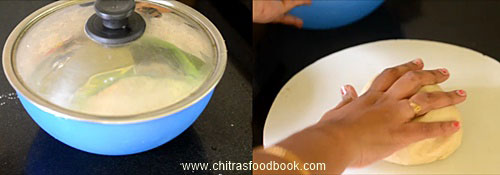
  • Add the required water little by little and make a stiff dough.Dough should be non-sticky, thick and stiff like our usual wheat flour poori.Cover it with a damp cloth. Let the dough rest for 30 minutes.
    How to make chola poori
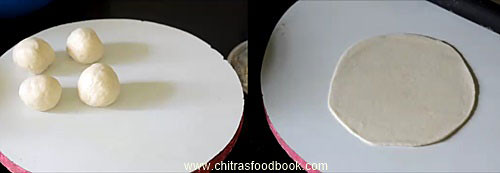
  • After 30 minutes, knead the dough for 2-3 minutes and make it smooth. Make small or big sized balls from the dough as per your wish. In hotels, they serve big sized poori. Roll it slightly thicker than the usual poori. Use wheat flour to dust the balls. Arrange them in a paper or a plate.
    How to make chola poori
    How to make chola poori
  • Heat oil in a kadai and when it gets heated, drop a pinch of dough to check the oil temperature.The dough should rise immediately to the top. Keep the flame medium high and drop one poori at a time. Poori will puff up immediately. If not, press the poori gently with a slotted ladle. It will puff up. Flip it and cook the other side till bubbles cease.It will look slightly golden in color.
  • The color of poori will change based on the oil temperature. You can find the difference in color or pooris in the main picture. To maintain white colored pooris, switch off the heat after making 2-3 pooris, let the oil cool down slightly. Then heat it and check with a pinch of dough. Proceed as mentioned above and deep fry the poori.
  • Remove the puri in a tissue paper. Drain and enjoy with chole masala or chana masala. Adjust the heat before frying each poori. Make sure oil is not smoking hot. Please check my POORI RECIPE for more details.
    How to make chola poori
    How to make chola poori
Enjoy !
Check out my beetroot poori and Palak poori recipes if interested !

Note
  • Make sure the dough is thick and hard but smooth. It should not be too soft like soft chapathi dough. So add water accordingly.
  • Resting time of 30 minutes is needed.
  • Poori will puff up only when its rolled thick. Thin poori will become like papad. So roll it thick.
  • The temperature of oil is very important to get puffy poori. If the oil temperature is too low, poori will absorb more oil and does not puff up. If oil temperature is too high and smoky, poori will turn golden brown very soon and cook unevenly.
Enjoy this white, puffy chola poori at home with chana/chole masala !!
How to make chola poori at home
Continue Reading...


September 21, 2016

Soya Chunks Manchurian – Soya Chunks Recipes

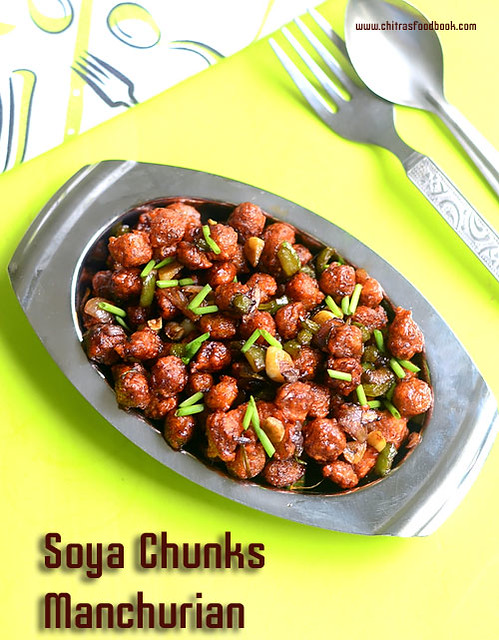
How to make Soya chunks manchurian/ meal maker manchurian – Dry version with step by step pictures !
Soya chunks also known as meal maker & soya nuggets is a good source of protein for vegetarians. Usually I add them in biryani. Recently I bought a pack of mini soya chunks(Soya chunks nano) to try some curry or gravy with it. But I got tempted to make soya chunks Manchurian after watching Vahrevah Youtube video. Soya chunks fry came out very crispy like Gobi 65 and tasted great when hot.I made a dry Manchurian sauce and it stayed crispy for sometime even after adding in gravy. But It became slightly chewy and soft after its cooled down. So make and serve it hot to enjoy its actual taste because the moisture content inside the soya chunks makes it soft soon. Use mini soya chunks for best results.If you use big sized soya chunks, chop it after soaking in water to make a crispy fry. Do try this for your kids. I am sure they will love it. Lets see how to prepare Soya chunks Manchurian also known as meal maker Manchurian with step by step photos !
Check out my other Manchurian recipes
Gobi manchurian

Baby corn manchurian

Idli manchurian

Mixed vegetable manchurian

Continue Reading...


September 19, 2016

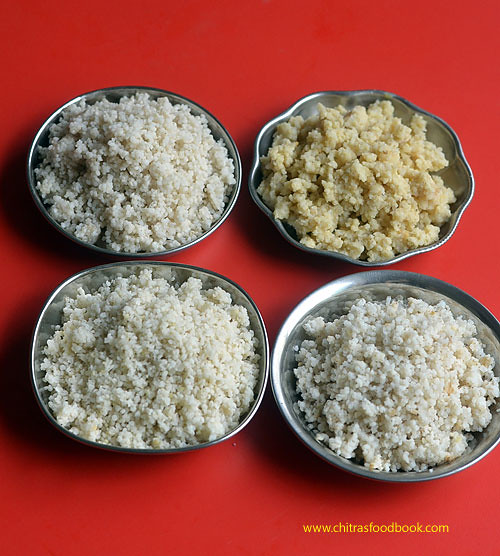
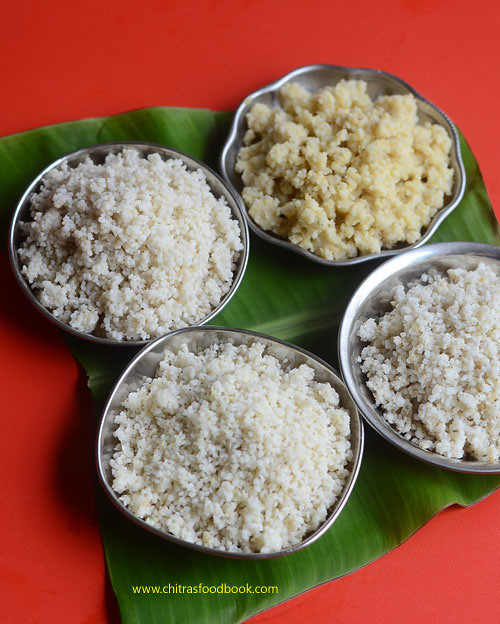
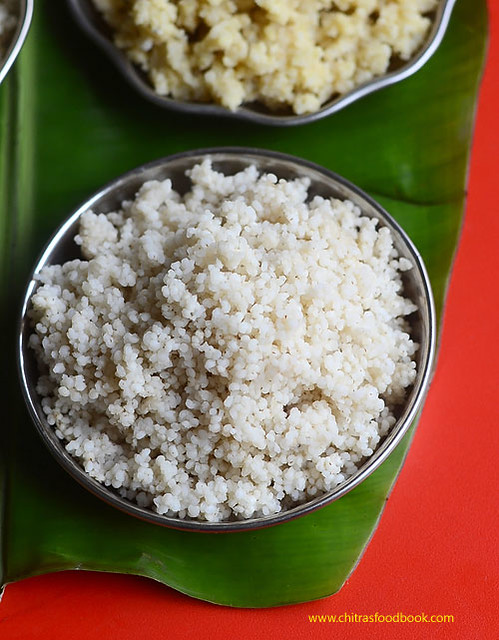
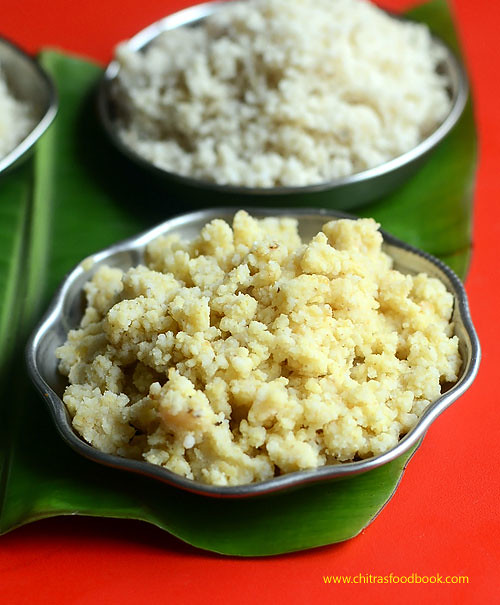
How To Cook Millet In A Pressure Cooker, Rice Cooker, Pan - Indian Style

How to cook millets 
In this post, I have discussed how to cook millet in pressure cooker, rice cooker and in a pan. All these are our Indian ways of cooking millets. Iam happy to make a post about Millets (Sirudhaniyam in Tamil)after a long time.

As we all know, Millets are a super healthy grain with loads of fiber, calcium, minerals & iron. People have started switching to millets and include it in their regular cooking as a replacement of rice for breakfast, dinner and lunch as well. Millet rice can be cooked on stove top( In a open pan), in a rice cooker, pressure cooker and even in microwave just like normal rice.

 But most of us are not sure about how to cook millets perfectly in a fluffy way like pulao, biryani or for making Indian style recipes like Pongal, upma, porridge, koozh with a mushy texture. Its always confusing about the water ratio for different types of millet like Varagu arisi (Kodo millet), Samai (Little millet), Kuthiraivali (Barnyard millet), Thinai rice (Foxtail millet) and Kambu (Pearl millet).
 I have not discussed about Quinoa in this post. Quinoa and thinai are different millets. I will make a post on that separately.

So in this post, I have shared how to cook Indian millets in 3 different ways i.e Open pan method, In a pressure cooker and in an electric rice cooker. Water quantity may vary based on the quality of millet. Some millet may need less water and some may need more. So please keep this post as a reference and do the trial and error.

Warning about millets

I would like to emphasize this point before going to this post. Even though, Millet is a super healthy food, one should consume it moderately based on their body. Over consumption may lead to indigestion, stomach bloating, loss of appetite, imbalanced thyroid levels. So please include different types of millet in your diet thrice or 4 times in a week.

Do not consume the same millet repeatedly. Try to include varieties of millet in your cooking. I have heard people consuming millet for all the 3 times in their daily food just for weight loss by completely avoiding rice. Recently I read in an article that Millets would slow down the thyroid activity. So moderate consumption is advised for people with thyroid problems.

In general ” Too much of anything is good for nothing”. So please consume it in moderate quantity and reap all it benefits. Maintain a healthy life style. This is my kind advice based on my own experience.

For people who are new to millet, please check my “All about millets” post for a better understanding. 

How to cook millets in pressure cooker

Millets names in different languages

ENGLISH – Finger millet, Kodo millet, Pearl millet, Barnyard millet, Little millet, Foxtail millet
 
HINDI - Nachani /mundua, Koden/Kodra, Bajra, Jhangora, Kutki, Kangni/Rala 
 
TAMIL – Ragi, Varagu, Kambu, Kuthiraivali, Samai, Thinai
 
KANNADA – Ragi, Harka, Sajje, Oodalu, Saame, Navane
 
TELUGU – Ragula, Arikelu, Sajjalu, Odalu, Sama, Korra
 
MALAYALAM – Panjipullu, Koovaragu, Kambam, Kavada pullul, Chama, Thina

How to cook millets in different ways

How to cook millets in different ways

How to cook Millet


How to cook Millet How to cook different types of millet - Thinai rice, varagu rice,samai, kuthiravali and kambu
Cuisine: Indian
Category: Millet Recipes
Serves: Serves 2
Prep time: 5-30 Minutes
Cook time: 10 Minutes
Total time: 15-40 Minutes


INGREDIENTS
1 cup - 240ml
  • Varagu arisi (Kodo millet), Samai arisi (Little millet), Kuthiraivali ( Barnyard millet) - 1/2 cup
  • Water – 1.25 cups to 1.5 cups ( 1:2.5 to 1:3 ratio)
  • Cooking oil - few drops (optional)
For thinai & kambu, water quantity may vary. Soaking is needed.
  • Thinai rice( Foxtail millet) - 1/2 cup
  • Water - 1.5 cups
  • Kambu / Pearl millet – 1/2 cup
  • Water – 2 cups
For making pongal, bisibelebath, thick porridge : use 1: 5 ratio of millet & water and use pressure cooker.
For making pulao, biryani : use 1:2 or 1: 2.5 ratio of millet and water. It is better to cook in open pan to get fluffy rice.
METHOD


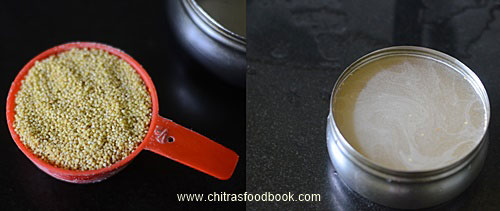
  • Try to buy unpolished millet because its healthier than polished ones. Wash the millet at least twice or thrice.Use a strainer or metal sieve with fine holes to filter it. Some millet may contain husk, dust particles or even small stones. So wash it well.
    HOW TO COOK VARAGU, SAMAI AND KUTHIRAVALI 
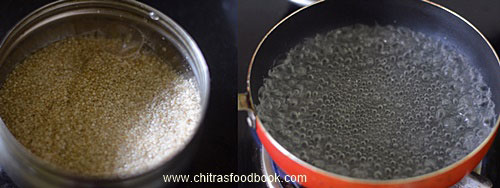
  • In Open pan : For 1/2 cup of varagu arisi, measure 1.25 cups of water ( 1:2.5 ratio). No need to soak in water. Heat water in a pan. When it starts to roll boil, simmer the flame completely.
 
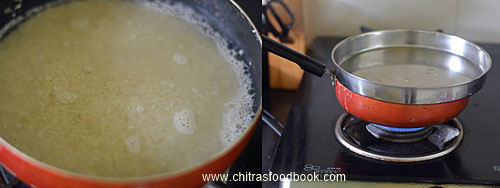
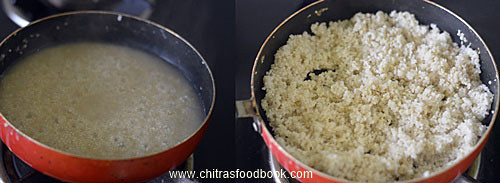
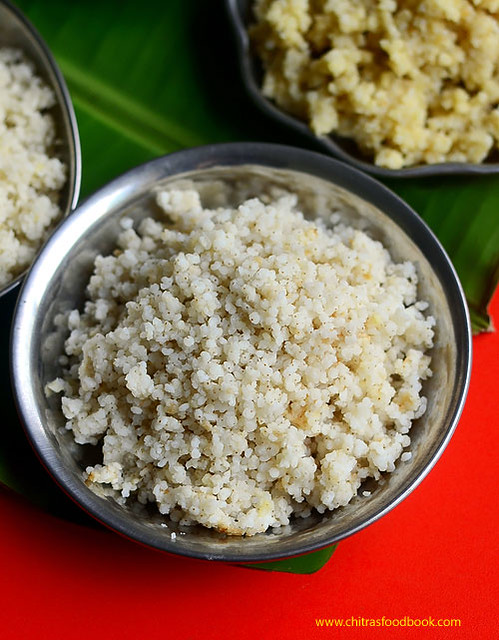
  • Add the washed and drained millet to the  boiling water. Lower the flame completely. Cover with a lid & cook for 5-7 minutes. Fluff it gently once in the middle using a fork. Cook till all the water is absorbed. Switch off the flame and keep it covered for 10 minutes.
  • It will get cooked in the resting time and becomes fluffy. After 10 minutes, you can remove it and serve with any sambar or any kuzhambu OR use it for making variety rice. Enjoy !

How to cook in rice cooker : Wash 1/2 cup of millet and drain the excess water. Boil 1.5 cups of water and add the millet
 ( 1:3 ratio). Cook it till the lights turn to warm mode. Open the cooker & check if its cooked well. If not, add 1/2 cup more water and cook for some more time.

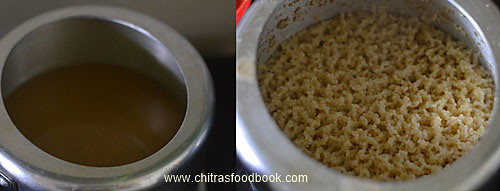
How to cook in Pressure cooker : For cooking in pressure cooker, wash the millet and drain the excess water. Heat a cooker base with 3 cups of water. In a cooker vessel, take 1/2 cup of varagu/ kodo millet, Kuthiravali/ barnyard millet and add 1.25 cups of water (1:2.5 ratio). 

For Samai/ Little millet, add 1 cup of water ( 1:2 ratio). Add few drops of cooking oil if you need fluffy rice. Cover with the lid and pressure cook in very low flame for 2 whistles. Make sure flame should be the minimum. It takes nearly 5-7 minutes to cook. If not, cook for 5 minutes in low flame and switch off the flame.

DO NOT COOK the millet directly in a cooker base. It may lead to burnt bottom layer. So its better and safe to cook millets by placing them inside a vessel.

If you are making pulao or biryani, you can directly cook it with spices and vegetables. In that case, add 1:2.5 water and keep an eye. Switch off after cooking for 6-7 minutes in very low flame. Open the cooker after the steam is released.

HOW TO COOK THINAI/ FOXTAIL MILLET
  • In a open pan : Wash the foxtail millet twice to remove the dust. Soak it for minimum 30 minutes. For 1/2 cup of thinai/ foxtail millet, heat 1.5 cups of water. When the water starts to roll boil, add the soaked thinai. Mix well and add a few drops of cooking oil. Cover and cook till all the water is absorbed. Toss it once or twice in the middle. Actually thinai takes long time to cook than other millets. So keep checking for the water content and add 1/4 cup more only if needed.
  • In a rice cooker : Wash 1/2 cup of foxtail millet and drain the excess water.Soak it for an hour. Boil 1.5 cups of water and add the millet. Cook it till the lights turn to warm mode. Open the cooker & check if its cooked well. If not, add 1/2 cup more water and cook for some more time. 
  • How to cook in Pressure cooker : For cooking in pressure cooker, wash the millet and drain the excess water. Heat a cooker base with 1.5 cups of water for 1/2 cup of thinai. Let the water roll boil. Add the washed millet, few drops of cooking oil and mix well. Cover with the lid and pressure cook in very low flame just for one whistle. Make sure flame should be the minimum. It takes nearly 5-7 minutes to cook. If not, cook for 5 minutes in low flame and switch off the flame. Cooking for longer time burns the bottom layer. So keep an eye.
How to cook thinai
How to cook thinai
  • HOW TO COOK KAMBU/ PEARL MILLET : Wash the kambu well. Soak in water for 30 minutes. Drain the excess water and spread in a cloth. Let it dry for 5 minutes. Grind it coarsely in a mixie to remove the husk. Sieve it well. Boil 2 cups of water for 1 cup of kambu. When the water starts to roll boil, add the kambu, mix well without lumps and cook till all the water is absorbed. Cover & cook it. Kambu cannot be cooked fluffy. It comes out mushy in texture.
  • In pressure cooker : Take 3 cups of water in a pressure cooker for 1 cup of kambu. Cook for one whistle in low flame or 3 whistles in medium flame.
Enjoy with sambar, kootu and poriyal !


How to cook millet


Note
  • The quantity of water may vary. +/- 1/2 cup difference may be there.
  • Cooking time may vary for the cooker and open pan method. So keep an eye if you are cooking for the first time.

MILLET RECIPES


Continue Reading...


September 15, 2016

Ulli Theeyal Recipe Kerala Style - Small Onion Theeyal /Shallot Curry

Ulli theeyal recipe Kerala
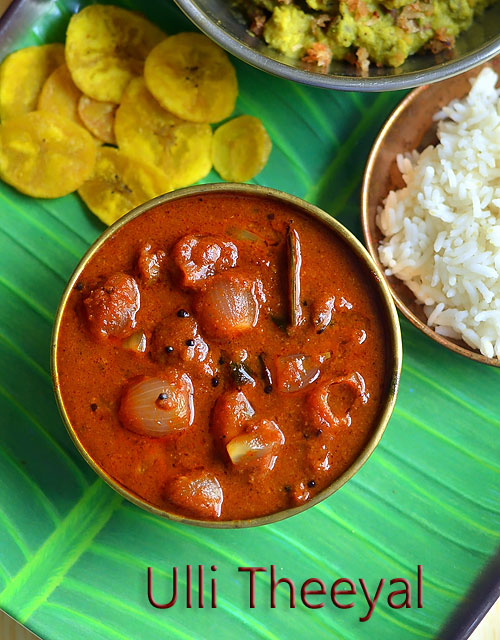
Ulli Theeyal is a Kerala special, gravy kind of side dish served for rice. Ulli means onion in Malayalam. Theeyal curry preparation is usually made with pearl onions (Shallot/Small onions) as the main ingredient. For variations, drumstick(Muringakka), Bittergourd(Pavakka) or ladies finger(Vendakka) can also be added along with onion. It is also served in Onam sadya. This gravy tastes similar to Tamilnadu Arachuvitta Puli kuzhambu.

 Traditional, authentic theeyal recipe calls for roasting coconut along with whole spices like coriander seeds, red chilli whereas I followed an easy and quick version from Marias menu. I have used Dhania powder and red chilli powder along with coconut.It came out really well and finger licking delicious.I am sure I will make this kuzhambu very often in my kitchen.Lets see how to make Kerala style Ulli theeyal recipe with step by step photos !

Check out other Kerala recipes too.
Ulli theeyal recipe Kerala

Ulli theeyal recipe - Kerala style Shallot curry for rice


Ulli theeyal recipe - Kerala style Shallot curry for rice Ulli theeyal recipe - Kerala special spicy, tangy gravy made with small onion/Shallots
Cuisine: Indian
Category: Side dish for rice
Serves: Serves 2-3
Prep time: 10 Minutes
Cook time: 20 Minutes
Total time: 30 Minutes


INGREDIENTS
1 cup - 240 ml
  • Small onions/ Shallots - 15 nos
  • Tamarind - Big gooseberry size
  • Salt & water - as needed
To saute in oil
  • Coconut oil - 2 tbsp
  • Grated coconut - 1/2 cup
  • Red chilli powder – 1.5 - 2 tsp
  • Dhania powder - 2 tsp
  • Turmeric powder - 1/4 tsp
To temper
  • Coconut oil – 1.5 tbsp
  • Mustard seeds - 1/2 tsp
  • Fenugreek seeds - 1/8 tsp
  • Curry leaves - few
  • Red chilli - 1 no ( pinched)
METHOD

  • Soak tamarind in 1 cup of water for 15 minutes and take the extract.Wash and peel the small onions. Slice it into two if its very big. Set aside.
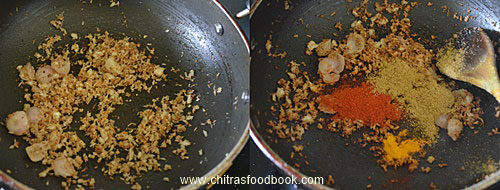
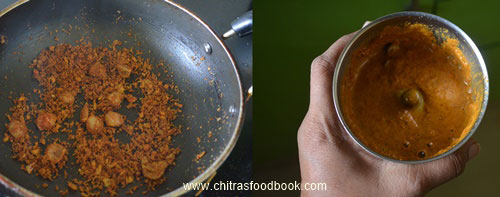
  • In a big kadai, heat oil and roast the grated coconut along with 5 small onions.Roast till coconut starts to turn golden brown with a nice roasted smell. It takes nearly 10 minutes to do this. So stay nearby and roast it patiently with continuous stirring. Keep the flame medium. Finally add the turmeric powder, red chilli powder and dhania powder. Mix well for a minute till raw smell leaves and switch off the flame. Let it cool down completely. Then grind them to a paste.
    Ulli theeyal - Kerala style
    Ulli theeyal - Kerala style
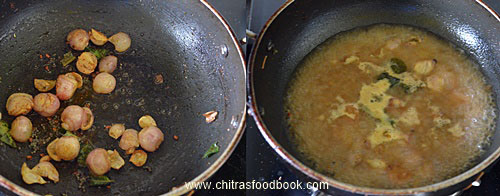
  • Heat 1 tbsp of oil in a kadai. Splutter mustard seeds, fenugreek seeds, curry leaves. Saute the  small onions till transparent. To this, add tamarind extract and required salt. Boil the gravy till onions cook well. After the onion is cooked, add the ground coconut paste. Check for taste, add more red chilli powder & dhania powder if it tastes tangy. Boil well till the gravy thickens and leave oil.
    Ulli theeyal - Kerala style
    Ulli theeyal - Kerala style
  • Enjoy ! This gravy thickens  more in time. So adjust the consistency by adding some water and give a boil before serving. check for taste and add more salt or red chilli powder, dhania powder if needed. Boil and serve !
  • This gravy stays good for weeks stored in refrigerator ! Use clean spoon for every use.

Note
  • Add more chilli powder if you like spicy gravy.
  • This gravy tastes the best with small onions. so its better to use it. If you don’t have them in hand, you can use big onion but flavors may differ.
  • Add less tamarind if its more tangy.

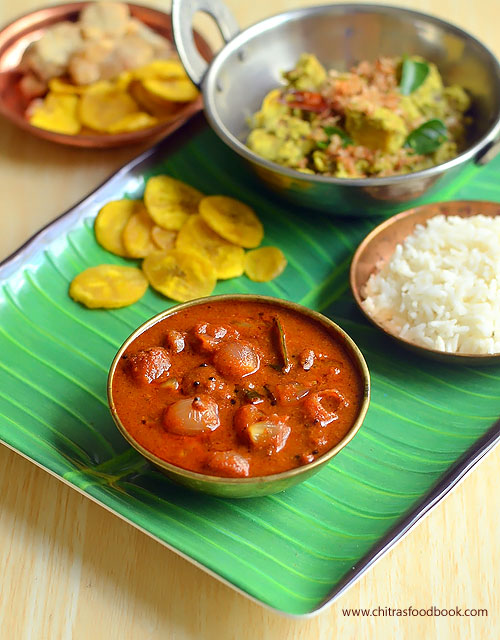
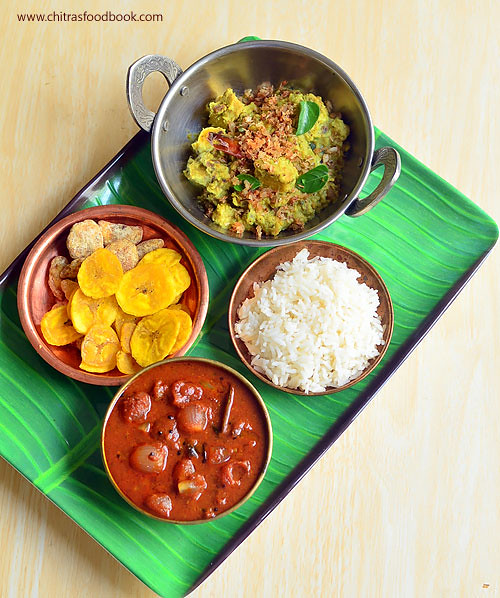
Yummy, finger licking Kerala ulli theeyal is ready to serve ! I served with Chena Erissery, Nendran chips and rice !!
Ulli theeyal recipe
Continue Reading...


September 13, 2016

Kerala Semiya Payasam Recipe – Vermicelli Kheer – Kerala Payasam Recipes
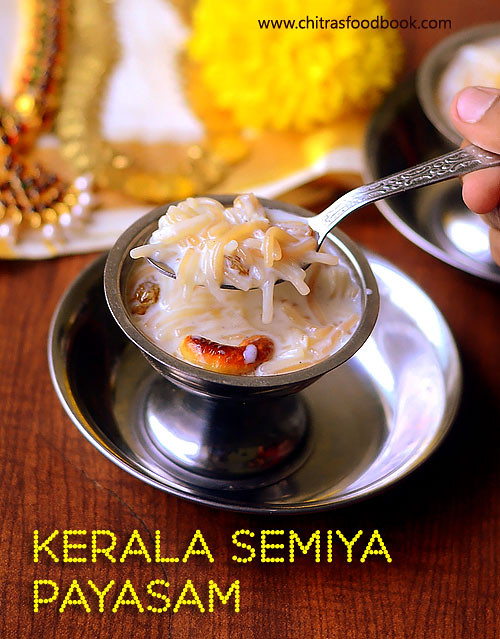
Kerala semiya payasam recipe
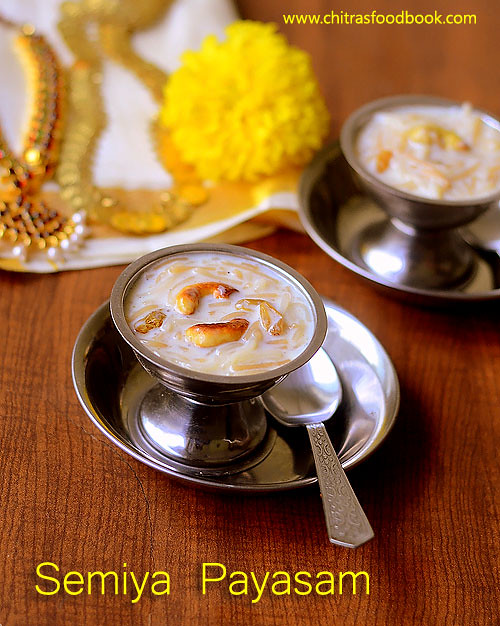
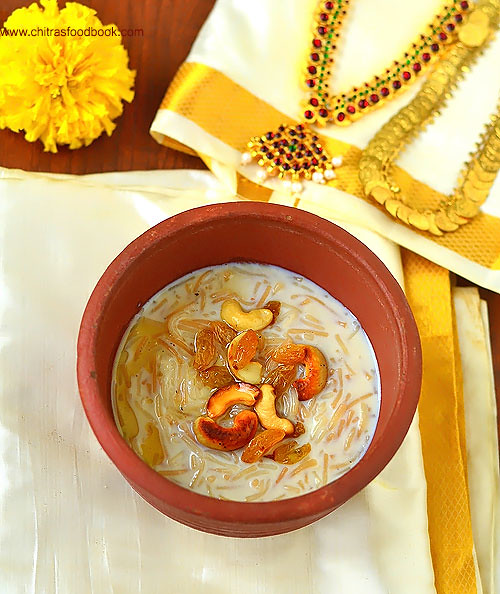
In Kerala, People make varieties of payasam recipes for Onam sadya menu. My neighbor told they make nearly 3-4 different types of payasam with jaggery and sugar. Semiya payasam@vermicelli kheer is one of the most popular and easy Kerala payasam recipe. Some people make it by adding condensed milk (Milkmaid) whereas I prepare in Nadan style with reduced milk following a chef’s recipe from Vanitha magazine. 
I modified the recipe and prepared in pressure cooker without adding condensed milk to make it quickly. Even though the ingredients of  Kerala semiya payasam is very similar to Tamil nadu semiya payasam, its preparation is slightly different from ours. It comes out very rich, tasty and creamy. Do try it for special occasions in your family. I am sure everybody will love it. Lets see how to make Kerala style semiya payasam with step by step photos !

Check out my Kerala Onam sadya feast in this link

Kerala vermicelli payasam recipe

Semiya Payasam - Vermicelli Payasam ( Kerala style)


Semiya Payasam - Vermicelli Payasam ( Kerala style) How to make Kerala Special semiya payasam using pressure cooker
Cuisine: Kerala
Category: Sweet
Serves: Serves 2-3
Prep time: 5 Minutes
Cook time: 20 Minutes
Total time: 25 Minutes


INGREDIENTS
1 cup - 250ml
  • Semiya/ Vermicelli - 1/4 cup
  • Full fat Milk - 2 cups
  • Water - 1/2 cup
  • Sugar - 1/4 cup
  • Ghee – 1 tbsp
  • Cardamom powder -1/8 tsp
  • Roasted cashew nuts & Raisins/dry grapes - 2 tbsp
HOW TO MAKE KERALA STYLE SEMIYA PAYASAM - METHOD

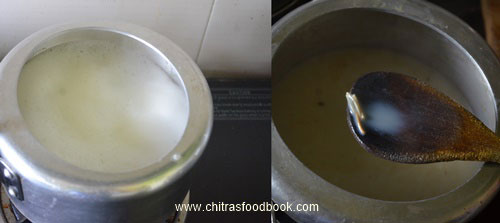
  • In a pressure cooker base, take the milk + water.Allow it to boil in medium flame till it reduces to 1.5 cups ( almost 1/2). Keep an eye on it to prevent from spilling. Milk becomes slightly thick.
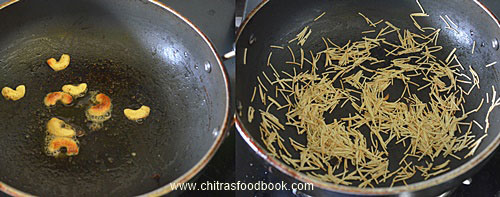
    In the mean time, heat a kadai with ghee. Roast cashews till golden and remove in a plate leaving the ghee in the pan. Roast raisins( dry grapes) till it turns plumpy. Remove in a plate. In the remaining ghee, add the semiya/vermicelli and roast for few minutes till it turns golden in color.
    Kerala semiya payasam
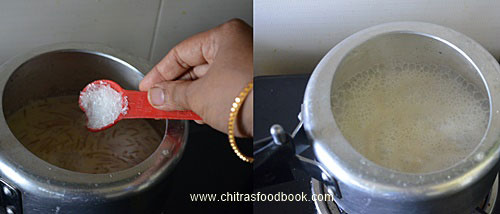
  • Add the roasted vermicelli to the boiling milk and pressure cook in very low flame for 1 whistle. Remove after the pressure is released by itself. Open the cooker and stir well. Vermicelli would have cooked well in milk. But it should not be mushy. Now add sugar, cardamom powder and boil till sugar melts. Remove and serve warm or chilled by refrigerating the payasam.
    Kerala semiya payasam
    Kerala semiya payasam
Enjoy !

Note
  • Adjust the quantity of sugar based on your taste.
  • Use thick milk for best taste. You can even use 3 cups of milk, reduce it to half of its quantity before cooking the semiya.
Creamy, delicious Kerala special Vermicelli Payasam is ready to relish !!
Kerala semiya payasam
Continue Reading...


September 12, 2016

Tomato Rasam Recipe–Kerala Style Thakkali Rasam Without Rasam Powder


Kerala tomato rasam recipe
In Kerala, Tomato rasam/Thakkali rasam is mostly served in Onam sadya. Basically Kerala style rasam can be done easily with instant rasam powder or with freshly ground spices. I was looking for a simple and easy rasam recipe without rasam powder and found in this blog. It came out super delicious and flavorful.After a long time, myself and Raksha had a plateful of rasam rice along with our favorite side dish papadam. Do try this yummy Kerala Rasam for this Onam sadhya and enjoy like me. Lets see how to make Kerala thakkali rasam without rasam powder.

Check out my other Onam sadya recipes.

Tomato rasam recipe - Kerala style

Tomato rasam recipe - Kerala style rasam


Tomato rasam recipe - Kerala style rasam Kerala style rasam without rasam powder - Kerala tomato rasam for Onam sadya
Cuisine: Kerala
Category: Rasam
Serves: Serves 2
Prep time: 10 Minutes
Cook time: 20 Minutes
Total time: 25 Minutes


INGREDIENTS

  • Ripe tomato - 2 nos  
  • Tamarind – medium gooseberry size
  • Red chilli powder – 1/4 tsp
  • Coriander powder/Dhania powder - 1 tsp
  • Turmeric powder - 1/8 tsp
  • Salt & water - as needed
To grind
  • Small onion - 3 nos OR Big onion – 1/2 no
  • Pepper corns - 1/2 tsp
  • Cumin seeds - 1 tsp
  • Garlic cloves – 3 nos
To temper
  • Coconut oil or ghee - 1 tbsp
  • Mustard seeds - 1/2 tsp
  • Red chilli - 1 no ( Pinched)
  • Green chilli - 1 no ( slit)
  • Curry leaves - few
  • Coriander leaves - to garnish
HOW TO MAKE KERALA TOMATO RASAM - METHOD
  • Soak tamarind in 1 cup of water for 20 minutes.Take the extract.Chop tomato into small pieces. Grind onion, pepper corns, cumin seeds,garlic coarsely without adding water. Set aside.
    Kerala style tomato rasam recipe

  • Heat oil or ghee in a kadai and splutter mustard seeds,red chilli, curry leaves and green chilli.Saute for few seconds. Now add the coarsely ground paste. Saute for a minute. Add salt, chopped tomato, turmeric powder, red chilli powder and dhania powder. Saute well till tomato turns mushy .Add the tamarind extract. Tomato rasam recipe - Kerala style
  • Boil well for 2-3 minutes till rasam becomes frothy. Add chopped coriander leaves and give one boil, switch off the flame. Transfer to a vessel and cover it with a lid. Let it rest for 15 minutes before serving.It helps for all the flavor to blend well. Serve with hot rice and papapdam. Tomato rasam recipe - Kerala style
      Enjoy! Adjust the quantity of chilli powder based on your spice level.

      Flavorful Kerala style tomato rasam is ready to serve with rice. Enjoy with papad !
      Tomato rasam recipe - Kerala style
      Continue Reading...


      September 10, 2016

      Onam Sadya Recipes – Kerala Onam Sadhya Vibhavangal/ Lunch Menu

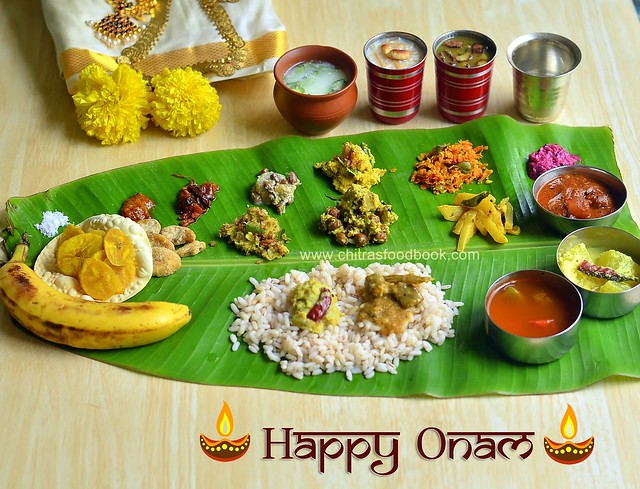
      I am extremely happy and proud to share my 5th Onam sadya lunch menu with you all. Since 2012, I have been sharing varieties of Onasadhya feast during ThiruOnam festival. Every year I used to attempt some new, authentic Kerala dishes in my Onam sadya. I take this as a chance to learn many Kerala recipes and to express my passion for their food. Moreover Sendhil and myself loves to have feast and treat ourselves with Kerala delicacies.

      Initially I started with a simple Onam sadhya menu in 2012. Later I started making around 15-20 dishes for the onam feast every year. Onam sadya preparation is the one and only thing that makes me busy in my kitchen and cook continuously for 3-4 hours. Pre Planning and organization is very important to cook a sadhya. So I have shared Onam sadya items list, how to prepare easily, Onam sadya serving order etc according to my knowledge and experience. Please excuse me and correct me if there is anything wrong.

      Most of the dishes are tried from our fellow food bloggers of Kerala. I have given the links for each recipes. I hope this post would help you plan and prepare Kerala Onam sadya easily and quickly. Lets see how to prepare Onam sadya lunch menu in detail.

      Please check out my other Onam Sadya menu below :


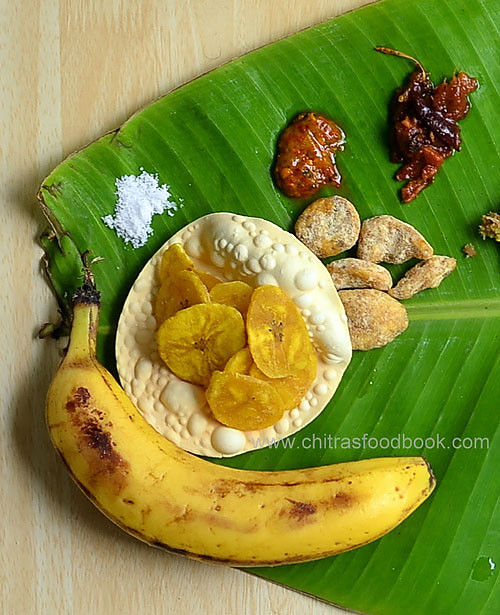
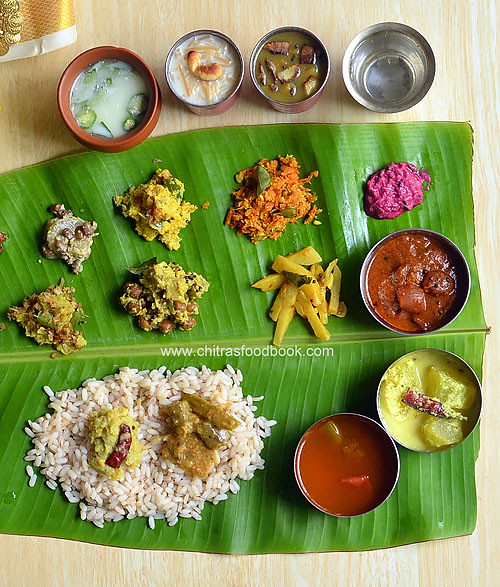
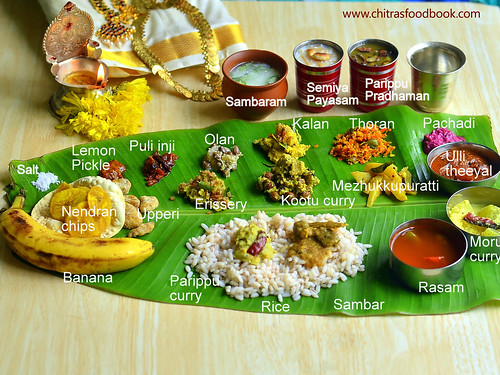
      Onam sadya Serving order : From tip of banana leaf : Salt, Papadam, Nendran banana, chips, upperi, Puli inji, Pickle, Olan, Kalan, Erissery, Puliserry, Avial, Kootu curry, Thoran, Mezhukkupuratti, Pachadi, Kichadi. In the center of leaf : Rice, Parippu curry, ghee, Sambar, Moru curry, ulli theeyal, rasam, Sambaram, Parippu pradhaman, Payasam varieties on the top corner.

      Refer image below.

      Onam sadya serving order

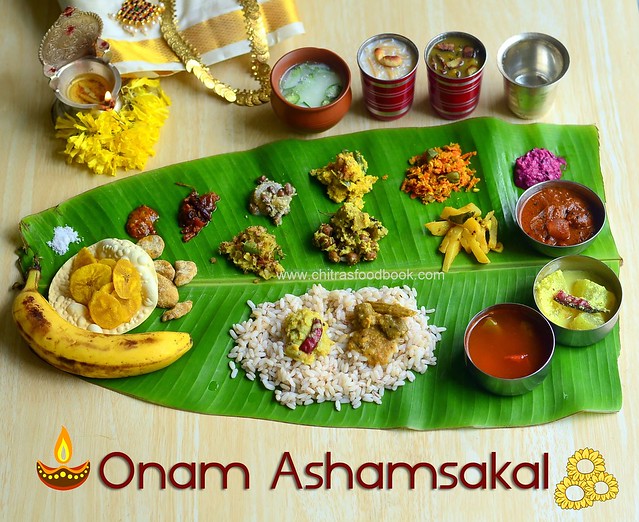
      Wish all my readers and friends a very happy Onam.”ONAM ASHAMSAKAL” !!

      How to prepare onam sadya

      Onam sadya Recipes - Kerala Lunch Menu


      Onam sadya recipes Onam sadya lunch menu recipes - Kerala Onam vibhavangal
      Cuisine: Kerala
      Category: Onam sadya
      Serves: Serves 2-3
      Prep time: 60 Minutes
      Cook time: 180 Minutes
      Total time: 4 hours


      INGREDIENTS
      Onam sadya items list for cooking
      • Vegetables I used for this menu ( Yam, Raw banana, Drumstick, Ash gourd/Kumbalanga, Carrot, Potato, Beetroot ) for thoran, Mezhukkupuratti, Pachadi, Olan, Kalan, Kootu curry, erissery, moru curry, sambar
      • Small onions
      • Ginger for Puli inji
      • Moong dal for Parippu curry
      • Curry leaves
      • Tamarind
      • Red chillies
      • Green chillies
      • Cumin seeds
      • Brown chana
      • Black eyed peas/Cow peas
      • Coconut oil
      • Coconut
      • Banana
      • Nendran banana
      • Moong dal for Parippu pradhaman
      • Jaggery
      • Semiya for semiya payasam
      • Sugar
      • Coconut milk
      • Cardamom seeds
      • Dry ginger powder
      • Papad
      • Salt & water
      • Sour Curd for moru curry
      • Buttermilk for Sambaram
      • Mustard seeds + Urad dal + Red chilli - For tempering
      Onam sadya recipes with links
      Side dishes
      Payasam recipes
      Sambaram

      Other recipes ideas for menu
      Onam Sadya menu
      HOW TO MAKE ONAM SADYA - METHOD
      • Plan the menu, buy the vegetables and other items one day before Onam. Soak the tamarind for sambar, rasam and brown Chana( Kadala) overnight. Wash and soak the matta rice overnight or for 2 to 3 hours. 
        • In the morning, after taking bath, start cooking. Soak the Ada in water for 30 minutes if you are making ada pradhaman. 
        • I used 2-3 cookers of 3 liter capacity for making this menu quickly.
      • Last year when I made sadya, I noticed that most of my time was spent in pre preparatory works like grating coconut, extracting coconut milk, grinding masala, chopping vegetables and for cooking dals & vegetables. This year I wanted to make all these works simple and easy. So instead of grating 2 coconuts, I made small slices of it using a ladle edge with thick & blunt handle as you see in the picture. Make sure your mixie blades are in good condition else it may break. 
      • Then I dry ground all the coconut slices together and divided them into 2 parts. I used one part for taking coconut milk and the other part for masala. It saved lot of time for me. Take the required amount of coconut for each dish. Most of the dishes call for grinding coconut +green chilli+ jeera to a smooth paste. So grind it by taking a portion of coconut. Keep it and use wherever needed. Use the remaining coconut for taking coconut milk. Add in payasam.
        How to prepare onam sadya
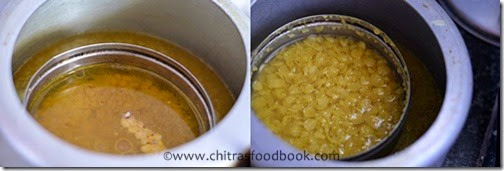
      • Also I dry roasted the moong dal for parippu curry and pressure cooked it along with toor dal for sambar together in my big pressure cooker by placing moong dal in the bottom of cooker and toor dal for sambar in a tiffin box. Please refer the picture. U can even keep a plate of mixed vegetables required for sambar over the toor dal. 
      • While the dals are cooking, You can chop the vegetables for sambar, avial or kootu curry, olan, Pulisssery, pachadi, kichadi & inji curry. By this time, steam would be released from the cooker. Remove the toor dal box and mash the dal well. Similarly mash the moong dal too. Add little ground coconut paste to moong dal and boil well. Parippu curry is ready.
        How to prepare onam sadya
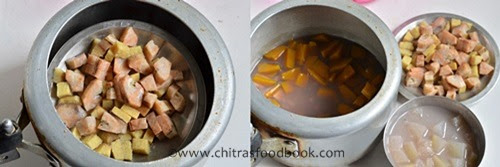
      • For cooking Vanpayar and vegetables for olan, kalan and erissery, I again used my big cooker and cooked them together by keeping one above the other in small bowls and plates. As all these veggies gets cooked in one go, you just have to add them in coconut mixture and boil it. For thoran, I cooked it in my small cooker adding very less water and cooked in high flame for two whistles.
        How to prepare onam sadya
      • After removing this, cook the red rice adding 1:12 water and drain the excess water. Keep the rice aside. Make sambar, rasam and other dishes. Make the payasam at the end using the cookers ! It takes nearly 2-3 hours.
      Disclaimer: I know these are not the authentic method of cooking Kerala food but to make my job easier, I followed these steps and I hope it would help beginners. Friends, please excuse me.

      Thanks for visiting this page. Hope you will try all these recipes and like it.

       Once again, I wish you all a very happy Onam. Enjoy the feast!


      Onam sadya items

      Make a grand Onam spread on Festival day and enjoy with your family members.
      Wish you all a very happy Onam !!

      Onam sadya recipes

      Continue Reading...