Search Chitra's Food Book

October 25, 2014

65 Chutney Recipes - South Indian Chutney Varieties For Idli, Dosa

Chutney recipes
Recently a reader requested me to share all the chutney recipes for idli, dosa in my blog as a collection under one page for easy reference. Then I realized I had posted nearly 65 chutney varieties as side dish for idli, dosa and other breakfast recipes like pongal, upma, paniyaram, neer dosa, wheat dosa, other instant dosa etc.

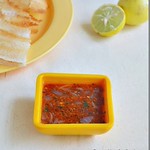
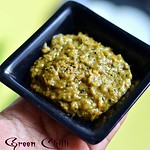
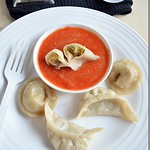
Generally we Tamil people make idli, dosa thrice in a week. So whenever I make idli dosa for breakfast, I used to hit my head thinking about the different types of side dish to prepare. And my search ended up with 60+ chutney recipes here. I have categorized them as list of  South Indian chutney varieties like coconut chutney recipes, tomato chutney recipe, onion chutney recipe, peanut chutney recipe, garlic chutney recipe, vegetable chutney recipe, spicy chutney for dosa without coconut, Chettinad style chutney, hotel style green chutney, few easy chutney recipes for working women, Andhra style chutney, brinjal chutney, Curry leaves chutney, mango chutney recipe, Travel chutney, Chat chutney, momo chutney and some thokku recipes for idli, dosa like tomato thokkku, tomato onion thokku and few more for easy selection.  All these recipes are with step by step pictures for easy understanding.

Basically I love making different and tasty side dish for idli and dosa.  Most of them are easy to make in busy morning hours and can be prepared in less than 10 minutes. I have also shared my tips on how to make white colored coconut chutney like in hotels, greenish mint and coriander leaves chutney and bright reddish tomato chutney, how to grind thick chutney, tips to troubleshoot watery chutney during winter based on my experience.

I hope this post will be useful for beginners who look for varieties of chutney recipes for idli,dosa and pongal. Friends, do try these chutney varieties all through the month and take credits from your family members. Ok, lets see the different types of chutney recipes of Tamil nadu for idli, dosa with tips and tricks to grind perfect chutney.

UPDATED : Recently I have made few 3 in 1 video recipes on varieties of easy, no cook, coconut chutney recipes ( white coconut chutney, red coconut chutney and green coconut chutney), 3 types of spicy raw onion chutney recipes and 3 different peanut chutney recipes. I have shared them below. Please check it :)

3 Coconut chutney recipes video 👇


3 Peanut chutney recipes video 👇


3 Raw Onion Chutney Recipes 👇


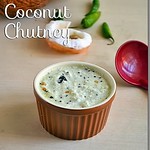
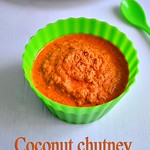
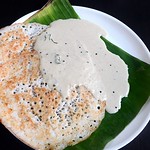
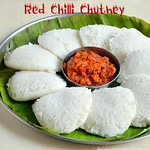
Tamilnadu hotel coconut chutney


TIPS TO MAKE PERFECT CHUTNEY

These are the tips I generally follow to make my chutneys easily and to look colorful. I hope it would be useful for beginners and bachelors. Experts, do share your tips in my comment section.It would be helpful for all of us.
How to slice coconut


  • During early or busy morning hours,the most noisy and irritating job is to grate coconut in large quantities for chutneys. U can buy grated coconut from the shops, freeze it in a zip lock bag & use them whenever needed. But some people don’t like the the taste of frozen coconut. Its the same in my house too.
  • So what I do if I want to grind coconut without grating is, I slice or chop the coconut using the back of a thick ladle. I remove it as thin, small slices for the mixer to grind easily. I don’t use knife as it is risky. So I use this ladle (shown in the picture ). This makes my job easier. But one thing, don’t follow this procedure everyday. Ur mixie jar blade may worn out/break soon. Make sure your mixie is of high power say 750W. So try this option once in a while if you are in a hurry.
  • For some people, most of the time coconut chutney becomes watery & it separates from the chutney. To avoid this, first dry grind all the ingredients adding salt. U will get a wet coarse powder. Then add water little by little and grind it for more time. U will get a smooth thick chutney. ( U can also use little milk to get white colored chutneys but its shelf life would be reduced)
  • During winter season,whenever u grind coconut for chutneys, you will find a layer of whitish oil separated from the chutney. Chutney won’t taste good. Use warm water to grind the chutney. The problem will be solved !!

DO’s and DONT’s TO MAKE WHITE COCONUT CHUTNEY

DO’s:
1. Always use fresh grated coconut, little brown coating of shell skin is ok to use. More coconut less pottukadalai/Fried gram is also a must for white chutneys.
2. Less water for Khatti (thick )chutney, add only if its necessary to run your mixie.
3. Indian mixer or small jars are a must.
4. Use small green chillies and always use less green chillies for white color chutney and increase the spiciness by tempering with more red chillies.

DON’Ts:
1. Ready made flakes or desiccated flakes or frozen grated coconut will work but don't expect taste and color. Mostly yuck, pale white color with oily look. In that case, follow the above tip I mentioned for winter season.
2. No microwaving for reheating, just thaw to bring back to room temperature. Reheating makes it release more oil and which results in stinky coconut smell.
3. Blender will not work for thick chutney and adding more water will make it thin but consistency will be still coarse.


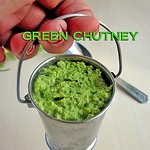
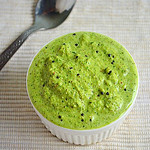
TIPS TO MAKE COLORFUL RED and GREEN CHUTNEYS

Chilli varieties
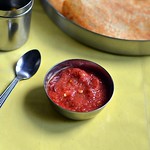
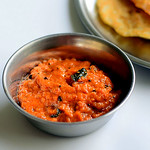
  • To get a bright red colored tomato or onion chutneys, use Byadgi red chilli variety (crushed ones) as shown in the above picture. I usually mix byadgi and spicy red chilli varieties to make my chutneys look colorful as well as spicy. Try this tip. It works great. If using chilli powder, use Aashirvad or MTR Kashmiri chilli powder. It gives a nice color to gravies and chutneys.
  • Bright green chutneys are always appealing to our eyes. To get a bright green colored chutneys, follow this tip. Saute coriander leaves or mint leaves in little oil for few seconds before grinding. Add a pinch of sugar while sauting and add a pinch of turmeric powder while grinding. If you don’t want to saute, just add a pinch of turmeric powder and sugar while grinding the chutney. It comes out in super green color.

HOW TO GRIND CHUTNEY IN RIGHT CONSISTENCY

  • When you grind the ingredients for chutney in a mixie jar, first grind it without adding water. After it turns coarse, add water little by little and grind smooth to the required consistency. This helps to avoid making too thick or thin/watery chutney.
  • If the chutney becomes watery, add little more grated coconut & fried gram dal ( roasted chana dal) and grind to make it thick.
  • If the chutney is too thick you can add little water and grind for more time to make it smooth.
  • Coconut chutney and chutney with dal thickens when it cools down and refrigerated. In that case, add 1 to 2 tbsp hot water, mix well and bring to desired consistency. Check for salt too.

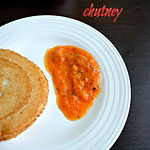
Chutney recipes for idli,dosa - South Indian Chutney Varieties

Chutney recipes for idli,dosa Chutney recipes for breakfast/Dinner - Side dish for idli, dosa and pongal.
Cuisine: Indian
Category: Chutney Recipes
Serves: 2
Prep time: 5 Minutes
Cook time: 10 Minutes
Total time: 15 Minutes

INGREDIENTS

Major ingredients used in all chutneys
  • Coconut
  • Tomato
  • Onion
  • Peanut
  • Curry leaves, coriander leaves, mint leaves
  • Mixed vegetables
  • Chillies
  • Ginger, garlic
  • Tempering ingredients like mustard, curry leaves.


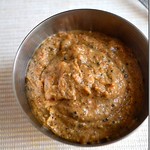
COCONUT CHUTNEY RECIPES


Tamilnadu hotel chutney
Karnataka hotel chutney
Karnataka Red coconut chutney
Karnataka red coconut chutney
Kerala red coconut chutney
Coconut chutney with onion
Pottukadalai chutney
Pottukadalai chutney without coconut
Coconut chutney for idli
Fried gram dal chutney/Pottukadalai chutney
Red coconut chutney with garlic
Coriander leaves chutney
Mint chutney/Pudina chutney
Hotel getti chutney
Hotel green chutney
Coconut chutney for travel


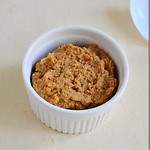
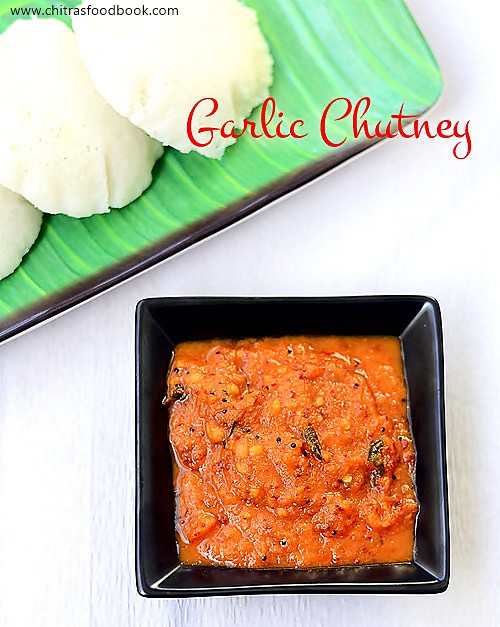
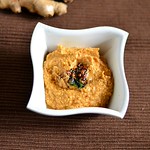
GARLIC CHUTNEY RECIPE


Easy side dish for chapathi-Tomato garlic chutney
Tomato garlic chutney for roti
Garlic chutney
Garlic chutney with onion
Momos chutney
Momos chutney
Kara chutney recipe
Garlic tomato chutney
Poondu molaapdi for vendhaya dosai


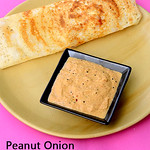
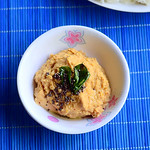
PEANUT CHUTNEY RECIPES


Hotel peanut chutney
Andhra hotel peanut chutney
Peanut chutney without onion, garlic
Peanut red chilli chutney
Peanut red chilli chutney without coconut
Easy peanut chutney
Peanut onion chutney
Andhra Tomato peanut chutney
Tomato peanut chutney


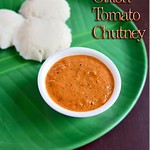
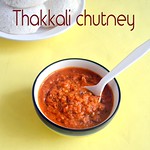
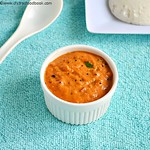
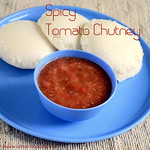
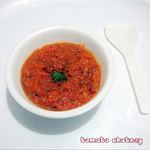
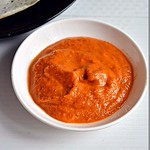
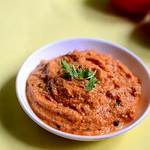
TOMATO CHUTNEY RECIPES


Boiled tomato chutney
Green tomato chutney
Hotel kara chutney
Hotel Kara chutney recipe
Tomato mint chutney
Tomato chutney without onion garlic
Tomato Chutney without Onion Garlic
Onion tomato chutney
Tomato chana dal chutney
Tomato chutney with ginger
Hotel red chutney
Raw tomato chutney
Tomato onion chutney for ragi dosa
Onion chutney for Aapam
Tomato gram dal chutney
Tomato roasted gram dal chutney


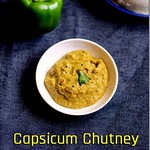
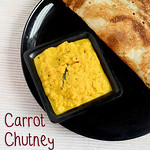
VEGETABLE CHUTNEY RECIPES


Raw mango chutney
Raw mango chutney
Capsicum chutney
Capsicum chutney
Mixed vegetable chutney
Carrot chutney
Sutta kathrikai chutney/Brinjal chutney
Spring onion chutney
Radish chutney/Mullangi chutney
Kadamba chutney
Kadamba chutney
Beetroot chutney
Beetroot chutney


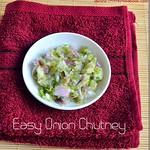
ONION CHUTNEY RECIPES


Onion chutney without tomato, coconut
2 ingredient raw onion chutney - Super easy
Raw onion chutney with garlic
Spicy raw onion chutney without garlic


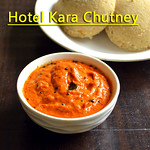
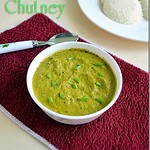
SPICY CHUTNEY RECIPES


Ginger chutney/Inji chutney
Lemon chilli chutney
Green chilli chutney/Milagai thogayal
Garlic dip for momos
Chettinad vara milagai chutney
Kara chutney recipe


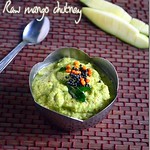
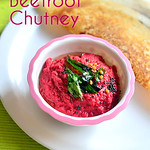
OTHER CHUTNEYS and THOKKU RECIPES


Curry leaves chutney
Onion chutney for travel
Walnut chutney
Onion tomato thokku
Onion tomato thokku - Chef's style
Easy tomato thokku Recipe
Tomato thokku - My mom's style
Thakkali thokku - My mom's style
Chat chutney recipe
Chat chutney recipes
Bombay chutney for poori,idli,dosa
Continue Reading...


October 23, 2014

Iyengar Milagu Kuzhambu Recipe-Pepper kuzhambu-No onion No Garlic Recipes

Milagu-kuzhambu
After having all the Diwali stuffs, all we needed is a simple vatha kuzhambu & sutta appalam for our lunch today. As I have shared enough variants of vatha kuzhambu in my blog, I wanted to try & post this Iyengar style milagu kuzhambu/Pepper gravy recipe as it was requested by a reader long time back in my facebook page. I usually make milagu kuzhambu in this way adding onions & garlic. But when the reader asked me to share this no onion no garlic version, I immediately asked my school friend Sumi for her recipe.

Based on the ingredients she told, I browsed few websites and prepared this gravy. As Sendhil is very much fond of pepper recipes, he loved this gravy a lot. Though it is a no onion no garlic recipe, it was very flavourful and yummy. Its very easy to make in busy morning hours as there is no chopping works at all. Even bachelors can give this a try. I found sutta appalam & Daangar pachadi are the best combinations for this gravy. When I read this, I got tempted to try Daangar pachadi. I must try & taste that combo soon. Ok, lets see how to make this yummy Iyengar, brahmin style milagu kuzhambu.

Do check out my Brahmin style easy manathakkali vatral kuzhambu recipe here.

iyengar-milagu-kuzhambu

Iyengar milagu kuzhambu


Iyengar milagu kuzhambu Iyengar style, flavourful pepper gravy/Milagu kuzhambu for rice!
Cuisine: Indian
Category: Gravies
Serves: 2-3
Prep time: 5 Minutes
Cook time: 15 Minutes
Total time: 20 Minutes


INGREDIENTS

  • Tamarind - a big gooseberry size
  • Salt & Water - as needed
  • Turmeric powder - 1/8 tsp
To roast & grind
  • Cooking oil - 1 tsp
  • Pepper corns - 1.5 tsp
  • Urad dal - 1 tsp
  • Red chillies - 1 no ( use 2 for more spicy)
  • Cumin seeds/Jeera - 1/2 tsp
  • Curry leaves - 5-7 nos
To temper
  • Gingely oil - 1 tbsp
  • Mustards seeds - 1/2 tsp
  • Urad dal - 1/2 tsp
  • Hing/Asafetida - a big pinch
HOW TO MAKE MILAGU KUZHAMBU - METHOD

  • Soak tamarind in warm water for 10 minutes and take the extract. Set aside. In the mean time, lets do the roasting part.
  • In a small kadai, roast all the ingredients given under “ to roast & grind” till pepper corns start to splutter and urad dal turns golden brown. After its cooled down, grind it to a smooth paste adding required water.
Milagu kuzhambu step2
  • In a kadai, heat gingely oil and temper all the ingredients given under”to temper”. Add the tamarind extract, salt, turmeric powder and few pinched curry leaves. Let it boil till its raw smell goes off. Add a small piece of jaggery while the gravy boils. Then add the ground pepper paste and boil well till the gravy thickens a bit.
Milagu kuzhambu step1
  • Remove the gravy. Serve hot with plain rice adding few drops of ghee. Enjoy with sutta appalam & kootu.
Milagu kuzhambu step3

Enjoy !
Note
  • Some people also add 1 tsp of toor dal while roasting. If you want to use toor dal, reduce urad dal to 1tsp.
  • Add more red chillies or pepper corns while roasting to make a spicy gravy.
  • If you want to add onions & garlic,chop it finely & saute it after you temper.


Enjoy this milagu kuzhambu mixing with plain rice topped with few drops of ghee & sutta appalam as side dish. It tastes yum!
Milagu-kuzhambu-recipe
Continue Reading...


October 21, 2014

DEEPAVALI MARUNDHU RECIPE - DEEPAVALI LEGIYAM

Diwali-marundhu-recipe
Last year I shared my mom’s Tirunelveli style ginger legiyam recipe/Inji legiyam as easy deepavali marundhu recipe. But I wanted to try the actual Diwali marundhu recipe at home for long time. Recently I bought deepavali legiyam from Salem “Home foods” as suggested by Sendhil’s friend. 

As we liked its taste very much, this time I made diwali legiyam on my own referring my cook book and Chitra amma’s kitchen recipe. I made it using the ingredients which I had in my pantry. Also I din’t want to go for soaking version as I had less time in hand. So I dry roasted everything, ground & prepared diwali marundhu powder and then I made legiyam with that powder. It came out very well. 

I won’t say this is the authentic version because I have not used some important ingredients like kandanthipili, arisi thipili etc. But I am sure this will help for digestion of oily & ghee rich sweets and snacks we relish for Diwali. Do try this deepavali marundhu recipe. Its not that much difficult to make as I thought. Anybody can make it easily. Just have a tsp of it in empty stomach for 3 days. It keeps you free from indigestion issues. 

I wish all my friends & readers a very happy Diwali. Thanks a lot for trying my Diwali recipes and sharing pictures with me. I am really touched. Do shower your encouragement and support always !
Diwali-marundhu-ingredients

diwali-marundhu

Diwali marundhu recipe


Diwali marundhu recipe Diwali marundhu recipe using easily available ingredients in pantry !
Cuisine: Indian
Category: Health food
Serves: Serves 4
Prep time: 10 Minutes
Cook time: 10 Minutes
Total time: 20 Minutes


INGREDIENTS
For marundhu powder
  • Dhania/Coriander seeds - 1 tbsp
  • Ajwain/Omam - 3/4 tbsp
  • Black pepper - 1/2 tbsp
  • Cumin seeds/Jeera - 1/2 tbsp
  • Khuskhus/Poppy seeds – 1 tsp
  • Cardamom - 1 no
  • Cloves - 1 no
  • Cinnamon - 1 no ( small)
  • Jathikai – a small piece ( optional)
  • Dry ginger powder - 1 tsp ( use 1 inch piece if u use dry ginger)
For syrup
  • Grated jaggery - 1/4 cup
  • Water - 3 tbsp
  • Ghee - 2 tsp
  • Sesame oil/Gingely oil - 1 tsp
HOW TO MAKE DWALI MARUNDHU - METHOD

  • Take all the ingredients mentioned under”for marundhu powder” . Dry roast in a kadai in low flame for 2-3 minutes till you get a nice medicine smell. Make sure you don’t burn them.
Diwali-marundhu-step1
  • Grind all the ingredients to a fine powder. Sieve if you wish. I dint do it. Take the ground powder in a bowl & add water to make it a thick paste. Set aside. In a kadai, take the grated jaggery and add water to cover it. When the jaggery is melted completely, strain the syrup and again boil the jaggery till it becomes frothy.
Diwali-marundhu-step2
  • Simmer the flame at this stage and add the ground paste. Mix well till it starts to thicken in medium flame.
Diwali-marundhu-step3
Diwali-marundhu-step4
  • When it starts to thicken, add gingely oil. Mix well. When it gets absorbed, add 1/2 tsp of ghee at regular intervals. When the marundhu starts to leave the sides of pan, add the remaining ghee and remove the kadai from the pan immediately. It looks likes a semi solid paste when hot. Transfer to a plate. 
  • When the marundhu becomes warm, touch it with your hands. If it is non-sticky and if you can roll as soft glossy ball,that's the right consistency. Store in a clean bottle and use whenever needed. If you stir for more time, it will become chewy. 
Diwali-marundhu-step5
Stays good for months when refrigerated ! Have a tsp of this after a heavy meal or in empty stomach for 3 days. It aids digestion & keep you free from indigestion issues !


Note

  • As suggested in my book, you can add 2-3 small stick of kandanthipili, arisi thipili and 1/4 tsp of saunf/soambu while dry roasting to make the authentic recipe.
  • If you don’t want follow roast and grind method, you can soak all the ingredients in water for an hour and proceed as given above.
  • As soon as the mixture starts to leave the pan and becomes together,remove it from the flame else it will become hard and you have to eat it as a chocolate. But it tastes fine & its health benefits retain in all the ways. So no worries.
  • U can grind this powder in bulk quantity. Store and use whenever you need.


Have a tsp of this diwali marundhu in empty stomach for 3 days. It will help you for better digestion.

Diwali-legiyam-recipe

Continue Reading...